


Your home works hard for you every day. It shelters your family, holds your belongings, and serves as the backdrop for your daily life. Over time, even the most well-maintained spaces can start to feel tired, outdated, or just not quite right anymore.

Knowing when your home needs a refresh can help you create a more comfortable and functional living environment. Some signs are obvious, like peeling paint or broken fixtures. Others are more subtle, like a layout that no longer works for your family or colors that make your rooms feel dark and cramped.
The good news is that updating your home doesn't have to mean a complete overhaul. You can start small with targeted changes that make a real difference. This guide will help you spot the key signs that your space is ready for an update and show you practical ways to get started.

Your home gives you clear signals when it's time for a refresh. These signs range from visible wear on fixtures to how well your space works for your daily life.
Your light fixtures, cabinet hardware, and faucets tell a story about when your home was last updated. Brass finishes from the 1990s, golden oak cabinets, or builder-grade chrome fixtures make your space look dated.
Popcorn ceilings and laminate countertops with visible seams are other common signs of aging interiors. These features were popular decades ago but now make rooms feel old and tired. Your flooring also shows age through worn carpet, scratched hardwood, or cracked tile grout.
Common outdated elements include:
Even if these features still work, they affect how your home feels and looks every day.
When you can't find storage space for your belongings, your home's layout isn't meeting your needs. Countertops piled with items, overstuffed closets, and boxes stacked in corners signal that your space lacks proper organization systems.
Closed-off rooms with single purposes create wasted space in modern homes. A formal dining room you use twice a year takes up valuable square footage. Small, separated rooms make it hard to keep an eye on kids or chat with guests while you cook.
Your storage problems might stem from outdated closet systems with just a single rod and shelf. Modern life requires more organized solutions for everything from shoes to small appliances.
Your home should make daily tasks easier, not harder. Rooms that feel too dark, too cold, or too hot point to problems with windows, insulation, or lighting. Rising utility bills often mean your home is working against you.
Spaces that don't fit how you actually live create constant frustration. A tiny kitchen with no counter space makes meal prep stressful. A bathroom shared by multiple people without enough storage leads to daily conflicts.
Physical damage like cracks in walls, water stains, or doors that stick are red flags. These issues affect both safety and comfort in your home.

Transforming your home requires a clear plan that addresses which spaces to update first, what style direction to follow, and how much money to allocate. These three factors work together to turn your vision into reality.
Start with rooms that get the most use or create the strongest first impression. Your kitchen and bathrooms typically deliver the best return on effort because people spend significant time in these spaces daily.
The entryway matters more than you might think. It sets the tone for your entire home and takes less time and money to update than larger rooms.
Living rooms and primary bedrooms come next on the priority list. These spaces affect your comfort and relaxation every single day.
Consider these factors when choosing which room to tackle first:
Focus on one room at a time if you have a limited budget. This approach lets you complete each space fully before moving on.
Pick a clear style before you buy anything or hire contractors. Your design direction should match how you actually live, not just what looks good in photos.
Modern styles work well if you prefer clean lines and minimal clutter. Traditional designs suit homes with classic architecture and formal spaces. Transitional styles blend both approaches for flexibility.
Create a simple mood board with 5-10 images that share common elements. Look for patterns in colors, textures, and furniture shapes across your saved images.
Choose a neutral base color for walls and large furniture pieces. Add personality through accent colors in pillows, art, and smaller items you can change later.
Stay consistent with finishes throughout connected spaces. If you choose brushed nickel in the bathroom, use the same finish in nearby rooms.
Set aside 10-20% more than your estimated costs for unexpected issues. Old homes especially reveal hidden problems once work begins.
Break your budget into these categories:
| Category | Typical Percentage |
|---|---|
| Labor | 20-35% |
| Materials | 40-50% |
| Fixtures and finishes | 15-25% |
| Contingency fund | 10-20% |
Paint delivers the most visual change for the least money. New lighting fixtures come in second for budget-friendly impact.
Save money on structural elements like cabinets and countertops by choosing mid-range options. Spend more on items you touch daily, like faucets and door hardware.
Get three quotes for any work you plan to hire out. The lowest bid is not always the best value if quality suffers.
Track every expense in a simple spreadsheet as you go. This habit prevents budget creep and helps you make informed choices about where to cut costs if needed.

Homeowners often wonder when minor fixes turn into a need for real updates, and which changes deliver the most noticeable results without breaking the bank. Understanding where to invest your time and money helps you tackle a home refresh with confidence.
Your home needs an upgrade when you notice physical damage that cleaning can't fix. Peeling paint, cracked tiles, chipped countertops, and scratched floors signal wear that requires actual repairs or replacements.
Outdated features also point to a need for upgrades. If your fixtures, cabinet hardware, or light switches look like they haven't been changed in 15 years, tidying won't make them look modern.
Layout problems are another clear sign. When your space doesn't work for how you actually live, no amount of organizing will solve the issue.
Paint creates the most noticeable change for your effort. Fresh paint on walls transforms a room faster than almost any other single update.
Your entryway and main living spaces deserve priority. These areas make first impressions and get the most daily use from both you and guests.
Updating visible hardware and fixtures also delivers strong results. Replacing old door handles, cabinet pulls, light fixtures, and faucets throughout your home creates a cohesive updated look.
Replacing cabinet hardware costs just a few dollars per piece but changes the entire look of your kitchen or bathroom. New knobs and pulls make old cabinets appear refreshed.
Removing heavy curtains and maximizing natural light brightens spaces without spending anything. This simple change makes rooms feel larger and more modern.
Deep cleaning areas you normally skip makes a significant difference. Clean grout, baseboards, light fixtures, and windows all contribute to a fresh appearance. Rearranging furniture you already own can also improve flow and function at zero cost.
You can paint walls, trim, and doors with basic supplies from any hardware store. A roller, brush, painter's tape, and paint are the only tools you need.
Peel-and-stick options work for multiple surfaces. You can apply peel-and-stick tile to backsplashes, wallpaper to accent walls, and vinyl planks to floors without specialized equipment.
Simple furniture assembly and swaps require just a screwdriver and maybe an Allen wrench. Moving pieces between rooms or adding affordable new items creates fresh layouts without complicated skills.
Deep clean every surface you can reach. Scrub floors, wipe down walls, clean windows, and tackle built-up grime in bathrooms and kitchens.
Declutter and reorganize your belongings. Removing excess items from counters, shelves, and floors makes your space look instantly better.
Rearrange your furniture to improve traffic flow. Move pieces to create better conversation areas or open up cramped spaces. Add better lighting by moving lamps to darker corners and using higher-wattage bulbs in existing fixtures.
Kitchens deliver strong returns because people spend significant time there and notice details. Even small updates like new hardware, a fresh backsplash, or painted cabinets make a difference.
Bathrooms also provide good value for updates. These smaller spaces cost less to refresh but create a big impact on daily comfort.
Your home's entryway sets the tone for the entire house. Improvements here affect how you and visitors perceive your whole space. Fixing visible wear like cracked tiles, peeling paint, or damaged surfaces prevents small problems from becoming expensive repairs.

Kitchen clutter can turn meal prep into a stressful chore. Crowded counters, messy drawers, and disorganized pantries make it hard to find what you need when you need it. The good news is that these problems have simple fixes.

Most kitchen organization problems come down to a few key issues: not enough storage space, poor use of existing space, and too much stuff without a clear home. Once you understand what's causing the chaos, you can tackle it with practical solutions that actually work.
This guide walks you through the most common kitchen storage frustrations and shows you exactly how to solve them. You'll learn which areas cause the most trouble and get straightforward strategies to keep your kitchen organized for good.

Kitchen clutter typically stems from three main problem areas: pantries that waste space, countertops covered in appliances and miscellaneous items, and drawers stuffed with disorganized utensils. Addressing these specific zones will transform your kitchen from chaotic to functional.
Your pantry becomes cluttered when you can't see what you have or reach items easily. This leads to buying duplicates and letting food expire in the back corners.
Common pantry problems include:
Clear containers let you see exactly how much pasta, flour, or cereal you have left. Group similar items together—baking supplies in one area, snacks in another, and canned goods in a third. Use shelf risers or lazy Susans to make every inch accessible.
Store items you use daily at eye level. Less frequently used items can go on higher or lower shelves. Label everything so family members know where things belong and can put them back correctly.
Countertops covered in small appliances, utensil holders, and random items make your kitchen look messy even when it's clean. Professional organizers identify countertop clutter as the biggest visual problem in kitchens.
Ask yourself which appliances you actually use daily. Your coffee maker might deserve counter space, but that bread maker you use twice a year doesn't. Store occasional-use appliances in cabinets or a pantry.
Paper piles, mail, and keys don't belong in the kitchen. Create a dedicated drop zone near your home's entrance instead. Limit your countertop items to what you use every single day.
Keep these guidelines in mind:
Drawers filled with tangled utensils and mystery gadgets waste your time and space. You end up digging through clutter every time you need a simple spoon or spatula.
Drawer dividers separate utensils into clear categories. Place forks with forks, spoons with spoons, and knives with knives. Dedicate one drawer to cooking utensils like spatulas and whisks, and another to eating utensils.
Get rid of duplicate tools. You don't need five wooden spoons or three can openers. Broken items and gadgets you've never used should go immediately.
Store sharp knives in a knife block or magnetic strip instead of loose in a drawer where they dull quickly and pose safety risks. Keep your most-used utensils in the drawer closest to your prep area.

The biggest kitchen organization struggles come down to three main areas: stuffed cabinets where items disappear in the back, mismatched food containers that waste space, and the messy area under your sink. These problems have straightforward fixes that work in any kitchen.
Your cabinets likely hold more potential than you realize. The problem isn't the size of your cabinets but how you use the vertical and horizontal space inside them.
Install shelf risers to create two levels where you previously had one. This doubles your usable space for plates, cups, and pantry items. You can find these for $10 to $20 at most home stores.
Add pull-out drawers or sliding organizers to deep cabinets. These let you access items in the back without moving everything in front. Corner cabinets work especially well with lazy Susans that spin to bring hidden items within reach.
Use the inside of cabinet doors for extra storage. Attach small racks or hooks to hold measuring spoons, pot lids, or cleaning supplies. Door-mounted organizers cost around $15 and install in minutes with adhesive strips or screws.
Stack items by frequency of use. Keep everyday dishes at eye level and special occasion items higher up or toward the back.
Mismatched containers create clutter and waste valuable cabinet space. A streamlined system makes meal prep faster and keeps your cabinets neat.
Pick one container brand and stick with it. Square or rectangular shapes use space better than round ones. Clear containers let you see what's inside without opening lids.
Store containers with their lids attached or use a separate organizer for lids. Standing lids upright in a small rack or file organizer saves space and makes them easy to grab.
Keep only what you actually use. Most households need 8-12 containers in various sizes, not 30 random pieces. Get rid of containers with missing lids or those you haven't touched in six months.
Label containers if you prep meals in advance or store dry goods like flour and rice. Simple labels help everyone in your household find what they need and put things back correctly.
The space under your sink often becomes a jumbled mess of cleaning supplies, trash bags, and random items. This area needs structure to work properly.
Install a tension rod across the cabinet to hang spray bottles by their triggers. This frees up floor space for other items and keeps bottles upright and easy to grab.
Use small bins or caddies to group similar items together. Put dish soap and sponges in one bin, trash bags in another, and cleaning supplies in a third. Pull out the entire bin when you need something instead of digging through loose items.
Add a sliding drawer system if you have the budget. These units typically cost $30 to $80 and make everything visible and accessible. Look for options that fit around your plumbing.
Place a small mat or tray on the cabinet floor to catch drips and spills. This protects the wood and makes cleanup easier when products leak.

Organizing a kitchen involves tackling specific challenges like limited counter space, messy cabinets, and hard-to-reach corners. These solutions address the most common questions about creating a functional kitchen that works for your daily needs.
Start by clearing your counters of items you don't use daily. Store small appliances in cabinets and only keep essentials like a coffee maker or dish soap visible.
Use your wall space by installing shelves, magnetic knife strips, or hanging racks for pots and pans. This frees up cabinet space for other items. Add hooks inside cabinet doors to hang measuring cups, pot holders, or cleaning supplies.
Consider a rolling cart that can serve as extra counter space and storage. You can move it around as needed or tuck it away when you need more room to walk.
Empty all your cabinets completely before you start organizing. This lets you see what you own and clean the shelves at the same time.
Place items you rarely use on the highest shelves, like special occasion dishes or serving platters. Store everyday dishes and glasses at eye level where they're easy to grab. Put heavy items like pots, pans, and small appliances in lower cabinets.
Group similar items together so you always know where to find things. Keep all your baking supplies in one area, drinking glasses in another, and food storage containers in their own spot.
Use drawer dividers to create separate spaces for different types of utensils. This stops everything from sliding around and mixing together when you open and close drawers.
Keep your most-used utensils in the drawer closest to your food prep area. Place measuring spoons, spatulas, and wooden spoons where you can reach them quickly while cooking.
Store sharp knives in a separate drawer with a knife organizer or in a knife block on your counter. Dedicate one drawer to junk like batteries, twist ties, and takeout menus so these items don't spread throughout your kitchen.
Clear containers let you see exactly how much of each ingredient you have left. Transfer items like flour, sugar, rice, and pasta into airtight containers with labels.
Place frequently used items at eye level where you can see and reach them easily. Put snacks, breakfast foods, and cooking staples in this prime location. Store backup items and bulk purchases on higher or lower shelves.
Use lazy Susans for bottles, cans, and jars so you can spin them around instead of digging through stacks. Group foods by category, keeping all your baking supplies together and all your canned goods in one section.
Install pull-out shelves or sliding drawers in deep cabinets so you can access items in the back without removing everything in front. These shelves work especially well for pots, pans, and small appliances.
Use lazy Susans in corner cabinets to make awkward spaces more functional. A two-tiered lazy Susan lets you store more items while keeping them visible and within reach.
Stack items vertically with shelf risers to double your storage space. This works well for plates, canned goods, and food storage containers.
Pull-out trash and recycling bins keep waste hidden but easy to access. These drawer-style systems fit inside base cabinets and slide out when you need them.
Vertical dividers help you store baking sheets, cutting boards, and pot lids on their sides instead of stacking them. This makes it simple to grab one item without disturbing the others.
Door-mounted racks add extra storage to the inside of cabinet doors. You can use them for spices, cleaning supplies, plastic wrap, or aluminum foil. Drawer peg systems let you adjust compartments to fit your specific dishes and bowls, keeping them from sliding around and breaking.

Your kitchen setup has a direct impact on whether you want to cook or avoid it entirely. When your cooking space is cluttered, poorly organized, or missing essential tools, it creates mental friction that makes cooking feel like a chore instead of an enjoyable activity. The layout of your counters, how you store your ingredients, and even the lighting in your space all play a role in whether you feel motivated to prepare a meal.

Think about the last time you wanted to cook but gave up before starting. You might have blamed it on being too tired or lacking inspiration. But the real problem could have been that your spatula was buried in a drawer, your cutting board had nowhere to go, or your pantry was so disorganized you couldn't find what you needed.
The good news is that small changes to your kitchen can make cooking feel easier and more appealing. By understanding which elements of your setup matter most, you can create a space that works with you instead of against you.

The physical setup of your kitchen directly influences how willing you are to start cooking. Three main factors create a space that either encourages or discourages meal preparation.
Your kitchen's layout determines how much energy you spend moving between tasks. The work triangle—the path between your stove, sink, and refrigerator—should measure between 12 and 26 feet total. When these distances are too long, you waste time and energy walking back and forth.
Place your most-used items within the zones where you actually use them. Store pots near the stove and knives near your main cutting surface. This reduces the mental effort needed to complete basic cooking tasks.
Counter space matters more than you might think. You need at least 36 inches of continuous counter space for prep work. Without enough room to work, you'll feel cramped and frustrated before you even start cooking.
An organized kitchen reduces the mental energy needed to find what you need. When you can't locate a specific tool or ingredient quickly, your motivation drops.
Store items based on how often you use them:
Clear containers for dry goods like rice, pasta, and flour help you see what you have at a glance. You won't buy duplicates or wonder what's available. Labels on containers and shelf edges make finding ingredients faster.
Group similar items together. Keep all baking supplies in one area and cooking oils in another. This creates predictable patterns that your brain can follow without extra thought.
Poor lighting makes cooking harder and less appealing. You need bright task lighting over work areas—at least 50 lumens per square foot for counters and the stove. Under-cabinet lights eliminate shadows on your workspace.
Natural light affects your mood and energy levels. If your kitchen has windows, keep them unblocked during the day. The connection to outside light makes the space feel more open and pleasant.
Ambient lighting sets the overall mood of your kitchen. Warm light (2700-3000K) creates a comfortable atmosphere that makes you want to spend time cooking. Cool light (4000K+) works better for detailed tasks but feels less inviting for casual cooking.

Your kitchen reflects your personal style and how well you maintain it directly affects your willingness to cook. When you customize your space and keep it clean, you remove mental barriers that make cooking feel like a chore.
The colors you choose for your kitchen walls and decor change how you feel when you walk into the space. Warm colors like yellow and orange can energize you and make meal prep feel more inviting. Cool colors like blue and green create a calm atmosphere that helps you focus on cooking tasks.
Your decorative choices send signals to your brain about whether cooking is worth the effort. When your kitchen feels dark or lacks personal touches, you're less likely to spend time preparing meals. Adding items that match your personality makes the space feel more welcoming.
Consider these mood-boosting elements:
A cluttered or dirty kitchen creates mental resistance before you even start cooking. Your brain sees the mess as an extra task to complete, which drains your motivation.
Dirty counters, full sinks, and overflowing trash bins add cognitive load to your cooking process. You have to clean before you can begin, which makes simple meals feel overwhelming. This explains why you might choose takeout even when you have ingredients at home.
Regular maintenance keeps your kitchen ready for action. Wiping surfaces daily, doing dishes right away, and organizing as you go reduces friction. When your space is clean, you can start cooking immediately without feeling stressed.
Small personal additions to your kitchen make cooking feel less like a duty and more like a creative activity. Matching glass jars for storing pasta, rice, and flour create visual order that motivates you to use these ingredients. Clear containers let you see what you have, which sparks meal ideas.
Display your most-used tools where you can reach them easily. Hanging utensils on hooks or keeping wooden spoons in a crock near the stove removes extra steps from cooking. When everything has a logical home, you spend less energy searching and more energy creating meals.
Personal motivators work differently for everyone. You might enjoy a small speaker for music, a tablet holder for recipes, or a chalkboard for meal planning. These touches transform your kitchen from a generic space into your cooking zone.

Simple changes to your kitchen can make a real difference in how often you want to cook. The right setup reduces stress, saves time, and makes meal prep feel less like work.
The work triangle is the foundation of good kitchen layout. This connects your sink, stove, and refrigerator in a triangle pattern. When these three areas sit within 4 to 9 feet of each other, you spend less time walking and more time cooking.
Keep your most-used items in easy reach. Store pots near the stove and cutting boards close to your prep area. This cuts down on unnecessary movement during cooking.
Clear pathways matter more than you might think. You need at least 42 inches of space for walkways and 36 inches between counters. This prevents you from feeling cramped while you cook.
Empty counters give you space to work without feeling overwhelmed. When you see piles of mail, appliances you rarely use, or random items on your counter, your brain has to process all of that before you even start cooking.
Visual clutter creates mental obstacles. Your mind works harder when it has to look past mess to find what you need. This makes cooking feel like more effort than it actually is.
Smart storage keeps counters clear. Store small appliances in cabinets and only keep daily-use items within reach. Vertical storage like wall racks or magnetic knife strips frees up counter space.
A good knife set makes prep work faster and safer. You need at least three knives: a chef's knife, a paring knife, and a serrated bread knife. Sharp knives require less force and give you better control.
Quality cutting boards protect your knives and give you stable work surfaces. Have at least two on hand so you can keep raw meat separate from vegetables.
Basic cookware includes a large skillet, a medium pot, and a baking sheet. These three items handle most home cooking tasks. When your tools work well, cooking feels less frustrating.
A food processor or blender speeds up chopping and mixing. These appliances cut your prep time significantly for tasks like mincing garlic or pureeing sauces.
Good lighting helps you see what you're doing. You need bright task lighting over your prep areas and stove. Dim kitchens make cooking harder and less safe.
Natural light boosts mood and energy. If your kitchen has windows, keep them clear to let in daylight. Natural light makes the space feel more welcoming.
Proper ventilation removes cooking smells and heat. A range hood that vents outside prevents your home from smelling like last night's dinner. Poor ventilation makes cooking feel unpleasant and can leave greasy residue on surfaces.
Fresh air keeps you comfortable. When your kitchen gets too hot or smoky, you'll want to leave instead of finishing your meal. Good airflow maintains a comfortable cooking environment.
Storage placement determines how smoothly you work. Group items by use: baking supplies together, cooking utensils near the stove, and dishes close to where you eat.
Counter space gives you room to work. You need at least 15 inches of counter on each side of your stove and 18 inches next to your refrigerator for setting down items.
Tool accessibility saves time and frustration. Place your most-used items between shoulder and knee height. This zone is easiest to reach without bending or stretching.
Appliance organization prevents decision paralysis. Keep appliances you use daily on the counter and store occasional-use items in cabinets. This reduces visual noise.
Cleaning efficiency matters for maintenance. Position your trash and compost bins near your prep area. Easy cleanup during cooking keeps your space functional.
Zone-based organization groups similar items together. Create zones for breakfast items, snacks, baking supplies, and dinner ingredients. When everything has a specific place, you spend less mental energy finding what you need.
Clear containers let you see what you have. Transfer dry goods like rice, pasta, and flour into matching glass or clear plastic containers. This prevents you from buying duplicates and helps you track what needs restocking.
Eye-level placement works for frequently used items. Put your go-to ingredients where you can see them easily. Items you rarely use can go on higher or lower shelves.
First-in, first-out rotation prevents waste. Place newer items behind older ones so you use things before they expire. This system keeps your food fresh and reduces the guilt of throwing away spoiled ingredients.
Labeled zones speed up decision-making. When your fridge has clear sections for produce, proteins, and leftovers, you can quickly assess what meals you can make. This removes a major barrier to cooking at home.

You might have noticed that highly productive people often keep their spaces neat and tidy. This isn't just a coincidence. An organized space helps your brain work better by reducing distractions, freeing up mental energy, and making it easier to focus on important tasks.

When your workspace is cluttered, your mind has to work harder to filter out what matters. Every item you see takes up a small amount of attention. Over time, this mental effort adds up and drains your energy.
In this article, you'll learn how your physical space affects your ability to get things done. You'll discover practical ways to organize your workspace and keep it that way. By the end, you'll understand why the connection between organized spaces and high productivity is so strong.

Your physical workspace directly shapes how well you perform tasks and manage your time. A well-organized environment reduces mental strain, simplifies decision-making, and creates conditions that support sustained focus throughout your workday.
When you work in an organized space, your brain processes information more easily. Clean surfaces and sorted materials create a sense of control that lowers stress levels. Your mind doesn't have to work as hard to filter out visual distractions.
Research shows that physical environments influence your well-being and motivation. When you feel satisfied with your workspace, you naturally feel more driven to complete tasks. An organized area sends signals to your brain that you're ready to work.
Key psychological advantages include:
The mental clarity you gain from order helps you think more clearly. You can focus on solving problems instead of searching for supplies or dealing with chaos.
Every choice you make during the day uses mental energy. When your space is disorganized, you face countless small decisions: Where did I put that file? Which pile has the document I need? Should I clear this clutter first?
These micro-decisions drain your mental resources before you start actual work. You have a limited amount of decision-making capacity each day. Wasting it on finding items or navigating mess leaves less energy for important choices.
An organized system eliminates unnecessary decisions. You know exactly where tools, files, and materials belong. This automatic knowledge frees your mind for creative thinking and problem-solving.
Your ability to concentrate depends heavily on your surroundings. Clutter competes for your attention, pulling your eyes and thoughts away from the task at hand. Each visible item can trigger unrelated thoughts or remind you of other tasks.
A clear workspace removes these competing signals. You can direct your full attention to one activity at a time. This focused state allows you to work faster and produce higher quality results.
Organization also speeds up your workflow. You spend less time searching and more time doing. When everything has a designated spot, you can move smoothly from one task to the next without interruptions.

Keeping your workspace organized requires specific techniques and daily habits. The key is to remove what you don't need, store items where you can find them easily, and stick to simple routines that prevent clutter from building up again.
Start by clearing everything off your desk and sorting items into three groups: keep, throw away, and relocate. This simple process helps you see what you actually use versus what just takes up space.
Keep only the items you use daily within arm's reach. Papers should be filed immediately or digitized to reduce desk clutter. Use drawer dividers and desktop organizers to give every item a specific home.
Essential items to keep on your desk:
Everything else should go in drawers, shelves, or storage areas. Label containers and folders clearly so you can find things in seconds instead of searching through piles. Take 10 minutes at the end of each day to put items back where they belong.
Storage should match how you actually work. Place frequently used supplies in easy-to-reach spots and rarely used items in less accessible areas. This approach saves time and keeps your main workspace clear.
Use vertical space with shelves and wall organizers instead of letting items spread across your desk. File cabinets, drawer organizers, and storage boxes turn messy piles into organized systems.
Choose storage that fits your specific needs. A graphic designer might need flat files for prints, while a writer might need magazine holders for research materials. The right storage makes it easier to maintain order because everything has a logical place.
Set aside five minutes at the end of each workday to clear your desk and put items away. This daily reset prevents clutter from accumulating and helps you start fresh each morning.
Schedule a deeper organization session once per week. During this time, file loose papers, wipe down surfaces, and reorganize anything that got messy. Monthly, review your entire workspace and remove items you no longer need.
Build these habits into your schedule like any other task. You might clean your desk right before lunch or do a quick tidy-up before your first meeting. The specific timing matters less than doing it consistently.

Organized spaces directly impact your ability to concentrate, manage time, and maintain consistent routines. Understanding the specific techniques and traits that support organization helps you create systems that last.
An organized workspace removes visual distractions that compete for your attention. When your desk and surrounding area are free of clutter, your brain spends less energy processing unnecessary information. This allows you to direct your mental resources toward the tasks that matter.
You can locate tools and materials faster in an organized space. The average person wastes up to an hour each day searching for misplaced items. When everything has a designated spot, you eliminate this wasted time.
Physical organization also reduces stress levels. Clutter triggers your brain's stress response because it signals unfinished work and chaos. A clean workspace creates a sense of control and calm that supports sustained focus.
Start by removing items you no longer use or need. Go through one room at a time and sort belongings into three categories: keep, donate, and discard. This prevents you from feeling overwhelmed by the entire house at once.
Assign a specific home for each item you decide to keep. Items without designated spots tend to migrate around your house and create new clutter. Use labels on containers and shelves to make it easy to remember where things belong.
Create zones in your home based on activities. Designate specific areas for work, relaxation, meal preparation, and storage. This helps you maintain routines because you naturally move through your day in an organized pattern.
Implement a daily reset routine where you spend 10-15 minutes returning items to their proper places. This small habit prevents clutter from building up again.
Set up a filing system that matches how you actually work. Whether you use digital folders or physical files, create categories that reflect your projects and responsibilities. Review and update this system monthly to keep it relevant.
Use a task management method that captures all your commitments in one place. Write down every task, deadline, and meeting so you don't rely on memory alone. Your system should let you see what needs attention today, this week, and this month.
Block time on your calendar for organization and planning. Schedule 30 minutes at the start of each week to review priorities and 15 minutes at the end of each day to prepare for tomorrow. These sessions keep your workspace and schedule from becoming chaotic.
Limit the number of items on your desk to only what you need for current projects. Store everything else in drawers or cabinets. A clear work surface makes it easier to transition between tasks.
Successful managers establish clear systems for tracking project progress. They use project management tools or shared documents where team members can see deadlines, responsibilities, and status updates. This transparency reduces confusion and duplicate work.
They hold regular check-in meetings on a consistent schedule. These meetings don't need to be long, but they create predictable touchpoints where issues surface before they become problems. You know what to expect and when to prepare updates.
Effective managers document decisions and action items immediately. They send follow-up emails or update shared workspaces right after meetings. This creates a record everyone can reference and prevents miscommunication.
They also model organized behavior for their teams. When managers keep organized calendars, respond to messages promptly, and maintain tidy workspaces, team members tend to adopt similar habits.
Highly organized people tend to be conscientious. They care about doing things correctly and following through on commitments. This trait drives them to create systems that prevent mistakes and missed deadlines.
They display strong self-discipline. Organization requires consistent effort even when you don't feel motivated. People who maintain organized spaces can delay gratification and stick to routines.
Detail orientation is another common trait. Organized individuals notice when things are out of place or when systems aren't working efficiently. They adjust their methods based on these observations.
Many organized people also value predictability and planning. They feel more comfortable when they can anticipate what's coming and prepare accordingly. This preference naturally leads them to create structured environments.
The two-minute rule helps prevent small tasks from piling up. If something takes less than two minutes to complete, do it immediately instead of adding it to a list. This applies to filing papers, responding to simple emails, or putting items away.
Create visual reminders for important habits. Place items you need in locations where you'll see them at the right time. For example, put your gym bag by the door the night before an early workout.
Review and adjust your organizational systems quarterly. What works in one season of life may not work in another. Set aside time every few months to evaluate which systems are helping and which need improvement.
Automate recurring tasks whenever possible. Set up automatic bill payments, use recurring calendar events for regular activities, and create templates for documents you use frequently. Automation reduces the mental load of remembering routine tasks.
Build organization into existing habits through habit stacking. After you finish your morning coffee, immediately review your daily schedule. When you return home from work, spend five minutes sorting mail and clearing surfaces. Linking new organizational habits to established routines makes them stick.

Your home is more than a roof. Where you live changes how you feel about yourself and how confident you are each day. If your space is messy or does not show who you are, it can tire you and make you doubt yourself.

How you arrange and organize your home affects your self-esteem and daily confidence. Your brain reacts to your surroundings. A neat, thoughtful space helps you feel in control and capable. A cluttered or uncomfortable home can raise stress and make you feel unsure.
Small changes in your home can change how you feel about yourself. This piece looks at how your home links to your confidence and gives easy, practical tips. You do not need costly renovations or hard projects to make your home boost your daily confidence.

Your home affects how you feel about yourself every day. The color of your walls, how messy things are, and the feel of your rooms all send messages to your brain about your worth and skills.
Your brain is always reading the room. When you walk into a space, you notice the light, how tidy it is, and the overall look in just a few seconds. That quick check helps shape your mood and how you see yourself.
Messy or chaotic spaces can make you feel stressed. Your body may release more cortisol, a stress chemical, which can make you feel worried or overwhelmed. Clean and organized spaces can do the opposite: they can help you feel calm and in control.
Personal items in your home help build your self-esteem. Photos, art, and things that show what you value or have achieved remind you of who you are. Seeing them every day can boost your confidence.
Natural light also affects how you feel. Rooms with lots of sunlight help keep your sleep cycle regular and raise mood chemicals like serotonin. Dark rooms can make you feel down or low on energy over time.
Colors can change how you feel and boost your confidence. Blue shades make people feel calm, trustworthy, and able to focus. Many people work better in blue spaces.
Warm colors like coral, terracotta, and soft yellow make you feel cheerful and energized. These colors are good in places where you get ready or need motivation. Red can make you more alert but use it sparingly so it does not feel overwhelming.
Neutral colors give a steady base that helps you feel grounded. Whites, grays, and beiges make rooms look clean and quiet. You can add bold accents with pillows or art to show personality without making the room too busy.
Green brings a bit of nature inside and helps you feel calm and balanced. It can lower anxiety while keeping your mind clear. Sage, olive, and emerald work well in many rooms where you want to feel relaxed and confident.
Physical clutter often causes mental clutter. When surfaces are full of things, your brain tries to process them, which tires you out. This leaves less energy for creativity and problem solving.
Start cleaning the places that get messy fast. Kitchen counters, entry tables, and dressers often collect stuff. Clear these spots every day to keep things feeling in order.
Benefits of decluttered spaces:
Keep only items that are useful or that you truly love. Every item in your home should have a purpose or bring you joy. This stops your space from filling up with things that drain your energy.
Give commonly used items a set place. When things have a home, you spend less time looking for them and more time doing what matters. This small daily order helps build confidence over time.

Your home's design affects how confident you feel every day. Making simple, smart choices can help create a home that feels like a daily confidence boost.
Your space should show who you are, not just follow trends. Put out items that show your achievements, interests, and values. This could be framed certificates, a small collection, or art that matters to you.
Make a special spot for things you love. A cozy reading corner with your books tells your story. Keep your hobbies visible, whether that means musical instruments, art supplies, or sports gear.
Pick colors and textures that make you feel good. If bright yellow energizes you, use it. If deep blue calms you, choose that instead. Your comfort matters more than strict design rules.
Photos and keepsakes from important moments remind you of what you can do. Put them where you will see them every day, like near your coffee spot or on a bedside table. Small reminders can lift your mood and your confidence.
A home that feels like a daily confidence boost starts with good light. Natural light lifts mood and gives energy. Keep windows clear of heavy curtains when you can. Put your desk or favorite chair near a window to get more sun.
Use different kinds of lights instead of only one ceiling light. Add table lamps, floor lamps, and wall sconces so you can change the light for different tasks. Bright light helps you focus on work or hobbies. Softer light makes rooms feel warm and welcoming.
Warm bulbs (2700–3000K) make living rooms and bedrooms cozy. Cooler bulbs (3500–4100K) are better for kitchens and bathrooms where you need to see clearly. Put in dimmer switches so you can change brightness by time of day or activity.
What you see every day affects how you think. Pick wall art or items with messages that match your goals and values. Skip quotes that do not feel real to you.
Your decor can include:
Arrange furniture to fit how you live. If you like having friends over, make seating that encourages talking. If you need quiet, make a small private corner that feels safe.
Get rid of things that cause bad feelings or remind you of chores you do not want. Your home should not hold items out of guilt. Each object takes up space in your room and in your mind.

Building confidence through your space and daily habits takes small, steady steps. Make choices that fit your life and keep your home feeling like a daily confidence boost.
Simple morning habits can shape your day. Make your bed, get some sunlight, and eat a good breakfast. These small wins help you feel capable.
Moving your body helps your mood and confidence. A short walk or some stretches can change how you feel.
Write down small things you did well each day. Note three wins, even if they seem small.
Use kind words with yourself when you think harsh thoughts. Say neutral or helpful things about what you are learning instead.
Start with basic self-care. Get enough sleep, eat well, and move a little before trying big tasks.
Set one easy goal each day. Finishing small tasks helps you trust yourself again.
Make your home a calm place where you feel safe. A quiet, tidy space helps you rest and recover.
Avoid comparing yourself to others while you heal. Everyone moves at their own pace.
Think of a few questions to ask before events. Having topics ready lowers pressure to speak perfectly.
Practice talking in low-pressure moments first. Chat with a cashier or neighbor to get used to small talk.
Listen more than you try to perform. Asking real questions takes the pressure off you to be entertaining.
Your home can be a safe place to practice. Host small get-togethers to feel more comfortable talking to others.
Pick one thing to work on instead of changing everything. Focused effort brings better results.
Know that confidence goes up and down. Some days will feel easier, and that is normal.
Learn skills by doing, not by waiting to feel ready. Action often creates confidence.
Make home routines that support your goals. Let your space help you keep good habits.
Have a set study spot at home. A clear area for schoolwork helps you feel organized and able.
Break tasks into small steps. Finishing each step shows you can do it.
Celebrate effort as well as results. Sticking with something is more important than being perfect.
Keep items in your room that remind you of past successes. Seeing proof of what you did well can boost your belief in yourself.
Your home can make you feel different emotions through your senses. Light, touch, smell, and sound all change how a room feels.
Rooms that show who you are feel more comfortable. When your things match your likes and values, you feel like you belong.
Being tidy affects your mood. Clutter can make your mind feel loud, while order helps you feel calm and clear.
The way your home supports daily tasks also matters. Places that make life easier feel welcoming and helpful instead of frustrating.

Hosting often feels like you're being judged on every detail, from how clean your home is to whether the food tastes perfect. This pressure turns what should be an enjoyable gathering into something that feels more like a performance review. You worry about whether people are having fun, if the music is right, or if your décor looks good enough.

The truth is that hosting feels like a test because we've learned to treat it as one, measuring our worth by how impressed our guests seem rather than focusing on genuine connection. Most people don't remember the fancy appetizers or perfectly arranged flowers. They remember how welcome they felt and whether they enjoyed spending time together.
The good news is that you can change how you approach hosting by understanding where these pressures come from and learning to focus on what actually matters. When you shift your mindset from performing to connecting, entertaining becomes less stressful and more rewarding for everyone involved.

Hosting has shifted from a simple social act to something that feels like being judged. The weight of expectation now comes from multiple sources, and recognizing where these pressures originate helps you separate what matters from what doesn't.
Social media changed how people view home entertaining. Platforms like Instagram and Pinterest created a visual standard that didn't exist before. You see styled tablescapes, coordinated color schemes, and perfectly plated food that took hours to prepare.
These images don't show the stress or cost behind them. They also skip the boring parts that make gatherings actually work.
The comparison happens automatically. When you host, you might worry your home doesn't look magazine-ready. You might feel your food needs to be restaurant-quality. This wasn't how hosting worked before the internet made everyone's gatherings visible.
Key triggers include:
The anxiety builds because hosting now feels like creating content, not just creating connection.
Modern hosting comes with unwritten rules that vary by social group. You might feel pressure to offer specific dietary options, craft cocktails, or themed decor. Some guests expect homemade everything. Others assume you'll accommodate their schedules perfectly.
These expectations create real work. Shopping for special ingredients takes time. Cleaning your entire house adds hours. Coordinating timing for multiple dishes causes stress.
The emotional labor is harder to measure. You feel responsible for everyone's comfort and enjoyment. If conversation lags, you blame yourself. If someone looks bored, you feel like you failed.
This responsibility extends beyond the event itself. You worry about thank-you messages, whether to post photos, and if people actually had fun.
You might be taking on too much pressure without realizing it. Certain patterns show when hosting has become more about performance than pleasure.
Watch for these behaviors:
You may also notice you're hosting the way you think you should, not the way that suits you. This means copying other people's styles instead of using your own strengths.
If you dread hosting more than you enjoy it, social pressure has likely taken over. The role of host has become a test you're trying to pass rather than a chance to spend time with people you like.

Real hospitality centers on genuine connection rather than flawless execution. When you focus on creating a welcoming environment instead of achieving perfection, hosting becomes less stressful and more meaningful for everyone involved.
Your guests come to spend time with you, not to inspect your home or judge your cooking skills. They want to feel comfortable and welcomed. When you shift your focus from creating a perfect event to building real connections, the pressure drops significantly.
Start by asking yourself what truly matters. A slightly messy kitchen won't ruin an evening, but a stressed host definitely affects the mood. Your energy and attention create the atmosphere more than any decoration or elaborate meal.
Simple ways to prioritize connection:
The goal is to create a space where people feel relaxed enough to be themselves. This happens when you're relaxed too. You don't need expensive ingredients or a spotless house to make someone feel valued.
Setting clear boundaries with yourself prevents the spiral of over-preparation. Decide ahead of time what you can reasonably accomplish with your available time, budget, and energy.
Choose one or two things to do well instead of ten things done poorly. Maybe you make a great lasagna but skip the homemade dessert. Or you keep the menu simple but set a nice table. This approach lets you execute confidently without burning out.
Practical boundaries to consider:
Communicate your plans honestly. If you're ordering pizza, just say so. Most people appreciate transparency more than forced formality.
Confidence grows through practice and preparation. Start small with low-stakes gatherings. Invite one or two people over for coffee before planning a dinner party for eight.
Keep a simple hosting playbook of meals and activities that work for you. When you have go-to recipes and reliable routines, you spend less mental energy on decisions and more on enjoying your guests.
Track what works. After each gathering, note what went smoothly and what you'd change. This builds a personal system based on your actual experience rather than borrowed standards.
Remember that your guests want you to succeed. They're not secretly hoping you'll fail or looking for mistakes. Most people feel grateful for the invitation and want to contribute to a good time.

Hosting anxiety often comes with specific questions about judgment, energy, and how to manage the social pressure. These answers address the most common concerns people have when opening their homes to others.
Your brain treats hosting as a performance because you're presenting multiple aspects of your life at once. Your home, cooking, conversation skills, and hospitality are all on display. This creates a sense that guests are forming opinions about you as a person, not just enjoying a meal or visit.
Most guests aren't actually critiquing you the way you think they are. They're focused on their own experience and whether they feel welcome. When you notice judgment fears creeping in, remind yourself that people remember how they felt, not whether your couch had a stain or your appetizer was store-bought.
The feeling of being evaluated gets stronger when you tie your worth to how well the event goes. Hosting is an action you're taking, not a reflection of your value.
Hosting requires you to manage multiple roles at the same time. You're a cook, server, conversationalist, and problem-solver all at once. Your brain is tracking who needs a drink, whether the food is ready, if everyone is included in conversation, and dozens of other details.
This mental load is tiring even when you enjoy the people. You can't fully relax because you're responsible for the experience. Unlike being a guest, you can't just show up and participate.
The exhaustion also comes from the prep work and cleanup that bookend the actual event. By the time guests leave, you've been in hosting mode for hours longer than the gathering itself.
Set a clear end time for your gathering and stick to it. Knowing when the event will finish helps you pace your energy. You can tell guests upfront that you're planning a two-hour brunch or an evening that wraps up by 9 PM.
Build in small breaks during the event by excusing yourself to check on food or refill drinks. These brief moments alone help you reset without abandoning your guests.
Choose smaller guest lists when possible. Hosting four people takes significantly less energy than hosting ten. You can have deeper conversations and feel less pressure to manage group dynamics.
Prepare as much as you can the day before. Set the table, prep ingredients, clean main areas, and decide what you'll wear. This reduces the number of decisions you need to make on the actual day.
Create a simple timeline for the day of the event. Write down when to start cooking each dish, when to shower, and when to do final touches. Having a plan keeps you from feeling scattered.
Accept that something will probably go wrong, and that's normal. Burned rolls or a late start doesn't ruin the gathering. When small things go off track, acknowledge them briefly and move on rather than apologizing repeatedly.
During the event, focus on one task at a time instead of mentally juggling everything. If you're talking to someone, be in that conversation. If you're plating food, focus on that. This prevents the overwhelm that comes from trying to do everything at once.
Include key information in your invitation. If you're serving dinner at 6 PM, say so. If kids aren't invited or you need people to leave by a certain time, state it upfront. Clear communication prevents assumptions.
Use specific language instead of hints. Say "We're planning for the evening to wrap up around 9 PM" rather than hoping people pick up on subtle cues. Most guests appreciate knowing what to expect.
You can say no to requests that add stress without offering lengthy explanations. If someone asks to bring their friend, you can simply say "I'm keeping it small this time, but thanks for asking."
Shift your focus from impressing people to connecting with them. Your goal isn't to prove you're a perfect host. It's to spend time with people you care about in your space.
Remind yourself that hospitality is about generosity, not perfection. You're offering your time, space, and effort. That matters more than whether everything goes smoothly.
Treat hosting like a skill you're building rather than a test you pass or fail. Each time you host, you learn what works for you and what doesn't. Anxiety often decreases as you gain experience and realize that most gatherings turn out fine despite small imperfections.

Quiet luxury homes focus on quality and simple design instead of showing off. They use natural materials, neutral colors, and clean lines to make rooms feel calm and high-end without being loud. The main idea is to choose pieces that last and remove what you don't need, so the home feels peaceful and elegant.

You don't need flashy furniture or bold patterns to make your home special. Quiet luxury comes from small, smart choices about texture, light, and space. Simple things like soft fabrics, warm light, and well-made furniture matter more than filling rooms with trendy items.
This design style helps you make a home that feels personal and calm. You will learn how to pick materials and colors that work together, make spaces that fit your life, and choose looks that still feel good years from now.

Quiet luxury means choosing quality over flash, natural materials over fake ones, and thoughtful choices over too much decoration. These ideas help create homes that feel calm and refined without trying too hard.
Quiet luxury means choosing calm, simple elegance instead of obvious signs of wealth. It focuses on well-made pieces rather than flashy brand names or price tags.
This style removes busy patterns and loud decorations. Rooms feel calm because each item has a clear purpose and place.
The goal is to make spaces feel peaceful and timeless. You avoid fast trends that get old quickly. Instead, you pick items that last in both build and style.
Quiet luxury uses restraint in decorating. Walls might have one special piece of art instead of many. Furniture is fewer but better, picked for how it looks and works.
Good craftsmanship is the base of this style. You choose furniture made by skilled makers who know how to build things that last.
Neutral color palettes are common in quiet luxury homes. Use colors like:
Clean lines and simple shapes replace fancy details. Furniture often has plain forms that let the material stand out.
Texture adds interest without being loud. Mix smooth linen with wool, matte surfaces with slight shines, and different weaves in similar colors.
Space matters. Leave room between pieces so each one can be noticed. Don’t try to fill every corner; open space feels intentional.
Natural materials are at the heart of quiet luxury design. Pick solid wood instead of thin wood coverings. Woods like oak, walnut, and maple look nice and last a long time.
Stone surfaces add quiet style. Limestone, travertine, and honed marble look elegant without a shiny finish.
Natural fabrics feel good and look soft. Use linen for its relaxed look, wool for warmth, and high-quality cotton for a simple, neat feel.
Metals should have brushed or matte finishes, not bright chrome. Choose aged brass, soft-steel finishes, or bronze with a natural patina.
These materials get better with age. They show character instead of just looking worn out.

To make a calm home, think about what to include and what to leave out. Aim for spaces that feel peaceful and lived-in by using simple layouts, clear focal points, and thoughtful materials. This is what makes the quiet luxury home that speaks without trying.
The quiet luxury home that speaks without trying should not feel cold or empty. Use warm natural materials like wood, linen, and wool to make rooms feel cozy.
Start by removing things you do not need. Keep only furniture and decor that has a purpose or makes you happy. Your home can be simple and still feel welcoming.
Add soft textiles and natural items. A wool throw on a sofa or a wooden bowl on a table adds warmth without clutter. Aim for a space that feels open and friendly.
Choose furniture with clean lines but comfortable sizes. A simple sofa looks warmer with linen cushions in cream or beige. Natural light also helps minimal spaces feel nicer.
Have a few strong pieces in each room instead of many competing items. Pick one or two focal pieces that stand out without crowding the space.
A sculptural chair, a large piece of art, or a special light can be the main focus. Keep other items simple in shape and color to support those pieces.
Good Statement Pieces:
Let the things around your focal pieces fade into the background. If your dining table is bold, choose plain chairs and simple wall decor. This creates interest without chaos.
Quality is more important than quantity. One well-made piece will look better than several average items fighting for attention.
Texture stops neutral color schemes from feeling flat or boring. You can make a room feel deeper by using different materials that have similar colors.
Use a palette of whites, beiges, grays, and earth tones. Within those colors, change up the textures. Put smooth plaster walls next to rough linen curtains. Place a soft wool rug near a sleek leather chair.
Natural materials add the most interest to neutral rooms. Stone, wood, raw silk, and matte metals reflect light in different ways. These small changes keep the room interesting without bright colors or busy patterns.
Layer textures in groups of three to five in each room. For example, you could mix bouclé, smooth marble, brushed oak, linen, and matte brass in one living room. The mix feels rich but still calm.
Don't mix too many undertones. Choose either warm neutrals (cream, beige, warm gray) or cool neutrals (pure white, cool gray, black) so the room feels balanced.

The quiet luxury home that speaks without trying focuses on good materials, careful work, and simple design instead of logos or trends. It makes a house feel high-end through small, thoughtful choices like natural textures, neutral colors, and well-made furniture.
Quiet luxury focuses on simple, calm style instead of flashy things. It uses natural materials and soft, neutral colors. People pick pieces for their quality and craftsmanship, not for brand names.
The room should feel peaceful and not crowded. Every item has a purpose and adds to a clean, refined look.
It avoids busy patterns and bright colors. Instead, it adds interest with texture and layers, like linen, wool, stone, and wood.
In homes, quiet luxury shows up in good design and strong materials. You won’t see logos or obvious status symbols.
It is about how the house feels when you walk in. Features like high ceilings, natural light, and well-sized rooms show value quietly.
Quality is clear in things like solid wood doors, stone countertops, and custom woodwork. These parts last a long time and often look better as they age.
Quiet luxury uses natural materials. Stone, marble, wood, linen, wool, and leather give a real and lasting feel.
Choose finishes that are matte or satin, not very shiny. Honed marble, brushed brass, and oiled wood add soft texture without glare.
Use neutral colors like warm whites, soft grays, beiges, and earth tones. These colors create a calm, matching background.
Taller ceilings make a room feel more expensive. Rooms with nine-foot or higher ceilings feel more open and grand.
Simple crown molding, baseboards, and trim add polish. Keep the lines clean so the details do not stand out too much.
Big windows and natural light lift a room. Floor-to-ceiling windows or French doors make the inside feel connected to the outside.
Built-in storage helps keep things tidy. Custom cabinets, window seats with hidden storage, and walk-in closets reduce clutter.
Start by clearing clutter. A clean, tidy room looks more expensive even if you spend little.
Buy fewer, better pieces instead of many cheap items. One well-made sofa will last longer than several low-quality ones.
Paint walls in soft, neutral colors and swap out cabinet and door hardware. These are low-cost changes that make a big difference.
Spend money on things you use every day: a good mattress, a comfy sofa, and a sturdy dining table are worth it.
Add texture with affordable fabrics like linen curtains, wool throws, and cotton rugs. These layers make a space feel rich without costly furniture.
Traditional luxury shows wealth with obvious designer pieces and bold displays. The quiet luxury home that speaks without trying focuses on subtle quality that you notice over time.
Traditional homes may have crystal chandeliers, ornate furniture, and shiny finishes. Quiet luxury uses simple lights, clean-lined furniture, and matte surfaces.
Color works differently too. Traditional luxury often uses rich, dramatic colors. Quiet luxury sticks to neutral, earthy tones.
Traditional style displays collections and decor openly. Quiet luxury keeps surfaces clear and stores items out of sight.
Finally, traditional luxury follows showy trends. Quiet luxury invests in timeless pieces that stay stylish for years.

You walk into a house and feel calm right away, even if you can't say why. Another home might look great in photos but feel strange when you step inside. The real reason some homes feel instantly welcoming is not random.

A home feels welcoming when its layout, lighting, and design all work together to make your brain relaxed without you noticing. It is not about expensive furniture or the latest trends. It is about how light moves through the rooms, how spaces connect, and how your senses react to the place.
Knowing this helps you choose a home and arrange your space better. These ideas are simple and useful. You do not need a big budget to make a place feel comfortable and welcoming.

Your brain decides quickly if a home feels warm and safe. In seconds you notice things that match memories and basic rules your body uses to feel comfort.
When you enter a room, your mind looks for signs that it is safe and familiar. This scan happens almost instantly — often in less than three seconds.
Common signs that make a place feel welcoming:
Soft blankets or cushions feel cozy because your brain links soft things with warmth and safety. Balanced furniture and symmetry also make a room feel steady and cared for.
Smells matter too. The scent of baking, wood, or clean laundry can bring back happy memories and make you feel at home.
The real reason some homes feel instantly welcoming is how they make you feel in your body and mind. Warm lighting feels safe because it reminds people of firelight. Harsh, cool light can feel cold and unfriendly.
Natural materials like wood and stone make people calm. Seeing things from nature tells your brain the place is not dangerous.
Room temperature affects mood. Most people find 68–72°F (20–22°C) comfortable. Colors matter too. Soft warm colors like beige, cream, and light brown feel cozy. Very bright white or very dark colors can feel cold or heavy.
Personal items lower stress. Photos, books, and lived-in furniture show the home is used and cared for. That makes visitors feel safe and welcome.

A home's mood comes from many simple things working together. Lighting, textures, colors, smells, and personal touches combine to make a place feel welcoming.
Natural light changes how you feel more than almost anything else. Rooms with lights at different heights feel balanced and cozy. Use a mix of general, task, and accent lighting instead of only one bright ceiling light.
How light moves through the house matters too. Windows that catch morning or evening sun make the day feel natural. Dimmer switches help you change brightness for different times and activities.
Spatial flow means how easy it is to move around and see between rooms. Open views make a home feel bigger and friendlier. Doorways should be clear and pathways free of obstacles so people can move naturally through the space.
Your sense of touch is always working at home through fabrics and surfaces. Soft textiles like cotton throws, wool rugs, and linen curtains add warmth that hard surfaces do not. Mix smooth and rough textures to make a room interesting without feeling busy.
Color affects how calm or awake you feel. Warm neutrals like beige, cream, and light gray help you relax. Cool colors work well where you need focus. A simple way to balance colors is the 60-30-10 rule: 60% main color, 30% secondary color, and 10% accent color.
Scent is strongly linked to memory and mood. Natural smells from wood, plants, or essential oils make spaces feel peaceful and memorable. Try to avoid strong artificial air fresheners because they can be too much or cause reactions.
Personal items like family photos, books, and things you collected make a home feel lived-in and real. These items tell your story and help you feel connected to your space. Focus on showing items that matter, not filling every surface with random stuff.
Minimalism does not mean removing all personality. It means keeping things that are useful or that you truly like. Clear surfaces and good storage cut down on visual clutter and make cleaning easier.
Find a balance between too much and too little. Display personal items in small groups of three or five so they look planned instead of messy. You can also rotate seasonal pieces or collections to keep the space fresh without adding more things.

The real reason some homes feel instantly welcoming is that certain design choices send quick signals to your brain. These choices include the color and warmth of light, how furniture is arranged, and what you see when you walk in.
Your brain decides how a place feels in about three to seven seconds after you enter. A clear entryway with places to store shoes or coats shows the home is organized. Personal items like family photos or souvenirs show someone lives there and makes the place feel lived-in.
Soft fabrics you can see from the door make you want to touch and stay. Being able to see into the next room makes you feel safer because there are no hidden spots. Natural things like wood and plants calm people because humans are used to those materials.
Using several types of light works better than just one overhead light. Try to have three kinds: general ceiling light, task lights like table lamps, and accent lights for special spots.
Warm white bulbs (about 2700K–3000K) feel cozy. Bright cool white light (over 4000K) can feel cold and unfriendly. Dimmer switches help you change the mood for different times and activities.
Lamps at eye level make soft pools of light that make a room feel used and welcoming. Having light at different heights reduces harsh shadows and gives your eyes comfortable places to look.
Warm neutral colors like beige, cream, and soft gray make a room feel cozy and welcoming. They reflect light without being harsh. Very cool grays and bright white can feel cold or sterile unless you add warm wood or textured fabrics.
The warmth or coolness of a color matters more than the exact shade. For example, warm terracotta feels friendly, while cool blue-gray can feel distant. Warm tones help your body relax.
Use an accent color in at least three places in a room. Repeating the color makes the space feel planned and calm instead of random.
Keep clear pathways that are about 36 inches wide so people can walk without squeezing by. If furniture blocks the path, people tense up even if they do not notice it.
Arrange seating in small groups instead of pushing everything against the walls. That makes a room feel used and welcoming. Rooms that connect logically—like kitchens near dining areas and mudrooms near garages—make daily life easier.
Choose furniture that fits the room size. A huge couch in a small room feels cramped. Tiny furniture in a large room feels empty and cold.
Good hardware matters. Metal drawer pulls and door handles feel solid compared to cheap plastic ones. Using the same finish for hardware across the home looks deliberate.
Thicker crown molding and baseboards add a feeling of quality. Hanging curtains from the ceiling makes ceilings seem higher. Curtains should reach the floor or slightly puddle, not hang a little short.
A fresh coat of neutral paint helps everything else look cleaner. Real plants in nice pots also make a room look cared for without costing much.
Clutter can cause stress because your brain notices every object. Clear surfaces let your mind rest and focus on the people in the room instead of the stuff around them. You feel calmer when you can quickly look around and see nothing dangerous or messy.
Clean floors and dust-free surfaces show that someone cares for the home regularly. This makes people think that other things, like plumbing and wiring, are probably taken care of too. Visible dirt makes your mind wonder what else might be wrong.
Storage that hides everyday items like mail and keys reduces visual chaos. Open shelves work only when items are grouped and kept to a few important things. When everything has a place, the home feels neater and more peaceful.

You have probably seen homes on social media that look perfect in every photo. They seem natural and calm, and every angle looks good. Making a home that looks effortless in photos begins with simple design choices that work in real life too.

The secret is knowing how a camera sees your space. Think about light, keeping things tidy, and small styling tricks. You do not need fancy furniture or a full makeover to make rooms look great in photos.
This guide explains the main ideas behind photogenic rooms and gives simple tips you can use at home. You will learn how to make spaces that look good in pictures and are still comfy and useful every day.

Most camera-ready homes share three main traits: strong basic design, colors that match, and good use of light. These things help rooms look great from any angle without feeling fake or overdone.
Your home needs simple design basics before you worry about decor. Choose furniture that fits the room and place pieces so people can move around easily.
Pick a main focus for each room. It can be a fireplace, a big window, or a standout piece of furniture. Arrange other items around that spot to make the room feel balanced.
Size is important. Too-big furniture makes a small room feel crowded in photos. Too-small furniture in a large room looks lost. Measure your rooms and leave space between pieces.
Key basic elements include:
Mix textures like wood, metal, fabric, and stone to add interest without clutter. Different materials show up differently in photos.
A simple color scheme helps every photo look put-together. Choose three to five colors to use through your home.
Use one main neutral, one or two supporting colors, and one accent color. Neutrals like white, beige, or gray should cover most of the space. Supporting colors appear on things like curtains and rugs. Accent colors show up on pillows, art, or small accessories.
Repeat colors from room to room to make the home feel connected. They do not have to be exact matches—similar shades work well.
Don’t use too many different colors. Stick to your palette, even when you add seasonal items or new decor.
Natural light makes rooms look warm and more attractive in photos. Arrange furniture so windows are not blocked.
Put mirrors across from or next to windows to reflect light and make rooms brighter. This also adds depth in photos.
Choose light, simple window coverings like sheer curtains or light blinds. Open curtains fully during the day to let in more light.
Think about how light moves through the room at different times. Place seating and work areas where they get good daylight. North-facing windows give even light; south-facing windows give brighter, warmer light.
Remove items that cast heavy shadows or block light. Place tall furniture on walls next to windows, not directly in front of them.

Cameras see things differently than our eyes. Some styling choices show up better in photos. The right textures, a few chosen accents, and small edits help a room look natural and polished in pictures.
Texture makes photos look deeper and more interesting. Use a few different materials in each room so the camera can pick them up.
Aim for three to five different textures. Mix smooth items like glass or metal with rough things like woven baskets or linen. Add wood tones from furniture. Use soft items like throw blankets, pillows, or rugs.
Texture pairs that work well in photos:
Notice how light hits textures. Matte surfaces soak up light and glossy ones reflect it. That contrast helps the camera see different objects and adds depth.
The right little items make a room feel planned but not messy. Keep only pieces that help the photo.
Group things in odd numbers, like three or five. Odd numbers look natural. Use objects of different heights in each group to make it more interesting.
Pick accents that have a purpose. Books add color and height. Plants add life and texture. Trays and bowls hold small items and add another layer. Keep colors that match the room.
Take away items with busy patterns or loud logos. Your decor should help the room, not distract from it.
Clear surfaces look better in photos than crowded ones. Remove most items from counters, tables, and shelves before you shoot.
Only leave a few essential or decorative pieces. In kitchens, keep counters mostly clear except for one or two styled items. On coffee tables, leave a small stack of books or a single decorative object.
Hide everyday things like remotes, chargers, and mail. Put away personal photos and toiletries. Close closet doors and cabinet fronts so lines look clean.
The goal is not to make the space look unused but to remove distractions. Every item left in the frame should have a reason to be there.

Making your home camera-ready involves understanding how colors work together, how light interacts with surfaces, and how to arrange items so they look natural instead of forced.
Start with a cohesive color palette that flows from room to room. When you use too many different colors in each space, your home looks disjointed in photos.
Layer different textures to add visual interest without clutter. Mix smooth surfaces with rough ones, like pairing linen pillows with a leather chair or placing a wool throw on a velvet sofa.
Keep surfaces mostly clear but not completely empty. Leave out only items that serve a purpose or hold meaning to you. A stack of books, a single vase, or a small tray with everyday items looks more natural than bare counters or crowded shelves.
Neutral tones create the most polished look in photographs. Stick with warm white, beige, taupe, greige, and soft gray as your base colors.
These shades photograph well because they create visual harmony instead of competing for attention. They also make spaces look larger and brighter on camera.
You can add depth by using different shades of the same color family. Try pairing cream walls with tan furniture and darker brown accents. This approach feels intentional without looking too coordinated.
Clear your countertops of most items before taking photos. Leave out only a few carefully chosen pieces like a wooden cutting board, a ceramic bowl, or a potted herb plant.
Use white or light-colored dishes and accessories to reflect light. Dark items absorb light and can create shadows that make your kitchen look smaller in photos.
Keep your dish towels, pot holders, and other fabric items in neutral colors that match your overall palette. Replace brightly colored plastic items with wood, glass, or ceramic alternatives that photograph better.
Natural light creates the most flattering photos. Open your curtains and blinds during the day to let in as much daylight as possible.
Take photos during the golden hours right after sunrise or before sunset when light is softer. Harsh midday sun can create strong shadows that look unflattering.
Turn on all your lights when natural light is limited. Mix overhead lights with lamps to eliminate dark corners and create even lighting throughout the room.
Avoid using just one light source, which creates harsh shadows. Layer multiple light sources at different heights to make the space look warm and inviting.
Place furniture away from walls to create depth in photos. Even pulling pieces out just a few inches makes a room look more intentional and spacious.
Group decor items in odd numbers like threes or fives. This creates visual interest that feels natural instead of too symmetrical.
Vary the heights of items you display together. If you group three vases, make sure they are different sizes so your eye moves around the arrangement.
Leave open space between furniture pieces and decor items. Negative space helps each element stand out and prevents the room from looking cluttered in photos.
Natural materials like wood, linen, cotton, and stone photograph better than synthetic alternatives. They add warmth and texture that translates well on camera.
Matte finishes work better than high-gloss surfaces for most spaces. Shiny materials can create glare and reflections that distract from the overall composition.
Metal finishes like brushed brass, aged bronze, or matte black add visual interest without overwhelming a space. Choose one or two metal finishes and use them consistently throughout your home.
Textured fabrics like bouclé, chunky knits, and natural weaves add dimension that shows up well in photos. These materials catch light in interesting ways that make images more dynamic.

A curated home does not mean following strict rules or buying everything from one place. It means making a space that looks planned but not forced. The effortlessly curated home look mixes old and new items, uses different textures, and includes things that matter to you.

The main idea is balance and purpose, not perfection. You do not need expensive furniture or a full remodel. Pick items that work well together and show your style while keeping the room calm and simple.
This look takes time and patience, but the result is a home that feels cozy and thoughtful. Learn the basic ideas that make a space look collected over time and use easy ways to choose furniture and decor that match across your rooms.

The effortlessly curated home look comes from three simple choices: pick a design that fits your life, choose colors that last, and mix materials so the room feels interesting but calm.
You do not have to pick only minimalism or only maximalism. Both can create an effortless look if you use them on purpose.
Minimalism means keeping things simple and useful. Keep only what you need or love. Choose furniture and decor carefully so each piece has a reason to be there. This style is good if you like open space and clean surfaces.
Maximalism uses lots of color, patterns, and collections. You layer items and mix styles. The secret is to curate—make sure each item has meaning or a job. That stops the room from feeling messy.
Many people do best with a mix. Use minimalist ideas in busy areas and add maximalist touches in cozy spots. Pick the style that fits how you actually live, not just what looks good in pictures.
Your color palette sets the mood for your whole home. Neutral colors give the most flexibility and last the longest.
Start with these basic colors:
Add 2–3 accent colors you can change later with pillows, artwork, or small decor. Soft tones like sage green, dusty blue, or terracotta stay nice longer than bright trendy colors.
Natural wood tones act like neutrals and add warmth without clashing. You can mix wood finishes if they have similar undertones—either warm or cool.
Texture adds depth and interest in ways color alone cannot. You want variety but not so much that the room feels messy.
Try to use three to five different textures in each room. Mix smooth surfaces like glass or polished metal with rough ones like jute rugs or raw wood. Add soft items like linen curtains, wool throws, or velvet pillows.
Material combinations that work well:
| Smooth | Rough | Soft |
|---|---|---|
| Marble | Jute | Bouclé |
| Glass | Concrete | Cashmere |
| Brass | Rattan | Mohair |
Repeat textures in different rooms to make the home feel connected. If you have brass fixtures in the kitchen, add small brass pieces in the living room. This ties rooms together without matching every piece of furniture.
Natural materials like stone, wood, and linen often look better over time. Some fake materials show wear in ways that hurt the simple, effortless look you want.

Creating the effortlessly curated home look means picking items that fit well together. Think about color, size, and style so each room feels calm and linked.
Statement pieces are the big items that set the room's tone. Choose one or two large pieces per room to define the space.
Pick a sofa, dining table, or bed that matches your home's style. Neutral colors give you more options with other decor. Bright or bold pieces work if you plan to keep them for a long time.
Quality is better than having many cheap items. One sturdy chair looks and feels better than several flimsy ones. Look for strong frames, good fabrics, and simple designs that will last.
Key points when picking statement pieces:
Make sure statement pieces share something, like wood tones, metal finishes, or a similar style. They do not have to match exactly, but they should feel related.
Storage keeps the effortlessly curated home look tidy. Use shelves, cabinets, and storage benches to hide everyday items and keep rooms neat.
Choose storage that fits the room's style. Modern rooms use smooth cabinets and hidden handles. Traditional rooms can have wooden bookcases or trunks.
Open shelves work if you arrange items neatly. Group books by color or size. Use boxes to hide small things. Leave some empty space so the shelves do not look crowded.
Closed storage hides items you do not want to see. Media consoles hide cords and electronics. Dressers keep clothes organized. Kitchen cabinets store dishes and pantry items.
Mix open and closed storage in the same room. This helps you show favorite items while keeping clutter out of sight.
After you pick your furniture, art and accessories give your room personality. These final touches make a space look like "the effortlessly curated home look" and tell your story.
Hang art at eye level. A good rule is 57–60 inches from the floor to the center of the piece. Put small artworks together in a group instead of spreading single pieces around the room. Use frames with similar finishes to make different styles feel linked.
Arrange accessories in odd numbers on tables or shelves. Three candlesticks or five small vases usually look more natural than two or four. Change the heights of objects to add depth and movement.
Easy accessory tips:
Mix metal finishes around the house instead of matching everything. Brass, chrome, and bronze can work together if you spread them across lights, hardware, and decor. This makes your home feel collected over time, not like a showroom.

A well-curated home keeps a balance between personal items and simple design. These answers help you get that collected look without making the space feel cluttered.
A well-curated home feels planned and personal. Each item has a reason for being there and shows part of your story.
An over-decorated space has too many items fighting for attention. Surfaces are crowded, patterns clash, and objects often feel random or meaningless.
Curated spaces have space to breathe. The things you show work together and match your real taste instead of following every trend.
Mix old and new pieces to add interest. Vintage finds next to modern furniture give character without making the room feel stiff.
Balance keeps a room calm. Spread visual weight so no area feels too heavy or crowded.
Layer textures and finishes to make the room feel rich. Combine smooth and rough surfaces and mix soft and hard materials.
Leave some surfaces simple. Empty spots give the eye a rest and make the space feel lived-in, not staged.
Group items in odd numbers like three or five. Odd groups look natural and collected instead of too formal.
Vary the heights and shapes of objects. Mix tall candlesticks with stacked books and small decorative pieces.
Use a simple color palette across displays. A consistent color scheme helps different items look like they belong together.
Remove things that don't help the look. A few well-chosen pieces always look more curated than many random objects.
Wrong furniture scale can ruin a room. Big pieces overwhelm small rooms, and tiny ones disappear in large rooms.
Bad lighting creates dark spots and makes a room feel flat. Use layers of light, not only overhead lights.
Filling every surface with objects makes the room chaotic. Your eyes need places to rest.
Pushing all furniture against the walls can make the room feel disconnected. Pull furniture in to create better flow and areas for talking.
Using too many colors or patterns at once overwhelms the eye. Stick to a limited palette and let one or two patterns stand out.
All-gray color schemes now feel cold and old. Warmer neutrals like beige, cream, and taupe make rooms feel cozier.
Matching furniture sets look plain and lack personality. Mix different pieces that share a style or a color to make a space more interesting.
Open kitchen shelves are not practical for most people. They need constant cleaning and collect dust, which outweighs how they look.
Farmhouse shiplap and rustic wood signs are no longer fresh. These strong trends can make a home look dated fast.
Shiny chrome fixtures and hardware can seem too bright and cold. Brushed metals like brass, bronze, and matte black feel warmer and more refined.
Warmer wood tones are replacing all-white kitchens. Natural or stained wood cabinets add warmth and hide wear better.
Two-tone cabinets add visual interest without being overly trendy. Try darker lower cabinets with lighter uppers or a contrasting island color.
Integrated appliances keep lines clean and reduce visual clutter. Panel-ready fridges and dishwashers blend into the cabinets.
Natural stone countertops with veins and variation look better than plain surfaces. Marble, quartzite, and granite add depth and a luxe feel.
Good-quality hardware in classic finishes lifts the whole kitchen. Solid brass or bronze pulls and knobs age well and never look cheap.

Your home should make you feel at ease the moment you walk through the door. A calm, confident home doesn't happen by accident—it comes from intentional choices in design, materials, and how you organize your daily life. When your space works with you instead of against you, it reduces stress and helps you think more clearly.

The good news is that creating this kind of environment doesn't require a complete renovation or an unlimited budget. Simple changes to lighting, color, and layout can shift how your home feels. You can build a space that supports both peace and productivity.
This guide will walk you through the design principles that create visual calm and the daily habits that maintain it. You'll learn practical ways to shape your home into a place that truly supports the life you want to live.

A serene home relies on specific design choices that work together to create peace and calm. These principles focus on reducing visual noise, maximizing natural elements, choosing soothing colors, and selecting furniture that serves both function and tranquility.
Your space needs breathing room to feel calm. Clutter creates visual stress and makes your mind work harder to process everything around you.
Start by keeping only items that serve a purpose or bring you genuine joy. Clear your countertops, tables, and floors of unnecessary objects. Store items behind closed doors or in designated spots where they belong.
Key decluttering practices:
Minimalism does not mean your space has to be empty or cold. It means being selective about what you display and own. Each item in your home should earn its place through usefulness or meaningful value.
Natural light changes how your space feels throughout the day. It affects your mood, energy levels, and sense of calm.
Remove heavy curtains or blinds that block sunlight. Use sheer fabrics or light-filtering shades instead. Position mirrors across from windows to bounce light deeper into rooms.
Open layouts let light travel through multiple spaces. If you cannot change walls, you can create visual openness by keeping sightlines clear. Avoid placing tall furniture in the middle of rooms or blocking windows with large pieces.
Ways to maximize natural light:
The goal is to let daylight reach as much of your home as possible. Artificial lighting works best when it mimics natural light patterns.
Colors directly affect how you feel in a space. Soft, neutral tones create a sense of peace that bright or dark colors cannot match.
Focus on whites, beiges, soft grays, and muted earth tones for walls and large furniture pieces. These colors reflect light and make rooms feel larger and more open. They also provide a neutral backdrop that does not compete for your attention.
Add warmth through natural wood tones. Introduce subtle color through plants, textiles, or a few carefully chosen accessories. Limit bold colors to small accents you can easily change.
Avoid mixing too many different colors in one room. Stick to three main colors plus one or two accent shades. This creates visual harmony instead of chaos.
Furniture should support calm living through both its design and placement. Choose pieces with clean lines and simple shapes rather than ornate or fussy details.
Select furniture that fits your room's scale. Oversized pieces make spaces feel cramped. Too-small furniture looks lost and creates an unbalanced feeling. Leave enough space to move freely around each piece.
Multi-functional furniture reduces the number of items you need. A storage ottoman serves as seating, a footrest, and hidden storage. A dining table can double as a workspace.
Furniture selection guidelines:
Arrange furniture to encourage conversation and connection while maintaining open pathways. Avoid pushing all furniture against walls, which can make a room feel disconnected.

Small daily practices shape your environment more than one-time changes. The way you organize, care for your body, and connect with natural elements creates a foundation for lasting calm.
Your daily routines either add to chaos or reduce it. Start by establishing a place for items you use every day. Keys, bags, and mail should have dedicated spots near your entrance.
Deal with incoming items right away instead of letting them pile up. Sort mail as soon as you bring it in. Put clothes away at the end of each day rather than draping them over chairs.
Daily reset habits:
These small actions prevent clutter from building up. They also give you control over your space. When everything has a home, you spend less mental energy tracking down what you need.
Physical wellness elements in your home support both body and mind. Set up a specific area for stretching or yoga, even if it's just a corner with a mat. You're more likely to practice when the space is ready.
Consider air quality as a wellness feature. Open windows for fresh air circulation when weather permits. Change HVAC filters regularly to keep indoor air clean.
Create a hydration station with filtered water and reusable bottles. Place it where you naturally spend time. Good lighting matters for wellness too. Use warm bulbs in evening spaces and brighter light where you work or read.
Temperature control affects your comfort throughout the day. Keep bedrooms slightly cooler for better sleep. Add soft textiles like throws and pillows to adjust warmth without changing the thermostat.
Natural elements reduce stress and improve focus. Place plants in rooms where you spend the most time. Choose low-maintenance varieties like pothos, snake plants, or ZZ plants if you're new to plant care.
Natural materials create visual calm. Wood furniture, stone accents, and cotton or linen fabrics bring outdoor textures inside. These materials age well and feel more grounded than synthetic alternatives.
Maximize natural light by keeping windows clear of heavy coverings during the day. Position mirrors to reflect light into darker corners. If natural light is limited, use full-spectrum bulbs that mimic daylight.
Bring in natural sounds when possible. Open windows to hear birds or rain. You can also use recordings of nature sounds in spaces without outdoor access.

A calm, confident home starts with deliberate choices about color, light, and layout that create both beauty and peace. These practical answers address common concerns about building spaces that feel intentional without sacrificing comfort or function.
Focus on three core principles: restraint, intention, and coherence. Restraint means limiting the number of colors, patterns, and decorative objects in each room. Intention involves choosing items that serve a clear purpose or hold genuine meaning for you.
Coherence ties everything together through repeated elements like similar wood tones or complementary metal finishes. When you walk through your home, these elements should feel connected rather than random. Each room should have a clear purpose and the furniture should support that purpose without excess.
Start with a neutral base of whites, soft grays, or warm beiges for walls and large furniture pieces. Add depth through varied tones of your chosen neutral rather than multiple competing colors. A room with three shades of gray creates interest without chaos.
Introduce one or two accent colors in muted versions. Sage green, dusty blue, or terracotta in small doses add personality without overwhelming your eyes. These colors work best in textiles like pillows or throws that you can change if your preferences shift.
Texture prevents bland spaces more effectively than additional colors. A cream room with linen curtains, wool throws, and cotton cushions feels rich and layered without any bright hues.
Layer three types of light in each room: ambient, task, and accent. Ambient light comes from ceiling fixtures or natural windows and provides overall illumination. Task lighting includes desk lamps or reading lights that serve specific activities. Accent lights highlight artwork or architectural features.
Use warm-toned bulbs between 2700K and 3000K for living spaces. Cool white light works in utility areas but creates harshness in rooms meant for relaxation. Dimmer switches let you adjust brightness based on time of day and mood.
Maximize natural light by keeping window treatments simple and placing mirrors across from windows. Natural light during daytime hours regulates your body's rhythms and reduces reliance on artificial sources.
Assign a specific home to every item you use regularly. Mail goes in one designated basket, keys hang on a specific hook, and remotes stay in a single drawer. When objects have clear places, they don't pile up on surfaces.
Store items at their point of use. Keep cooking utensils near the stove and toiletries in bathroom cabinets rather than on counters. Closed storage like cabinets and drawers hides necessary items while keeping them accessible.
Follow a one-in-one-out rule for discretionary items. When you bring home a new book, donate an old one. This prevents gradual accumulation that turns into clutter over time. Display only items that serve a function or bring you genuine joy when you see them.
Create clear pathways through rooms with at least 30 inches of walking space. Arrange furniture to facilitate conversation rather than forcing people to shout across wide gaps. In living rooms, place seating pieces close enough that people can talk comfortably without raising their voices.
Anchor each seating area with a rug that fits under the front legs of all furniture pieces. This visually groups the space and defines its purpose. Leave breathing room between furniture and walls rather than pushing everything to the perimeter.
Scale furniture to room size. Oversized sofas overwhelm small rooms, while tiny chairs get lost in large spaces. Measure your rooms and furniture before purchasing to ensure proportions work together.
Natural materials like wood, stone, linen, and wool create warmth through their inherent variations and organic qualities. Wood furniture with visible grain patterns adds visual interest without busy patterns. Stone or concrete surfaces provide weight and permanence that grounds a room.
Mix smooth and textured surfaces within each space. Pair a sleek leather chair with a nubby wool throw or place a rough ceramic vase on a polished wood table. These contrasts create dimension while maintaining a cohesive feel when materials share similar color tones.
Limit yourself to three or four material types per room. A living room might combine wood floors, linen upholstery, cotton curtains, and ceramic accessories. Adding more material varieties creates visual confusion rather than richness.

Some people have a natural gift for making guests feel welcome, but great hosting isn't about perfection. It's about creating a space where people feel comfortable and want to return. You don't need a fancy home or expensive meals to be a host everyone loves.

The best hosts focus on making their guests feel relaxed and valued rather than impressing them with flawless execution. When you prioritize comfort over perfection, you create an atmosphere where real connections happen. Your guests remember how they felt in your home, not whether every detail was perfect.
Learning to be a great host involves understanding what makes people feel at ease and knowing how to handle different situations with confidence. From the moment someone walks through your door to the time they leave, small choices shape their experience. This guide will show you practical ways to create a welcoming space and develop hosting skills that make people eager to visit again.

A welcoming environment starts with the physical space and extends to the thoughtful details that show you care about your guests' comfort. The most memorable visits happen when hosts pay attention to basic comfort needs, prepare their space properly, and add small touches that make guests feel valued.
Your home's temperature should stay between 68-72°F so guests feel comfortable without asking for adjustments. Make sure your lighting works well throughout the day with both overhead lights and softer lamps for evening hours.
Keep your guest spaces clean and uncluttered. Clear surfaces in the guest room or bathroom give visitors space for their belongings. Fresh air matters too, so open windows before guests arrive or use air fresheners sparingly if needed.
The guest bed needs clean sheets, enough pillows with different firmness levels, and a blanket plus an extra throw. Test the mattress yourself to make sure it provides good support. Your guest bathroom should have fresh towels, basic toiletries, and toilet paper that's easy to find.
Sound control helps guests relax. A white noise machine or fan can cover household sounds. If you have thin walls, let guests know quiet hours and stick to them yourself.
Stock your guest bathroom with travel-size shampoo, conditioner, body wash, and lotion. Add a new toothbrush still in packaging, toothpaste, and pain relievers. Place these items where guests can see them easily.
Your kitchen should have basics available for guest use. Set out coffee, tea, glasses, and mugs where visitors can help themselves. If guests stay overnight, ask about food allergies or preferences before they arrive.
Clear space in your closet or provide a luggage rack so guests don't live out of their suitcase. Add empty hangers and make sure dresser drawers are available. A full-length mirror in or near the guest room helps people get ready.
Create a small welcome area with bottled water, snacks, and any house information guests might need. Include your WiFi password written down and phone chargers if you have extras.
Learn what your guests enjoy and incorporate those preferences. If someone loves reading, place a few good books on their nightstand. For coffee lovers, set up their favorite blend or creamer.
Small gestures show you prepared specifically for their visit. Fresh flowers in the guest room, their preferred snacks in the kitchen, or activities planned around their interests make people feel special.
Keep entertainment options available without forcing an agenda. Board games, streaming service access, and local restaurant menus give guests choices. Share your favorite spots in the area but let them decide what sounds appealing.
Your energy as a host sets the tone for the entire visit. Stay relaxed and flexible when plans change. Guests feel most comfortable when you seem happy to have them rather than stressed about perfection.

Great hosts know how to communicate clearly, spot what their guests need before being asked, and create the right mix of fun and downtime. These skills turn a simple visit into an experience people want to repeat.
Good communication starts before your guests arrive. Send them clear details about parking, arrival time, and what to expect. Let them know if the event is casual or formal so they can dress appropriately.
When guests arrive, greet them warmly and show them where to put their belongings. Tell them where the bathroom is and make them aware of any house rules, like where pets are allowed or if shoes should stay on or off.
During the visit, check in without hovering. Ask simple questions like "Can I get you anything?" or "Are you comfortable?" Listen to their answers and respond to what they actually say. If someone mentions they're cold, offer a blanket right away.
Be direct about meal times and plans. Your guests shouldn't have to guess when dinner will be ready or if they need to be back by a certain time.
Pay attention to small details that make guests comfortable. Stock the guest bathroom with fresh towels, soap, and toilet paper. Keep basic items like phone chargers, pain relievers, and water glasses within easy reach.
Ask about dietary restrictions before planning meals. Keep track of preferences you learn over time, like how someone takes their coffee or if they avoid certain foods.
Common guest needs to prepare for:
Notice when someone's glass is empty or when the room temperature needs adjusting. Small actions like refilling drinks or opening a window show you're thinking about their comfort.
Plan activities but don't pack every minute of the day. Give guests free time to rest, read, or explore on their own. Some people need quiet moments to recharge.
Offer options instead of fixed schedules. You might say, "We could go hiking at 10, or there's a farmers market if you prefer something low-key." This lets guests choose what fits their energy level.
Create natural gathering times around meals or evening activities, but make it clear that participation is optional. Set up comfortable spaces where guests can join the group or step away as needed.
Read the room during activities. If conversation is flowing well, let it continue. If people seem tired, don't push for one more game or activity. The best hosts know when to keep things going and when to let everyone wind down.

Great hosts share common qualities like warmth and attentiveness, but the specifics matter when it comes to creating spaces where people genuinely want to spend time. These questions address the practical details that separate memorable hosting from stressful entertaining.
A great host pays attention to small details without making guests feel like they're causing extra work. You notice when someone needs a refill or seems cold without hovering or asking constantly. You also know how to read the room and adjust your energy to match what guests need.
Flexibility stands out as one of the most important hosting traits. Plans change, dietary restrictions come up last minute, and guests arrive late. You handle these situations calmly and make people feel welcome regardless of what goes differently than expected.
Good hosts also know when to step back. You create spaces for conversation to flow naturally rather than forcing entertainment or activities. You're present when needed but give guests room to relax without feeling watched or managed.
Greet guests at the door with genuine warmth and take their coats or bags immediately. Show them where to put their belongings and point out the bathroom location right away. These simple actions eliminate awkward searching and establish that they're truly welcome in your space.
Offer a drink within the first few minutes of arrival. It gives guests something to hold and helps them transition from travel mode to relaxation. Keep the options simple like water, coffee, or wine so you're not making complicated cocktails while people stand around waiting.
Give a brief tour of the spaces guests can use freely. Point out snacks they can grab, where extra blankets live, and which areas are theirs to enjoy. This prevents guests from feeling like they need permission to do basic things like get water at night.
Clean the guest bathroom thoroughly and stock it with fresh towels, extra toilet paper, and basic toiletries like soap and shampoo. Add a small trash can if one isn't already there. These basics prevent midnight searches and awkward requests for supplies.
Prepare the sleeping area with clean sheets, extra blankets, and at least two pillow options since people have different preferences. Clear out a drawer or closet space where guests can unpack if they want to. Add a phone charger, reading light, and small water carafe on the nightstand.
Set out breakfast items the night before so morning routines run smoothly. Coffee, tea, basic breakfast foods, and clean mugs should be easily accessible. This lets early risers help themselves without waking you or feeling like they're intruding in your kitchen.
Choose one main dish you can prepare mostly or entirely ahead of time. Casseroles, slow cooker meals, and sheet pan dinners let you spend time with guests instead of being stuck in the kitchen. Add simple sides like salad, bread, and a vegetable that roasts alongside the main.
Keep the timeline loose with approximate serving times rather than rigid schedules. Tell guests "we'll eat around 6:30" instead of announcing a specific minute. This reduces pressure on you and lets guests arrive within a reasonable window without disrupting your plans.
Ask one or two guests to bring specific items like drinks or dessert. Most people want to contribute, and giving them concrete assignments makes them feel included while reducing your workload. Skip the pressure of making everything from scratch when quality store-bought options exist.
Build-your-own food stations accommodate different preferences without extra cooking. Taco bars, pasta with separate sauces, or grain bowls with various toppings let guests choose what works for them. Keep proteins, vegetables, and carbs separate so people can customize their plates.
Stock basics that cover common dietary restrictions. Offer plant-based milk, gluten-free crackers or bread, and at least one main dish without meat or dairy. Having these options available shows thoughtfulness without requiring you to prepare entirely separate meals.
For drinks, provide still and sparkling water, one or two alcoholic options, and a simple non-alcoholic choice beyond soda. This range covers most preferences without turning your counter into a full bar. Wine, beer, and flavored sparkling water satisfy the majority of guests.
Address minor issues quickly and quietly before they become bigger problems. If someone makes an uncomfortable comment, change the subject smoothly or redirect conversation to safer topics. You don't need to call out every awkward moment, but you can guide discussions away from trouble areas.
For guests who dominate conversations, ask direct questions to other people to bring them into the discussion. This balances the dynamic without embarrassing the talkative guest. You can also suggest moving to different rooms or starting an activity that naturally breaks up monopolizing behavior.
When real conflicts arise, pull involved parties aside separately rather than mediating in front of everyone. Stay calm and focus on solutions instead of assigning blame. Sometimes the best response is simply ending the gathering earlier than planned to prevent situations from escalating further.

Your home should do more than just look pretty. It should make your daily life easier and support the life you actually want to live. Many people decorate based on photos or trends, but that often makes homes that do not work for how they really live.

Building the home that supports the life you actually want to live starts with knowing your real priorities and routines. Think about simple things: your morning coffee, where you read, and how you move around on busy days. Be honest about what you need, not just what looks nice.
You do not need a big budget or a total makeover. Small changes to layout, storage, and furniture can help a lot. When your rooms match your habits and goals, your home helps you live the life you want instead of getting in the way.

Your home should show what matters to you every day, not what looks good in magazines or worked for someone else. If your space fits your values and routines, it will support your well-being and make daily life easier.
Your values are the main things that matter to you and guide how you spend time. Examples include family time, creativity, health, learning, and rest. Write down three to five values that feel most important to you right now.
After you list them, look around your home. Does your space help you live by those values? For example, if family meals matter but your kitchen is small and cluttered, that makes living your value harder.
Think about the activities that make you happiest. If creativity matters, you need a spot for supplies and projects. If fitness matters, you need room to exercise. Your home should have real spaces for your values, not just ideas.
Write down a normal weekday and a normal weekend. Include things you do every day: morning habits, cooking, work, exercise, family time, and how you relax at night.
Your home should make these routines easier, not harder. If you work from home, you need good light and a place to work. If you cook most nights, your kitchen should be set up for easy meal prep.
Notice where you struggle. Where does clutter build up? What tasks take more time than they should? These problems usually mean the space doesn't fit your real needs. The aim is to cut daily stress, not to have a perfect-looking home you never use.
A practical home meets everyday needs. A comfortable home feels good to be in. You need both to live well.
Start with basics: enough storage, good lighting, comfy seating, and steady temperature control. These are not extras. They help you relax and focus on what matters.
Then add things that make you feel calm and happy. This could be soft fabrics, lots of natural light, plants, or items you love. Choose what makes you feel good, not just what looks trendy.
Essential Balance Points:
Your home works best when practical features and personal comfort support each other.

Good design makes daily tasks easier. The right layout, storage, and controls help your home fit different parts of your day. That means less work for you.
Rooms do not need just one purpose. A dining table can be for breakfast, a work table at noon, and dinner at night.
Use furniture that moves or has more than one use. A desk on wheels can be for work or crafts. A Murphy bed clears floor space for exercise or play.
Key elements of flexible spaces:
Divide open rooms with rugs, furniture, or paint instead of walls. This makes separate areas but keeps the room flexible. Also, keep outlets easy to reach so you can plug in devices where you need them.
Clutter happens when things do not have a place to go. Smart storage puts items where you use them and keeps surfaces clear for daily tasks.
Built-in cabinets and shelves use vertical space better than freestanding furniture. Put storage near entry points—hooks by the door, a bench with shoe space, and a small spot for mail. These stops keep items from spreading into living areas.
Your kitchen benefits from drawer dividers, pull-out shelves, and labeled containers. Bathrooms need medicine cabinets, under-sink organizers, and hooks for towels. Bedrooms do well with closet systems that have sections for different types of clothes.
Hidden storage keeps rooms looking tidy. Ottomans with storage, bed frames with drawers, and coffee tables with lift tops add space without extra visual clutter.
Natural light helps your sleep cycle and can lower energy bills. Put work areas and seats near windows so daylight reaches them during the day.
Window coverings can control light without blocking it all. Sheer curtains soften bright sun while keeping rooms bright. Top-down, bottom-up shades let you adjust privacy and light separately.
Ways to improve air quality:
Light-colored walls and mirrors send natural light deeper into rooms. Skylights bring daylight into inner spaces without outside windows. Keep window areas free of large furniture that blocks light.

Knowing costs, what is covered, and the timing of changes in care helps you plan. These answers explain common questions about moving between care levels, money matters, and what different services offer. Our goal is to help you find the home that supports the life you actually want to live.
Assisted living helps with daily tasks like bathing, dressing, and taking medicine. You usually live in your own apartment or room and keep much of your independence. You need only small amounts of medical care.
Nursing homes give 24-hour medical care from registered nurses. They help people with serious health problems or big disabilities. Staff help with all daily tasks and provide medical treatments that assisted living cannot.
The main difference is medical need and independence. Assisted living is for people who need some help but want privacy and freedom. Nursing homes are for people who need constant medical care or cannot do daily tasks safely even with help.
Most assisted living places help with bathing, dressing, grooming, and using the bathroom. Staff remind you about medicine and help manage prescriptions so you take them correctly.
You usually get three meals a day in a dining room. Housekeeping and laundry are often included. Many places offer scheduled rides to doctor visits and shopping.
There are social activities, exercise classes, and common rooms to meet other people. Many rooms have emergency call systems so you can quickly reach staff if you need help.
Some services cost extra, such as memory care, physical therapy, or more hands-on personal care. Ask which services are included and which cost more when you compare places.
Think about moving to a nursing home when your medical needs are higher than assisted living can handle. This includes needing regular skilled nursing care, close monitoring of serious conditions, or help from several staff members for basic tasks.
Memory loss that risks your safety can mean you need a nursing home. If you wander, forget to eat, or cannot notice danger, a secure place with constant supervision may be needed.
If you need a lot of physical help to move, a nursing home may be safer. For example, if you cannot move from bed to a chair or need two people to help you walk, assisted living may not have enough staff.
Your doctor can help decide if you need a higher level of care. Assisted living staff will also suggest a move when they cannot safely support you anymore.
Many people live in supported living for years or even decades if their health stays stable. How long you can stay mainly depends on your physical and mental health over time. A supported living option can be the home that supports the life you actually want to live when your needs stay steady.
If you have a stable disability or a chronic condition that is managed well, you may be able to stay indefinitely. The key is that your needs remain within what the program or facility can safely provide.
If you develop serious medical problems that need skilled nursing care, you may need to move. Things like falls, strokes, late-stage dementia, or conditions that need frequent medical treatment usually mean a higher level of care is needed.
Changes in behavior or safety needs can also shorten your time in supported living. If you become a risk to yourself or others, or if you need more supervision than staff can give, you may need to transition to another setting.
Costs for group homes vary by location, how much support you need, and state funding. Monthly costs often range from about $3,000 to $6,000 per person, though some specialized homes cost more. Choosing the home that supports the life you actually want to live may affect cost if you need extra services.
Many people do not pay the full cost themselves. Medicaid waiver programs often cover most or all group home expenses for those who qualify. Some states also pay through developmental disability services.
The basic fee usually covers your room, meals, help with daily tasks, medication management, and supervision. You will also have shared living spaces and chances to join household activities.
Extra costs can include personal spending money, clothing, entertainment, and therapies not covered by insurance. Some homes charge more for transportation or one-on-one support beyond usual staff levels.
Medicare does not pay for retirement homes or assisted living because those are mainly housing and personal care, not medical treatment. You pay these costs yourself or use long-term care insurance if you have it. For many people, finding the home that supports the life you actually want to live means planning how to pay for it.
Medicare may pay for skilled nursing care in a nursing home, but only under certain rules. You must first have at least a three-day hospital stay and then go to a Medicare-certified nursing home within 30 days for the same condition.
If you qualify, Medicare pays the full cost for the first 20 days of skilled nursing care. From day 21 to day 100, you pay a daily copayment. After 100 days, Medicare stops paying and you must cover the costs.
Most long-term nursing home stays are not covered by Medicare because they are considered custodial care rather than skilled medical care. In that case, Medicaid may pay if you meet its income and asset rules and need ongoing nursing home care.

You walk into some homes and everything just makes sense. The colors work together. The furniture fits the space. Each room flows naturally into the next. Then you walk into others—maybe even your own—and something feels off, even if you can't quite explain why.

Most homes feel random because decisions are made one piece at a time without a larger plan connecting them together. A couch gets bought because it was on sale. A paint color gets chosen because it looked nice in the store. Decor gets added over time without thinking about how it all relates. The result is a collection of individual choices that never add up to a cohesive whole.
The difference between a home that feels intentional and one that feels thrown together comes down to a few key principles. When you understand what disrupts visual flow and what creates it, you can start making choices that actually work together instead of against each other.

When homes lack intentional design, the problem usually shows up in three ways: colors that compete instead of complement, furniture that blocks natural movement, and mixed styles that create visual confusion.
Your color choices either tie rooms together or make them feel disconnected. When you paint each room a completely different color without any connecting thread, your home feels choppy as you move from space to space.
The issue gets worse when you ignore undertones. A warm beige in one room clashes with a cool gray in the next, even though both seem neutral. Your eyes pick up on this mismatch immediately.
Common color scheme mistakes include:
You need a consistent color story. Pick three to five colors total for your main living spaces. Use them in different proportions from room to room, but keep them present so your eye finds familiar elements as you move through your home.
Combining different design styles can work, but only when done with clear intention. Most homes feel random because they mix farmhouse, modern, traditional, and industrial elements with no unifying thread.
The problem isn't variety itself. It's throwing together pieces that share nothing in common. A sleek glass coffee table, a rustic wooden bench, an ornate Victorian mirror, and industrial metal shelves in the same room create visual chaos.
Your spaces need something to connect different pieces. This could be similar wood tones, repeated metal finishes, or consistent lines and shapes. Without these connecting elements, every item competes for attention.
Limit yourself to two main styles maximum. Let one be dominant and use the other as an accent. This gives you variety without confusion.
Furniture that blocks doorways or cuts through natural walking paths makes your home feel cramped and awkward. You should be able to move from one area to another without squeezing between pieces or taking an indirect route.
The biggest mistake is pushing all furniture against walls. This creates dead space in room centers and makes conversation areas feel disconnected. Float your sofa away from the wall to define zones and improve flow.
Another common error is choosing furniture that's too large for the space. An oversized sectional might seem comfortable, but if it leaves only narrow passages around it, your room feels crowded. Leave at least 30 inches for main walkways and 18 inches for secondary paths.
Position furniture to guide movement, not obstruct it. Your largest pieces should define activity zones while keeping clear paths between entry points.

A unified home requires two fundamental approaches: creating visual patterns that connect your spaces and making design choices that reflect what matters to you.
Visual consistency comes from repeating specific design elements across multiple rooms. This doesn't mean everything needs to match perfectly.
Start with a limited color palette of three to five colors. Use these same colors in different rooms through paint, furniture, and accessories. For example, if you choose navy blue, cream, and warm wood tones, these should appear throughout your home in varying amounts.
Key elements to repeat include:
Pick one or two materials to use as a thread through your space. If you use marble in your kitchen, incorporate it in a bathroom or entryway. If you choose velvet for living room pillows, add a velvet chair in your bedroom.
The goal is recognition without repetition. When you walk from room to room, your eye should catch familiar colors or materials without seeing the exact same items.
Your design choices should reflect how you actually live and what you care about. This creates spaces that feel authentic rather than staged.
If family time matters most, arrange furniture to encourage conversation rather than focusing everything toward a television. If you value reading, place comfortable chairs near windows with good lighting and keep books visible.
Make practical choices that match your lifestyle. A household with young children needs durable fabrics and washable surfaces. A person who cooks daily needs an organized kitchen with easy-to-reach tools.
Design around your priorities:
Select furniture and accessories that serve a purpose you actually need. Empty decorative bowls and unused accent chairs make spaces feel generic. Items you use daily create authentic, lived-in environments that still look intentional.

Many homes feel disconnected because of uncoordinated color schemes, furniture in conflicting styles, and a lack of intentional planning from room to room. These issues stem from impulse purchases and missing visual anchors that tie spaces together.
The most common reason is buying furniture and decor without a unified color scheme. When you purchase items based on individual appeal rather than how they work together, rooms end up feeling disconnected.
Different flooring materials in adjacent rooms also creates visual breaks that disrupt flow. Hardwood in one room, carpet in another, and tile in a third makes your home feel choppy and unplanned.
Mixing too many design styles creates confusion. If your living room is modern, your bedroom is farmhouse, and your kitchen is traditional, your home lacks a coherent identity that connects the spaces.
Inconsistent lighting types across rooms makes the problem worse. Warm lighting in one space and cool lighting in another changes how colors appear and prevents smooth transitions between areas.
Pick one dominant style and use it for 70% of your design choices. This creates your home's foundation and prevents the space from feeling scattered.
Pull accent elements from your secondary style for the remaining 30%. This allows you to incorporate other aesthetics you love without overwhelming the main design direction.
Find common elements that appear in both styles you like. Natural wood appears in farmhouse and mid-century modern styles, so using it throughout creates continuity even when mixing aesthetics.
Stick to a limited color palette that works for both styles. Colors act as the glue that holds different design elements together and makes combinations feel intentional rather than accidental.
The 2/3 rule states that your area rug should cover about two-thirds of your floor space. This grounds your furniture and defines the seating area without making the room feel cramped.
The rule also applies to furniture placement on the rug. The front two-thirds of your sofa and chairs should sit on the rug, with back legs either on or off depending on the room size.
For wall art, the 2/3 rule means your artwork should take up roughly two-thirds of the wall space above furniture. A piece that's too small looks lost, while one that's too large overwhelms the space.
This proportion creates visual balance that feels natural to the eye. Rooms that follow this guideline appear more polished and intentional than those with extreme size relationships.
Displaying too many small decorative items creates visual noise. When every surface holds multiple objects, your eye has nowhere to rest and the space feels chaotic.
Furniture pushed against walls makes rooms feel stiff and unintentional. Floating furniture away from walls creates conversation areas and makes the layout feel purposeful.
Mismatched furniture scales make spaces look accidental. A tiny coffee table with an oversized sectional, or a large dining table with small chairs, signals a lack of planning.
Exposed cords and cables immediately make a space look unfinished. These practical necessities break the visual flow and remind you that the space wasn't thoughtfully organized.
Too many competing focal points confuse the eye. When multiple bold elements fight for attention, nothing stands out and the room feels disorganized.
Start with three colors: one neutral base, one main color, and one accent. This simple framework prevents color overload while providing enough variety to keep spaces interesting.
Your neutral should appear in 60% of each room through walls, large furniture, or flooring. This creates the backdrop that allows your other colors to shine without overwhelming the space.
Use your main color in 30% of the room through medium-sized furniture, curtains, or rugs. This color should appear in every room to create the thread that connects your spaces.
Reserve your accent color for 10% of each room in pillows, artwork, or small decor items. This pop of color adds energy without dominating the space.
Test your colors in different lighting conditions before committing. Colors change dramatically between morning and evening light, so viewing them at various times ensures they work throughout the day.
Mediterranean-style homes with heavy stucco, arches, and tile roofs perform poorly in many markets. Buyers find them dated and expensive to update since the architectural features are difficult to modify.
Split-level homes from the 1960s and 1970s struggle with resale. The choppy layout with multiple short staircases feels awkward to modern buyers who prefer open floor plans.
Highly customized or quirky homes with unusual layouts limit your buyer pool. Most people can't envision living in a home with a very specific or eccentric design.
Homes with popcorn ceilings, outdated wallpaper, or heavy wood paneling signal deferred maintenance. Buyers see these features as immediate projects that require time and money to fix.
Colonial-style homes in regions where they're uncommon face challenges. A New England colonial in Arizona feels out of place and doesn't match what local buyers expect or want.

You don't need a complete home makeover to feel better in your space. Small, intentional changes to your daily environment can improve your mood, focus, and overall well-being without costing much time or money.
The key to elevating your environment is making small adjustments that fit naturally into your existing routines. Simple tweaks to lighting, organization, and daily habits can transform how you experience your home and workspace. These changes work because they address the practical aspects of your day-to-day life.
This guide will show you how to create a more supportive environment through minor improvements you can start today. You'll learn which small adjustments make the biggest difference and how to build mindful routines that enhance your daily experience.
Your environment responds to simple modifications that create meaningful shifts in how you experience your space daily. Strategic changes to lighting, natural elements, and personal touches transform rooms without requiring renovation or major expense.
Natural light affects your mood, energy levels, and sleep patterns. Opening blinds first thing in the morning helps regulate your circadian rhythm and increases alertness throughout the day.
Position mirrors across from windows to reflect sunlight deeper into your rooms. This simple trick doubles the brightness in darker corners without adding any light sources.
Remove heavy curtains and replace them with sheer or light-filtering options. You maintain privacy while allowing more daylight to enter your space. Clean your windows inside and out every few months, as dirt and grime can block up to 40% of incoming light.
Quick adjustments for better light:
Keep your walls in lighter shades if possible, as they bounce light around rooms more effectively than dark colors.
Adding plants to your space improves air quality and reduces stress levels. Start with low-maintenance options like pothos, snake plants, or succulents if you're new to plant care.
Place one or two plants in areas where you spend the most time. Your desk, bedside table, or kitchen counter are ideal spots. Even small plants make a difference in how natural a room feels.
Natural materials create warmth and texture in your environment. Swap plastic containers for wooden bowls or woven baskets. Add a small water feature like a desktop fountain to introduce calming sounds.
Stones, shells, or driftwood collected from nature serve as free décor that connects your indoor space to the outdoors.
Your décor should reflect your interests and experiences rather than following trends. Display items that hold meaning for you, whether that's family photos, travel souvenirs, or artwork you've created.
Rotate your displayed items seasonally to keep your space feeling fresh. Store some pieces and bring out others every few months. This prevents visual clutter while giving you variety.
Personalization strategies:
Limit décor to items you actually like looking at daily. Remove pieces that don't serve a purpose or bring you satisfaction, even if they were gifts or expensive purchases.
Small shifts in how you start your day, wind down at night, and engage your senses can change how your entire environment feels without requiring new furniture or renovations.
The first thirty minutes after waking set the tone for your entire day. Instead of reaching for your phone immediately, try sitting up and taking five deep breaths before you do anything else.
Keep a glass of water on your nightstand to drink right when you wake up. Your body is dehydrated after sleep, and this simple act helps you feel more alert and focused.
Open your curtains or blinds as soon as possible to let in natural light. This signals to your brain that it's time to be awake and active. If you don't have much natural light, turn on bright lights instead.
Simple morning touchpoints:
These actions take less than fifteen minutes total but create a sense of control and calm that carries forward.
Your evening routine should help your mind and body recognize that it's time to slow down. Set a specific time when you'll dim the lights in your home, usually one to two hours before bed.
Lower the temperature in your bedroom to around 65-68 degrees Fahrenheit. A cooler room helps your body prepare for sleep naturally.
Create a simple sequence you follow each night. This might include putting away dishes, laying out clothes for tomorrow, and setting up your coffee maker. These practical tasks done in the same order become calming signals.
Evening wind-down activities:
Consistency matters more than perfection. Even following half of your routine is better than skipping it entirely.
Your nose and ears constantly process information about your environment, even when you're not paying attention. Using these senses intentionally can shift how a space feels.
For scent, choose one smell for morning energy and another for evening calm. Peppermint or citrus works well in the morning. Lavender or vanilla helps with relaxation at night. You can use essential oil diffusers, candles, or even fresh herbs.
Sound works similarly. White noise or nature sounds can mask distracting background noise from neighbors or traffic. You can also use music with specific purposes: upbeat songs while you cook, quiet instrumental music while you work.
Practical scent and sound pairings:
| Time of Day | Scent Option | Sound Option |
|---|---|---|
| Morning | Citrus, mint | Upbeat music or birdsong |
| Afternoon | Rosemary, eucalyptus | Light background music |
| Evening | Lavender, chamomile | White noise or soft piano |
Keep these elements subtle. Strong scents and loud sounds defeat the purpose of creating a calm environment.
Simple switches like reusable bags and LED bulbs can significantly lower your environmental footprint, while understanding basic sustainability principles helps you make better choices across all areas of your home and daily life.
You can unplug devices when you're not using them to cut phantom energy consumption. This simple action takes seconds but reduces electricity waste throughout your day.
Switching to reusable water bottles and coffee cups eliminates single-use plastic without disrupting your schedule. You still get your drinks, but you're creating less waste each time.
Turn off lights when you leave a room and run full loads in your dishwasher and washing machine. These habits fit naturally into what you already do and lower both energy use and utility bills.
LED light bulbs use 75% less energy than traditional incandescent bulbs and last much longer. You replace your bulbs as they burn out rather than all at once.
Cloth napkins and towels replace paper versions without requiring any change in how you clean up. You simply wash them with your regular laundry instead of buying disposables.
Switching to concentrated cleaning products or refillable options reduces plastic packaging. Many stores now offer refill stations where you can reuse the same bottle multiple times.
Start by learning what your local recycling program actually accepts. Many people contaminate recycling bins with materials that can't be processed, which makes the entire batch unusable.
Keep a small compost bin in your kitchen for food scraps like vegetable peels and coffee grounds. You can add these to an outdoor compost pile or use a countertop composting system that requires no yard space.
Buy products with less packaging when you have the choice. Loose produce instead of pre-packaged, bulk items in your own containers, and concentrated products all reduce what ends up in your trash.
Rinse containers before recycling them to prevent contamination. This quick step takes only a few seconds per item but keeps your recyclables from being rejected at processing facilities.
Lower your water heater temperature to 120°F instead of the default 140°F. This reduces energy consumption without affecting your comfort during showers or washing dishes.
Fix leaky faucets and running toilets as soon as you notice them. A single leaking faucet can waste thousands of gallons per year, and the repairs are often simple and inexpensive.
Use cold water for laundry whenever possible since heating water accounts for about 90% of the energy your washing machine uses. Modern detergents work effectively in cold water for most loads.
Install low-flow showerheads and faucet aerators. These devices cost under $20 each and reduce water flow without noticeably decreasing pressure.
Buy products made from recycled materials or those designed to be recycled at the end of their life. Check labels for certifications like Energy Star, Fair Trade, or FSC-certified wood products.
Choose items with longer lifespans over cheap disposable versions. A durable product might cost more initially but saves money and resources over time by not requiring frequent replacement.
Support local businesses and farmers markets when you can. This reduces transportation emissions and often means less packaging than products shipped long distances.
Read ingredient lists and avoid products with harmful chemicals that wash into water systems. Plant-based cleaners and personal care items are widely available at similar prices to conventional options.
The three pillars of sustainability are environmental protection, social equity, and economic viability. These principles work together to create lasting positive change.
Environmental protection means reducing waste, conserving resources, and minimizing pollution in your daily choices. You apply this through actions like recycling, reducing energy use, and choosing eco-friendly products.
Social equity involves supporting fair labor practices and community wellbeing. You can buy from companies that treat workers fairly and support local businesses that strengthen your community.
Economic viability focuses on making sustainable choices that are financially practical over time. This means investing in quality items that last, reducing utility bills through conservation, and avoiding wasteful spending on disposable products

You straighten a picture frame, line up books, or feel good when tiles match. These small actions show how your brain works. People are drawn to symmetry and order because the brain finds neat patterns easier to understand than messy ones.

This liking for order is not only about taste. Your eyes and brain look for balance and clear patterns in what you see. When things are balanced, your brain works less hard to make sense of them. That feeling can make you calm and satisfied.
Knowing why you like visual harmony helps explain many choices. It affects art, design, and everyday things like buildings and websites. Order and symmetry shape how you see the world.

Your brain uses both fast automatic reactions and what you learn from culture to form visual tastes. These tastes come from how the mind finds and reacts to patterns, the feelings symmetry can create, and long-term advantages that helped humans survive.
Your brain looks for order, symmetry, and visual harmony to make sense of what you see. This need helps you find things easy to understand and pleasant to look at.
Your brain uses two main ways to read patterns. Bottom-up processing works automatically. When you see symmetry, your brain notices it quickly without thinking hard. Top-down processing is when you think more. You use what you learned before—like culture and experience—to judge complex patterns or art.
Key differences:
Your eyes and brain prefer patterns that are easy to process. Simple, balanced designs feel nicer because they are easier to understand. This ease of seeing leads to a positive feeling when you look at them.
Symmetry often gives people a feeling of comfort and satisfaction. Many cultures and ages respond to symmetry in similar ways. Your brain may see symmetry as a sign of quality and stability.
Children also notice balanced patterns early, even before they learn what is considered beautiful in their culture. This shows that the need for order and visual harmony starts young.
But feelings can change with context. For example, perfect symmetry may work well in buildings, while a little asymmetry can look better in faces or natural scenes.
Your liking for symmetry comes from long ago and helped people survive. Symmetry in nature often showed health, good genes, and a stable place to live. People who noticed these patterns picked better food, mates, and safe places.
Seeing patterns also helped early humans spot danger and chances to find food. Noticing when things were out of place made it faster to react to threats. This skill became part of how our brains see the world.
Today your brain still uses those old tricks. When you look at things, you quickly notice patterns and order the same way people did for thousands of years.

Balance, symmetry, and proper size affect how you feel about art, buildings, and objects. These ideas change how comfortable, focused, or calm you feel in a place.
Symmetry gives a strong sense of stability by copying parts across a line. Your brain reads a symmetrical picture faster and sees it as neat.
Proportion is about the size of one part compared to another. Long ago, people like the Roman architect Vitruvius wrote down human measurements that designers still use. Good proportions make things feel natural.
Key principles include:
You feel harmony when designers place items on clear grids. This creates an order that guides your eye and reduces confusion.
Architects use symmetry on building fronts to show stability and importance. Classical buildings like courthouses have matching columns and centered doors that people notice right away.
Product designers use these ideas for everyday items. Many smartphones have centered camera groups and buttons that are balanced. Kitchen appliances often have controls placed evenly because they are easier to find and use.
Le Corbusier created measurement systems based on human body proportions to plan rooms. This helps spaces feel comfortable for people. Today architects still use grids and repeatable parts to make buildings that look right from every view.
Neat visual spaces lower your mental load. When you enter an organized place with clear patterns, you can focus on tasks instead of figuring out a messy scene.
Studies show people like familiar patterns and balanced designs. Rooms with even proportions and symmetry reduce stress. That is why hospitals and offices often aim for visual order.
Your work can get better in places with consistent design. When things line up on simple grids and follow clear rules, you spend less energy understanding the space. That leaves more energy for concentration and creativity.

People often ask how liking symmetry links to brain function, mental health, and daily habits. These questions look at the science behind why we prefer certain visuals and when strong preferences might mean something more.
Preferring order and symmetry shows that your brain looks for patterns to understand the world. When you see balanced designs or organized spaces, your mind reads them as steady and predictable.
This habit means you use visual harmony as a quick way to judge places. Symmetrical settings feel safer and more reliable than chaotic ones. You naturally feel calm in spaces where things look balanced and planned.
Wanting order also shows a need to save mental effort. Reading symmetrical patterns takes less thinking than figuring out random layouts.
The brain notices symmetry quickly because it can read mirrored information faster than irregular shapes. The visual cortex checks one side against the other, which uses less effort than studying two different sides.
This ease of processing makes the brain feel good. Symmetrical patterns often trigger the brain’s reward system, so people feel pleasure when they see them.
Over time, our brains learned to link balance with health and safety. Seeing symmetry can cause small releases of dopamine, which gives a mild sense of satisfaction.
Researchers use visual preference tests that show two images at once. You pick which image you like more, and that shows how much you respond to balance and symmetry.
Questionnaires ask about daily habits, like how bothered you feel when things are out of place. Answers help show where your need for order fits compared to others.
Some studies use eye-tracking to see how long people look at symmetrical versus asymmetrical parts of a picture. These gaze patterns reveal preferences people might not say in a survey.
Wanting things to be symmetrical does not always mean you have OCD. Many people like balanced designs but do not feel upset or have trouble in daily life because of it.
The main difference is whether the need for symmetry causes big anxiety or gets in the way of your life. With OCD, you might spend hours arranging things to make them perfect or feel very upset when things are not even. You may also keep checking things over and over to make sure they are symmetrical.
Normal preferences let you enjoy order without needing to make everything perfect. You can handle small mistakes and keep going. With OCD, thoughts about symmetry are hard to control and come into your mind a lot, and you may have rituals you feel you must do.
People with autism may like symmetry because of how their senses work. Symmetry can feel calm and cut down on sensory overload. You might arrange things to make your space feel more predictable and comfortable.
The big difference from OCD is why it helps. For autistic people, symmetry soothes and helps with sensory regulation. It is usually not about stopping a feared event. They do not often have intrusive worries about what will happen if things are not symmetrical.
Autistic people may also like routines and sameness in many parts of life. Liking symmetry is often part of a wider pattern of seeking order rather than one single compulsion.
Being organized becomes a problem when it harms your life or causes strong distress. If you spend so much time organizing that you miss school, work, or events, the habit is causing trouble.
The change happens when you cannot stop organizing even if you want to. You may know your need for perfect order is too much but feel unable to change it. Your relationships or schoolwork can suffer because of the time you spend keeping things perfect.
Another warning sign is intense emotional responses to disorder. If seeing something messy causes panic, anger, or severe anxiety instead of mild annoyance, the reaction is more than a normal preference. You may need help from a mental health professional to learn healthier ways to cope.

Your home should work for you, not against you. When small annoyances pile up or your space feels chaotic, it affects your mood and productivity every single day. The good news is that you don't need a big budget or major renovation to turn things around.

Simple, affordable upgrades can restore order to your home and give you back a sense of control over your environment. These changes take minimal time and money but deliver real results. From better lighting to smarter storage, each small fix removes friction from your daily routine.
The upgrades ahead focus on practical improvements that make your space more functional and pleasant to live in. You'll learn which small changes create the biggest impact and how to prioritize them based on your needs. Many of these solutions cost less than $100 and require no special skills to implement.

Your home's interior directly affects your sense of control and mental clarity. Physical changes to your living space create immediate shifts in how you navigate daily routines and manage stress.
Start with visible surfaces in your most-used rooms. Clear off countertops, tables, and dressers by keeping only items you use daily. Everything else should have a designated storage spot.
Use the four-box method to sort through problem areas. Label boxes as keep, donate, trash, and relocate. This system removes the emotional overwhelm of making instant decisions about your belongings.
High-impact decluttering zones:
Tackle one room per week instead of your entire home at once. A single organized space gives you a sense of accomplishment that motivates continued progress.
Your entryway sets the tone for your entire home. Install wall hooks at different heights for coats, bags, and keys. A small tray or bowl near the door catches loose items like sunglasses and mail.
Add a slim console table or floating shelf to create a landing zone. This prevents clutter from migrating deeper into your home.
Kitchen organization directly impacts your daily efficiency. Drawer dividers keep utensils separated and easy to grab. Cabinet risers double your storage space for dishes and canned goods.
Group items by use frequency. Place everyday dishes and glasses at eye level. Store specialty appliances you use monthly in upper cabinets or the pantry. Label containers in your pantry so you can find ingredients quickly.
Layer three types of lighting in each room: ambient, task, and accent. Overhead fixtures provide ambient light. Desk lamps and under-cabinet strips offer task lighting. Table lamps and wall sconces create accent lighting.
Install dimmer switches on main lights to adjust brightness throughout the day. Bright light in the morning increases alertness. Dimmed light in the evening signals your body to wind down.
Choose bulbs between 2700K-3000K for living spaces. This warm white temperature feels comfortable and welcoming. Use 3500K-4100K cool white bulbs in your kitchen and home office for better focus and visibility.
Position task lighting to eliminate shadows on your work surface. Place desk lamps to the left if you're right-handed, or to the right if you're left-handed.

Your bedroom, bathroom, and workspace are the three areas where small changes create the biggest shift in how much control you feel over your day. These rooms shape your energy, focus, and rest more than any other space in your home.
Your bedroom sets the tone for both your sleep quality and how you start each morning. A few targeted upgrades can transform this space into a true recovery zone.
Blackout curtains or blinds block outside light and give you control over when your day begins. You'll sleep longer and deeper when you remove street lights and early sunrise from the equation.
Bedside organizers keep your phone, glasses, and books within reach without creating clutter. Simple trays or small shelves eliminate the frustration of searching for items in the dark.
Adjustable lighting lets you set the mood you need. Install dimmer switches or use bedside lamps with multiple brightness levels. Warm, low light in the evening helps your body prepare for sleep, while brighter options work for reading.
Quality bedding makes an immediate difference in comfort. Focus on breathable materials and the right weight for your temperature preferences. Clean, fresh sheets that feel good against your skin turn your bed into a space you look forward to.
Your bathroom can either stress you out or help you reset. Small modifications turn rushed routines into calming rituals.
Shower upgrades create a spa-like experience without major renovation. A handheld showerhead gives you control over water direction and makes cleaning easier. Add a shower caddy or built-in shelves to keep products organized and accessible.
Better storage solutions reduce morning chaos. Install drawer dividers for makeup and toiletries. Use under-sink organizers to maximize space and keep cleaning supplies separated from personal items.
Updated hardware like towel bars, hooks, and drawer pulls makes the space feel more intentional. Choose finishes that match and install hooks at heights that work for everyone in your household.
Improved lighting helps with grooming tasks and sets a relaxing mood. Add lights around your mirror to eliminate shadows. Consider a dimmer switch for evening baths when you want softer light.
Your workspace directly impacts your productivity and mental clarity. Strategic upgrades help you maintain boundaries between work and personal life.
Dedicated desk space signals to your brain that it's time to focus. Even a small folding desk in a corner works better than spreading out on your kitchen table. Keep this area for work only.
Cable management removes visual clutter that distracts you throughout the day. Use clips, sleeves, or boxes to organize cords. A clean desk helps you think more clearly.
Proper lighting reduces eye strain and headaches. Position your desk near natural light when possible. Add a task lamp with adjustable brightness for evening work or cloudy days.
Noise control helps you concentrate. Use a white noise machine to mask distracting sounds. Noise-canceling headphones work well if you share your space with others. Set up your desk away from high-traffic areas when you can.

Small home upgrades can create noticeable improvements in how you experience your space daily. These answers address common questions about making practical changes that enhance organization, comfort, and control.
Cabinet organizers and drawer dividers help you find items quickly without searching. When everything has a designated spot, you spend less time looking for things and more time on what matters.
Motion-sensor lights in closets and hallways eliminate fumbling for switches. You can add under-cabinet lighting in the kitchen to make food prep easier on your eyes.
A mail station near your entryway keeps important documents from piling up. Sort incoming papers immediately instead of letting them create visual clutter.
Installing hooks by the door gives keys, bags, and coats a consistent home. This simple addition prevents the morning scramble when you're trying to leave.
Tension rods create vertical dividers in cabinets and under sinks. You can separate cutting boards, baking sheets, and cleaning supplies for easier access.
Adhesive cord organizers attach to desks and nightstands to manage charging cables. They cost just a few dollars but eliminate tangled wires.
Over-the-door organizers add storage in bathrooms, bedrooms, and pantries without tools. You gain space without drilling holes or making permanent changes.
Drawer organizers for utensils and tools keep similar items grouped together. Clear containers in the pantry let you see what you have at a glance, which reduces overbuying and food waste.
Dimmer switches let you adjust brightness based on time of day and mood. Lower lighting in the evening helps your body prepare for sleep naturally.
Warm-toned LED bulbs create a softer atmosphere than harsh white lights. Look for bulbs rated between 2700K and 3000K for living spaces and bedrooms.
Table lamps and floor lamps add layers of light instead of relying on overhead fixtures alone. This creates depth and makes rooms feel more inviting.
Smart bulbs allow you to control lights from your phone and set schedules. You can program lights to turn on before you arrive home or gradually brighten in the morning.
The 30% rule suggests you shouldn't spend more than 30% of your home's value on renovations. This guideline helps you avoid over-improving for your neighborhood.
For a $300,000 home, you would cap total renovations at $90,000. Small upgrades should be prioritized based on what improves your daily life first, then what adds resale value.
Focus on changes that serve you now rather than hypothetical future buyers. Upgrades like better storage, improved lighting, and functional fixes make your home work better immediately.
The rule reminds you to think proportionally about investments. A $200 cabinet organizer makes more sense than a $5,000 custom closet system if it solves your problem.
Replacing outdated light fixtures updates a room's look without electrical rewiring. You can swap old ceiling lights or sconces in an afternoon.
New cabinet hardware in the kitchen and bathrooms changes the feel of these spaces. Modern pulls and knobs are inexpensive and install with just a screwdriver.
Painting walls in neutral, modern colors refreshes rooms without structural changes. You can complete a bedroom in a weekend.
Updating outlet and switch covers to match your décor creates a polished appearance. White or brushed metal covers look cleaner than old ivory plastic ones.
Fresh paint throughout the home appeals to buyers and suggests good maintenance. Neutral colors let potential buyers envision their own belongings in the space.
Updated fixtures in bathrooms and kitchens signal that the home has been cared for. New faucets, cabinet pulls, and light fixtures are relatively cheap but highly visible.
Improved curb appeal through landscaping and a new front door creates strong first impressions. Buyers form opinions before they step inside.
Organized storage solutions demonstrate functionality that buyers want. Closet systems and pantry organizers show that the home can handle their belongings efficiently.

When you walk into a clean, organized home, something shifts. You feel calmer, more in control, and maybe even a little proud. We equate an organized home with being "put-together" because our living spaces act as physical reflections of our inner state, signaling to ourselves and others that we have things under control. This connection runs deeper than just surface-level appearances.

The link between a tidy home and personal competence isn't just in your head. Society has long viewed domestic order as a measure of responsibility and stability. When your space is organized, people assume you're organized in other areas of your life too.
Understanding why this connection exists can help you see your home differently. The way culture shapes our views on cleanliness and how your environment affects your mental state both play major roles. Your organized space does more than look good—it changes how you feel and how others see you.

Society has long connected a clean home with personal worth and social standing. These beliefs come from both historical class systems and modern media that shapes what we think a "proper" home should look like.
Throughout history, keeping an orderly home showed you had money and status. Wealthy families hired servants to maintain their spaces, which made cleanliness a visible marker of class. If your home looked neat and organized, it signaled you had resources and time to dedicate to domestic upkeep.
The Victorian era made this connection even stronger. During this time, a well-kept home became a moral issue, not just a practical one. People believed that a clean house reflected good character and proper values.
This thinking carried into the 20th century when middle-class families tried to show they were respectable through their homes. Women especially faced pressure to maintain perfect households as proof of being good homemakers. The state of your home became tied to your identity and how others judged you.
Modern media reinforces the link between organized homes and successful lives. Social media platforms show endless images of perfectly styled spaces that look effortless. These images suggest that put-together people naturally have put-together homes.
Home improvement shows and lifestyle magazines set standards that feel impossible to meet. They present organizing as simple and quick, rarely showing the real time and effort involved. You see the finished result without understanding the work behind it.
Common media messages about organized homes:
These messages create pressure to maintain a certain image. You might feel judged when your home doesn't match these idealized versions, even though most real homes look nothing like what media presents.

Your living space affects how you see yourself and how well you function each day. A clean home can change your mental state and the way you think about your own life.
You often judge yourself based on the state of your home. When your space looks organized, you tend to feel like you have control over your life. This happens because your brain links your surroundings to your sense of self.
Your home acts as a reflection of who you think you are. A tidy room sends a message to yourself and others that you are capable and in control. This connection explains why you might feel embarrassed when someone sees your messy space.
The way you maintain your home becomes part of your identity. If you grew up in an organized household, you likely learned to connect cleanliness with being responsible. These early experiences shape how you view yourself today.
Clean spaces help your brain focus better. When your desk is clear, you can concentrate on tasks without visual distractions pulling your attention away. Your mind processes information more easily in organized environments.
A tidy home can improve your mood throughout the day. You feel calmer when you walk into a clean room because your brain doesn't have to process clutter. This calmness helps you handle stress better.
Your productivity increases in organized spaces. You spend less time looking for things you need. You also feel more motivated to start tasks when your environment looks orderly. Studies show that people complete work faster in clean spaces compared to messy ones.

A clean home triggers assumptions about someone's character because society links visible order to invisible traits like responsibility and control. Media images of perfect spaces set unrealistic standards, while clutter creates real mental strain that affects daily life.
A clean home serves as visible proof of effort and control. When you maintain organized spaces, others assume you have the time, energy, and skill to manage your responsibilities. This connection runs deep because keeping a home tidy requires consistent action and decision-making.
Society views self-discipline as a valuable trait. A neat living space suggests you can delay gratification, stick to routines, and follow through on tasks. These are the same qualities needed for career success and personal goals.
The link isn't always accurate, though. Someone might have an organized home because they work from home, have help, or simply prioritize cleaning over other activities. A messy space doesn't mean someone lacks discipline in other areas of life.
Media outlets constantly show idealized homes with matching furniture, empty counters, and perfect lighting. These images appear in magazines, social media feeds, and home improvement shows. You see these spaces so often that they start to feel normal or expected.
Cultural background shapes what "organized" means to you. Some cultures value minimalism and hidden storage. Others celebrate displayed collections and full surfaces as signs of abundance and family life.
Social media amplifies these standards. People share their best angles and cleanest moments, not the everyday reality. This creates pressure to match an impossible standard that doesn't reflect how most people actually live.
Clutter raises your stress levels in measurable ways. When you look at a messy space, your brain processes multiple visual stimuli at once. This constant input drains mental energy and makes it harder to relax.
Focus suffers in cluttered environments. Your attention gets pulled toward unfinished tasks and out-of-place items. This makes it harder to concentrate on what you're trying to do.
Too many visible items slow down decisions. Each object represents a choice you haven't made yet. Where should it go? Do you need it? This mental load builds up and leads to decision fatigue throughout your day.
Clean spaces became linked to virtue during specific historical periods. Religious and social movements promoted cleanliness as a sign of good character. These ideas stuck around and still influence how people judge themselves and others.
Your home is visible to others in ways your work or thoughts aren't. Guests can see your kitchen counter but not your work ethic or values. This makes your living space an easy target for quick judgments about who you are.
Women face harsher criticism for messy homes than men do. Traditional gender roles assigned housekeeping to women, so a disorganized home gets read as a personal failing. These unfair standards persist even as household responsibilities become more shared.
The golden rule of organizing is to give every item a specific home. When each object has a designated place, you know where to find it and where to put it back. This simple principle prevents the endless shuffle of moving things around without actually organizing them.
This rule works because it removes guesswork. You don't waste time deciding where something goes each time you use it. The habit becomes automatic once the system is in place.
Start by grouping similar items together. Keep all your cooking utensils in one drawer or all your office supplies in one bin. This creates logical homes that make sense when you need to find something quickly.
Focus on systems that match your actual habits instead of ideal ones. If you always drop your keys by the door, put a hook or bowl there. Work with your natural patterns rather than fighting them.
Set a minimum standard that keeps your home functional. This might mean clearing the kitchen counter once a day or doing laundry before you run out of clean clothes. You don't need magazine-worthy spaces to live comfortably.
Build in flexibility for busy periods. Your home won't always look the same, and that's normal. The goal is to maintain basic function and find things when you need them, not to achieve constant perfection.

The rooms you walk through, the buildings you work in, and the spaces you call home do more than just provide shelter. Your physical surroundings actively shape how you see yourself, influencing your mood, thoughts, and sense of identity in ways you might not consciously notice. Research in environmental psychology shows that elements like lighting, organization, textures, and even colors directly affect your emotional state and cognitive function.

Your brain constantly processes sensory information from your environment. When you enter a cluttered room, your mind responds differently than when you step into an organized space. These reactions happen automatically and build up over time to influence how you think about yourself and your capabilities.
Understanding how physical spaces impact your self-perception gives you power to make intentional choices about your surroundings. The connection between your environment and your mental state involves both psychological mechanisms and broader social factors. By learning how these elements work together, you can create spaces that support the version of yourself you want to become.

Your physical surroundings trigger specific mental processes that shape how you see yourself. These mechanisms operate through spatial arrangements, color exposure, and lighting conditions that directly affect your brain's interpretation of who you are.
The way space is arranged around you influences your self-concept. Open layouts with clear pathways make you feel more autonomous and capable of making independent choices. Cramped or cluttered spaces restrict your movement and create feelings of limitation that extend beyond the physical.
Room organization affects identity formation through:
When you occupy a well-organized space, your brain processes this orderliness as a reflection of competence. Conversely, chaotic environments send signals about lack of control. The physical boundaries of your space also matter. Smaller spaces can make you focus inward and feel more self-conscious, while larger areas allow your attention to extend outward.
Colors in your environment directly affect your mood and self-perception through physiological responses. Blue tones lower your heart rate and create feelings of calmness and reliability. Red increases arousal and can make you feel more energetic but also more anxious.
Warm colors like yellow and orange activate different brain regions than cool colors. These neural responses shape how you view your emotional state in that moment. If you regularly occupy spaces with certain color schemes, your brain associates those emotional responses with your baseline self-concept.
Color categories and their psychological effects:
| Color Type | Primary Effect | Impact on Self-View |
|---|---|---|
| Cool blues/greens | Calming, focused | Competent, stable |
| Warm reds/oranges | Energizing, stimulating | Active, passionate |
| Neutrals | Balanced, minimal | Professional, composed |
Light exposure controls your circadian rhythms and hormone production. Bright natural light increases serotonin levels, which improves your mood and creates positive self-assessments. Dim or artificial lighting can reduce these neurochemicals and lead to more negative self-perception.
The direction and quality of light also matters. Harsh overhead lighting creates unflattering shadows that make you more critical of your appearance. Soft, diffused light from multiple sources reduces these harsh contrasts. Your brain uses visual feedback from your environment to form judgments about yourself, and lighting determines what you see.
Consistent exposure to poor lighting affects your cognitive function. This decline in mental performance feeds into your beliefs about your capabilities and worth.

Where you live and spend your time affects how you interact with others and what cultural practices you adopt. Your physical surroundings create different opportunities for social connection and shape the beliefs you develop about yourself and your place in society.
Your home environment directly reflects your socioeconomic status and influences how you see yourself. If you grow up in a crowded apartment with limited privacy, you develop different beliefs about personal boundaries than someone raised in a spacious house with their own room.
The material conditions of your living space affect your daily routines and habits. Families with fewer resources often share rooms and have less control over their physical environment. This shapes parenting practices and how children learn to interact with others.
Your neighborhood's physical features send messages about your social standing. Well-maintained parks, clean streets, and quality buildings signal higher status. Run-down areas with limited resources can negatively impact how you view your own worth and possibilities.
Physical markers of socioeconomic status include:
Public spaces create opportunities for you to interact with diverse groups of people. Parks, plazas, and community centers bring together individuals from different backgrounds. These interactions shape your social skills and cultural understanding.
The design of public areas affects whether you engage with others or keep to yourself. Open layouts with seating areas encourage conversation. Isolated or poorly lit spaces make you avoid contact with strangers.
Private environments like your home let you express your identity differently. You control who enters and how the space looks. This ownership shapes your confidence and sense of autonomy.
Your behavior changes based on whether you're in public or private settings. You follow different social rules in each type of space. These patterns become part of how you understand your role in different social contexts.

The spaces you occupy daily trigger specific brain responses that alter how you see yourself. Room design, environmental features, and social influences all work together to shape your confidence and self-worth through measurable psychological and physiological pathways.
The organization and layout of your room directly affect your emotional state and self-presentation. A clean, organized space creates feelings of calm and self-assurance, while cluttered, chaotic environments lead to stress and less confident behavior.
Color choices, lighting, and furniture arrangement send signals to your brain about safety and control. Rooms with natural light and open layouts typically boost your mood and make you feel more capable. Cramped spaces with poor lighting can make you feel restricted and lower your self-confidence.
The physical boundaries in your environment also matter for your sense of self. Spaces that give you clear personal territory help you feel more secure and in control. When your environment lacks defined boundaries, you may experience increased stress and difficulty concentrating.
Your brain processes sensory information from your surroundings through multiple pathways that affect your emotions and thoughts. Environmental psychology research shows that physical spaces impact your emotional states, cognitive functioning, and physiological responses.
Sensory input from textures, sounds, and visual elements creates specific brain reactions. Your mind connects these sensory experiences with emotions and memories, which then influence how you think about yourself.
The concept of peripersonal space explains how your brain maps the area around your body. This mental map helps you understand where you end and the environment begins. When this space feels safe and comfortable, your brain sends positive signals that support confident self-perception.
Living or working in cramped conditions creates ongoing psychological stress that builds up over time. Research spanning five decades shows that spatial restriction affects your emotions, behavior, thinking patterns, and physical health.
Your stress levels respond directly to your environment, which then impacts both your mental and physical wellbeing. Chronic exposure to poorly designed or overcrowded spaces can lead to persistent anxiety and negative self-perception.
The relationship between you and your surroundings is not one-sided. Your perception of a space matters as much as the physical features themselves. If you view your environment as threatening or uncomfortable, your mental health suffers even if the space seems adequate by external standards.
Cultural beauty standards create mental benchmarks that you measure yourself against daily. These standards vary across societies and time periods, but they consistently influence how you evaluate your physical appearance.
When you internalize beauty ideals that you cannot realistically achieve, your self-worth becomes tied to an impossible goal. This creates a gap between your actual appearance and your ideal self-image. The wider this gap, the more negative your self-perception becomes.
Media exposure to beauty standards reinforces specific body types and features as desirable. Repeated exposure to these images trains your brain to prioritize certain physical attributes. This constant reinforcement makes it harder to develop self-worth based on qualities beyond appearance.
Social media platforms show you carefully selected images that rarely represent reality. When you scroll through edited photos and filtered content, your brain starts using these unrealistic images as comparison points.
The frequency of social media use matters more than you might think. Regular exposure to idealized bodies and faces creates persistent pressure to match those standards. Each viewing session reinforces the message that your natural appearance needs improvement.
Social media feedback through likes and comments links your self-worth to external validation. When you post photos and wait for responses, you give others power over your self-perception. Lower engagement on your posts can trigger feelings of inadequacy and self-doubt.
Your view of your physical self determines how confidently you move through the world. When you feel good about your body and appearance, you take more risks and pursue more opportunities. Negative self-perception holds you back from activities and interactions.
Relationships depend partly on how you present yourself to others. Your self-perception influences your body language, eye contact, and willingness to engage socially. People who view themselves positively typically form stronger connections because they interact with less self-consciousness.
Daily decisions about what to wear, where to go, and who to meet all flow from your physical self-perception. Your motivation to exercise, eat well, or try new activities connects directly to how you see yourself. When you believe you deserve care and respect, you make choices that support your wellbeing.

Creating content-ready corners in your home means setting up small spaces that look good on camera and work well for photos or videos. These spots don't require a full room makeover or expensive equipment. You just need to think about what makes a space look clean, bright, and interesting on screen.

The key to a content-ready corner is combining good lighting, a simple background, and items that fit your style while staying functional for everyday use. Your space should work for both creating content and living your normal life. This approach saves money and keeps your home feeling natural instead of like a studio.
You can transform any corner of your home into a content-ready spot by following some basic design rules. The right setup will make taking photos and videos easier while keeping your space comfortable. Whether you work with a desk area, a cozy reading nook, or a kitchen counter, these principles apply to any room in your house.

The most effective content-ready corners combine three core elements: strategic location selection, flexible design that adapts to multiple needs, and a careful balance between visual appeal and practical use.
Look for areas in your home that receive consistent natural light throughout the day. Windows facing east provide morning light, while south-facing windows offer steady illumination that works well for most content types.
Corners near power outlets save you from dealing with extension cords running across your floor. You need easy access to electricity for lighting equipment, phones, cameras, and laptops.
Key spots to evaluate:
Pay attention to background elements. A corner with a plain wall lets you control your backdrop completely. Areas with built-in shelving or interesting textures give you ready-made visual depth.
Traffic flow matters more than you might think. Avoid corners where people constantly walk through your frame or block your light sources.
Design your corner to serve multiple content types without requiring a complete setup change each time. A simple desk can transform from a workspace for productivity content to a product photography station to a video recording area.
Use furniture pieces that move easily. Lightweight chairs, rolling carts, and modular shelving units let you reconfigure your space in minutes instead of hours.
Store your equipment within arm's reach. A small cart or shelf system next to your content corner keeps cameras, ring lights, props, and backdrops accessible. This setup eliminates the excuse of "it takes too long to get everything ready."
Consider investing in dual-purpose items. A clothing rack serves as both storage and a backdrop element. Stackable storage boxes become props or risers when needed.
Your content corner must look good on camera while remaining practical for daily use. Start with a neutral base color scheme that photographs well, then add pops of color through removable items like pillows, plants, or art prints.
Choose surfaces that resist scratches and stains. A wooden desk with a protective finish handles product photography better than unfinished materials that show every mark.
Install appropriate lighting that serves both your content needs and regular activities. A dimmable overhead light combined with a ring light or softbox gives you control without making the space feel like a studio when you're not filming.
Keep cables organized with clips, sleeves, or boxes. Messy wires ruin otherwise perfect shots and create safety hazards in your home.

Smart storage keeps surfaces clean while good lighting makes everything look better on camera. The right fabrics and decorations add depth without creating clutter.
Hidden storage is your best friend when creating content-ready corners. Use furniture pieces that do double duty, like ottomans with storage inside or coffee tables with drawers. This keeps your filming area clear while giving you quick access to props and equipment.
Floating shelves work well because you can style them for photos but also store items you need often. Keep everyday items in matching baskets or boxes so they look good in the background. Leave some shelf space empty so your corner doesn't look crowded on camera.
Storage options that work best:
Keep the items you use most in the easiest spots to reach. Store backup supplies and seasonal decorations in closets or other rooms. Your content corner should only hold what you actually use regularly.
Natural light from windows gives the most flattering results for photos and videos. Position your content corner near a window but avoid direct sunlight, which creates harsh shadows. North-facing windows provide steady light throughout the day.
Add artificial lights to fill in shadows and make your space usable at any time. Ring lights work well for close-up shots and product photography. LED panel lights give you adjustable brightness and color temperature. Place lights at different heights to avoid flat, boring lighting.
Use three-point lighting when you need professional results. Put your main light to one side, a fill light on the other side to soften shadows, and a back light behind your subject. This creates dimension and makes everything look more polished.
Pick neutral base colors for larger textiles like curtains, rugs, and chair covers. Beige, gray, white, and cream work with many different themes. You can swap out smaller accessories to change the mood without replacing expensive items.
Layer different textures to add visual interest. Combine smooth surfaces with rough ones, like a velvet pillow on a linen chair or a wool throw on a leather ottoman. This creates depth that looks good both in person and on camera.
Accessories to keep on hand:
Rotate accessories between shoots to keep your content fresh. Store extras in clear bins so you can see what you have. Stick to a consistent color palette so everything works together when you mix and match.

A content-ready corner needs intentional styling, proper lighting, and smart organization. Understanding basic design principles and practical maintenance strategies helps you create spaces that photograph well consistently.
A content-ready corner needs three basic elements: a clear focal point, balanced composition, and appropriate scale. Your focal point might be a styled desk, a reading chair, or a plant display that draws the eye first.
Balanced composition means arranging items so no single side feels too heavy or empty. You want visual weight distributed evenly across the space.
Scale matters because oversized items in a small corner look cramped, while tiny objects get lost in a large space. Each piece should fit the dimensions of your corner without overwhelming it.
Natural light from a window provides the most flattering illumination for content. Position your corner perpendicular to the window so light hits your subject from the side rather than directly behind or in front.
For artificial lighting, choose bulbs with a color temperature between 3000K and 4000K. This range produces warm, natural-looking light that mimics daylight.
Avoid overhead lighting alone because it creates harsh shadows under the chin and eyes. Add a secondary light source at eye level or slightly above to fill in shadows and create even illumination.
The 3-4-5 rule suggests using three colors, four textures, and five accessories in a styled space. This formula creates visual interest without overwhelming a small area.
Your three colors should include one dominant shade, one secondary color, and one accent. These might be white walls, natural wood tones, and green plants.
Four textures could include smooth ceramic, woven baskets, soft fabric, and rough wood. Five accessories might be books, a vase, a candle, a small plant, and a decorative box.
The 2-3 rule states that you should arrange furniture and decor in groups of two or three items rather than single pieces or even numbers above three. Odd groupings look more natural and less formal to the eye.
In a tight corner, this might mean pairing two chairs together or grouping three small plants on a shelf. You can stack two books with a small object on top, or cluster three frames of different sizes on a wall.
This rule helps you avoid the common mistake of spacing items too evenly or symmetrically. Grouped items create visual anchors that make your corner look purposefully styled.
Layered textures create depth in photos better than multiple small objects. A chunky knit throw, linen cushions, and a jute rug add dimension without taking up much visual space.
Books work well as both props and risers for elevating other items. You can stack them horizontally to add height or stand them vertically as backdrop elements.
Natural elements like dried branches, pampas grass, or potted plants add organic texture. These items photograph well and fill vertical space without cluttering horizontal surfaces.
Mirrors and reflective surfaces bounce light around and make corners appear larger on camera. A small mirror propped on a shelf or hung on the wall expands the perceived space.
Choose a designated home for each item in your corner so you can quickly reset the space after use. Take a reference photo of your styled corner and keep it on your phone for easy reference.
Limit the number of items you need to rearrange daily. Keep permanent pieces like furniture and large plants in place, and only adjust smaller props as needed.
Dust and tidy your corner once per week rather than daily. This regular maintenance prevents buildup and keeps your space camera-ready with minimal effort.
Store backup props in a nearby basket or drawer so you can quickly swap items when you want a fresh look. Having options within reach makes restyling faster and easier.

Your home should match who you are becoming, not only who you were. When you plan your space on purpose, it becomes more than a place to live. It can show your goals, values, and the life you want to have.

A home that feels right supports your daily routines, gives you comfort, and helps you feel steady when life is busy. This happens when you pick items and place them to match how you actually live. It is not about following trends or copying magazine pictures.
The main idea is to make a space that fits your real needs and works for your life. You can create rooms that feel connected to who you are and where you're going. Small changes in how you arrange and decorate can change how you feel every day.

Your home should show who you are and how you live. Rooms, furniture, and items should match your daily habits and what you value.
The way your house is built can say a lot about you. If you care about the planet, pick recycled wood, energy-saving windows, or solar panels. If family time matters, choose open rooms so people can see and talk to each other.
How you plan space tells what is important. A big kitchen that has many work areas shows you like cooking and hosting. A quiet home office shows you need focus. A bright art room shows you love making things.
Simple choices that reflect your values:
These choices make a home that fits your life, not just a fashion trend.
Your furniture and decorations should reflect you. Use items you collect or make instead of filling space with random things. Group similar items together to make them stand out.
Pick colors and fabrics that match the mood you want. Soft colors and fabrics make bedrooms cozy. Hard surfaces and bright light help you work better. Give each room a clear purpose that fits your routine.
Choose furniture that fits your body and how you live. A reading chair should support your back and have good light nearby. A dining table should hold the number of people you usually have over. Custom or repaired pieces can feel more personal than mass-made items.
Add layers like rugs, pillows, and throws to make rooms feel warm and interesting without clutter.

Your home can show who you are when it helps people feel close and comfortable. The rooms you make and how you care for them change how connected you feel to your family and yourself.
Make shared spaces that invite people to gather and talk. Arrange seats so people face each other instead of all facing a TV or wall. A round or L-shaped seating area makes it easier to talk.
Keep these spaces tidy. Too much clutter makes a room feel stressful. Use soft lighting from lamps instead of only bright overhead lights. This makes the room calmer and more inviting.
Fill common areas with things that start conversations. Put board games on a shelf, books on a table, or art supplies in a basket. A kitchen island with stools can turn cooking into a chance to chat.
Design these rooms so different people can do different things at once. One person might read while another works on a puzzle. Being near each other this way helps people feel close even without constant talking.
Physical comfort at home affects your mood and how open you are to others. Keep rooms at a comfortable temperature and let in natural light. Open curtains during the day and use mirrors to brighten dark corners.
Choose furniture that feels good to sit on for a long time. Try chairs and sofas before you buy them. Add pillows and blankets in textures you like.
Cut down on loud noises from appliances and outside. Use weather stripping on doors, rugs on hard floors, and soft materials to absorb sound. A quieter home helps you relax and feel safe.
Place personal items that bring good memories around your home. Photos, souvenirs, and handmade things remind you of happy times and people. These items help you feel like the home fits the life you live and the life you’re stepping into.

The home that feels like the life you’re stepping into blends useful features, good health conditions, and simple design. It should fit how you live every day.
The layout should match your daily habits. If you cook a lot, you need a practical kitchen with counter space and storage. If you work from home, you need a quiet spot with natural light and room for your desk.
Storage helps keep your things tidy. A home that fits your life has places for the activities you do often, like exercising, making art, or hosting friends.
How rooms connect matters too. Open spaces help you stay together with family. Separate rooms give you privacy when you need to focus or rest.
Watch how you move around during a normal day. Notice if you struggle to find places for your things or if some activities feel awkward in the rooms you have.
A home helps your routines when simple tasks feel easy. The kitchen should be easy to use for meals. The entry should hold coats and shoes. Bedrooms should be quiet for sleep.
Think about the future. Want a family? You may need extra bedrooms. Want to stay in the house as you get older? Look for wide doorways and a main-floor bedroom.
Poor air quality can feel like constant stuffiness, musty smells, or a lot of dust. These may come from bad ventilation, mold, or old heating and cooling systems.
Not enough natural light can lower your mood and energy. Dark rooms make it hard to feel awake during the day and can mess with sleep.
Too much noise from traffic, neighbors, or machines causes stress. You should be able to find quiet spots at home to rest and concentrate.
High humidity can cause mold and mildew. Very dry air can make breathing uncomfortable. Big temperature differences between rooms can mean bad insulation or heating problems.
A home that feels like the life you’re stepping into is shaped by simple things that make you relaxed and welcome.
Natural light brings warmth and helps your body stay on a healthy day-night schedule. Rooms with windows that let in daylight feel more open than those lit only by lamps.
Soft textures like linen, wool, and cotton make bedding, rugs, and furniture feel nice to touch. These materials also help reduce noise.
The room layout affects how safe and comfortable you feel. Clear room purposes and an easy flow create order. Small cozy corners give you places to relax.
Colors set a room’s mood. Neutral colors feel calm, while one or two accent colors add personality without overpowering the space.
Unpack and set up items you use every day first. Make the bed with familiar sheets, arrange kitchen tools, and put toiletries in the bathroom. These small steps help you feel normal fast.
Use soft lamps instead of only bright ceiling lights. Warm lighting makes rooms feel cozier at night.
Show personal items that matter to you. Family photos, favorite art, and keepsakes make the space feel like yours.
Add living things like flowers or houseplants. They bring color, life, and fresher air.
Work on one room at a time instead of trying to finish everything at once. Start with the bedroom, kitchen, or living room—places you use most.
Very dated styles with obvious era features can turn buyers away. Homes stuck in 1970s or 1980s looks often need costly updates.
Split-level homes can be less popular because many short staircases make moving around harder. The broken-up layout can feel confusing compared to open floor plans.
Odd layouts or strange room shapes make it hard for buyers to picture their furniture fitting. Long hallways or awkward corners waste usable space.
Homes with extreme design choices limit who will like them. Very modern or very traditional styles appeal to fewer buyers.
Houses that need major repairs or updates to roofs, plumbing, or electrical systems lose value. Most buyers prefer move-in ready homes.

You walk into your home every day, but does it really feel like you? Many people experience a disconnect between their true personality and what their living space actually looks like. The gap between who you are and how your home looks often comes from outside pressure, budget limits, and not knowing how to turn your identity into design choices.

This mismatch can affect how comfortable you feel in your own space. Your home should support who you are, not work against it. When your surroundings don't match your values or interests, it can create a sense of not belonging in the place where you spend most of your time.
Understanding why this gap exists is the first step to closing it. You'll learn how your identity shapes what feels right in your home, what gets in the way of creating a space that fits you, and how to make practical changes that bring your personality into your living space.

Your identity shapes every design decision you make in your home, from the colors on your walls to the furniture you choose. The way you decorate reflects your personal values, cultural background, and the version of yourself you want to project.
Your core beliefs directly influence what you bring into your home. If you value sustainability, you'll likely choose secondhand furniture or natural materials. If family connection matters most to you, you'll display photos and create gathering spaces.
Your decorative choices act as a physical representation of what you care about. Someone who prioritizes minimalism will keep surfaces clear and own fewer items. Someone who values creativity might fill their space with art supplies and colorful pieces.
Common value-driven design choices:
These choices happen both consciously and unconsciously. You might not realize you're expressing your values until you step back and look at your space as a whole.
Your cultural background influences your color preferences, spatial arrangements, and comfort levels. Different cultures have distinct approaches to how homes should look and function.
In many Asian cultures, removing shoes indoors is standard, which affects entryway design. Mediterranean cultures often favor warm tones and communal spaces. Scandinavian design emphasizes light colors and simple forms due to long, dark winters.
Your cultural identity affects practical decisions too. Kitchen layouts vary based on cooking styles. Storage needs differ depending on what items hold cultural significance. Even your preferred level of privacy influences room arrangements.
These preferences often persist across generations. You might choose design elements that remind you of childhood homes or spaces from your cultural heritage. Sometimes you blend multiple cultural influences if you come from a mixed background.
The gap between authentic and aspirational design creates tension in many homes. You might copy trendy looks from social media that don't match your actual lifestyle or personality.
Aspirational design reflects who you want to be rather than who you are. You buy a fancy espresso machine when you drink instant coffee. You create a reading nook but never sit there. You maintain a pristine white couch despite having kids and pets.
Authentic design matches your real habits and needs. It includes practical storage for your actual belongings. It accommodates how you truly spend your time. It reflects your genuine taste rather than what seems impressive.
The pressure to create Instagram-worthy spaces pushes many people toward aspirational choices. But homes designed around your authentic self feel more comfortable and functional. You don't need to maintain a false image in your own space.

Many people struggle to make their homes reflect who they really are. Social pressure, money issues, and worry about what others think create real obstacles between your true self and your living space.
Social media and design trends shape how you think your home should look. You scroll through perfect photos on Instagram and Pinterest, and suddenly your personal style feels wrong or outdated.
Design trends push specific looks each year. Right now, you might feel pressure to have a minimalist space, farmhouse accents, or the latest color palette. These trends can override your actual preferences.
Your home becomes what you think it should be rather than what you want it to be. The pressure comes from friends, family, and even real estate concerns. You might avoid bold colors or unusual furniture because traditional styles feel safer.
Common social pressures include:
Money creates a major gap between your vision and reality. Custom furniture, quality materials, and professional design services cost more than most budgets allow.
You might know exactly how you want your space to feel but lack the funds to make it happen. Budget furniture often comes in limited styles that don't match your identity. Custom pieces that reflect your personality can cost three to five times more than mass-produced options.
Accessibility adds another layer of difficulty. Many design products and services target higher income brackets. Affordable options tend to follow safe, generic styles rather than unique or personal aesthetics.
You hold back on decorating choices because you worry what visitors will think. This fear stops you from displaying collections, choosing bold colors, or arranging furniture in unconventional ways.
The anxiety feels especially strong in public areas of your home. Your living room might follow safe design rules while your private bedroom shows more personality. You edit your self-expression based on who might see each space.
This judgment can come from parents, in-laws, friends, or even imagined future home buyers. You make choices for these other people instead of yourself. The result is a home that feels acceptable to others but disconnected from your identity.

Living spaces influence self-perception, communicate identity to others, and often fall short of reflecting who we really are due to practical constraints, unclear personal preferences, or major life changes that shift our needs.
Your home acts as a mirror for your identity. When you walk into a space that feels aligned with your values, you're more likely to feel confident and settled. The colors, furniture, and objects around you send constant signals about who you are.
Over time, your brain starts to internalize these visual cues. If your home looks organized and intentional, you may begin to see yourself as someone who has their life together. If it feels chaotic or disconnected from your interests, you might feel like you're not living authentically.
This relationship works both ways. Your home reflects your inner world, but it also reinforces certain habits and beliefs about yourself.
Visitors form quick judgments based on what they see in your home. Clean, minimal spaces suggest discipline and focus. Colorful, eclectic rooms communicate creativity and openness to new experiences.
The art on your walls, the books on your shelves, and even how you arrange your furniture tell a story. These details reveal your priorities, interests, and how you want to be perceived. A home filled with family photos signals that relationships matter to you. A space with few personal items might suggest you value simplicity or privacy.
People notice the care you put into your environment. It's not about having expensive things. It's about whether your space feels intentional or accidental.
Life moves faster than most people can update their homes. You might have furniture from a previous relationship, hand-me-downs that don't match your style, or decorations you bought because they were cheap rather than meaningful.
Financial limits play a big role. You may know exactly how you want your home to look but lack the money to make it happen. Renting adds another layer of difficulty since you can't make permanent changes.
Sometimes the gap exists because you haven't figured out what actually feels right to you. You see images of beautiful homes online and try to copy them, but they don't reflect your real life or personality. The disconnect creates a constant sense that something is off.
Start by noticing what makes you feel calm and energized in other spaces. Pay attention when you visit a friend's house or sit in a café. What specific elements draw you in? Is it the lighting, the textures, or the way furniture is arranged?
Look at the items you already own and use regularly. These objects reveal your true preferences better than Pinterest boards. Notice which possessions you reach for, display, or feel attached to.
Write down three to five words that describe how you want to feel at home. Maybe it's peaceful, creative, or connected. Use these words as a filter when making decisions about what stays and what goes. If something doesn't support those feelings, it's not authentic to you.
Rearranging furniture costs nothing and can completely change how a room feels. Move pieces around until the flow matches how you actually use the space. Put your favorite chair in the best spot for reading instead of where it's "supposed" to go.
Paint is one of the cheapest ways to make a big impact. Even painting one wall or a piece of furniture can shift the entire mood of a room.
Edit what you already have before buying new things. Remove items that don't serve you or match your values. A clearer space often feels more aligned than a cluttered one filled with "perfect" purchases. Display the objects that actually mean something to you rather than generic decor.
Swap items with friends or shop secondhand. You can find unique pieces that reflect your personality without spending much money.
Major life changes shift your daily routines and priorities. A new job might mean you need a dedicated workspace. Ending a relationship creates the need to remove shared items and reclaim the space as your own.
Becoming a parent transforms nearly every room. You need different furniture, more storage, and spaces that work for multiple people with different needs. What felt perfect before suddenly doesn't function.
Even positive transitions create tension between your old home setup and your new reality. You're not the same person you were before the change. Your home needs to catch up to support who you're becoming and how you now spend your time. Adjusting your space helps you process the transition and move forward.

When you picture a successful person's home, you probably imagine certain features: a grand entrance, high ceilings, or a house in an exclusive neighborhood. These aren't random thoughts. Society teaches us to link specific types of homes with success through media, cultural values, and the status symbols we see around us every day.

Your brain connects houses with achievement based on what you've learned over time. The size of a property, its design style, and where it sits on the map all send signals about the person who lives there. These signals shape how you view both your own home choices and how you judge success in others.
Understanding why you make these associations can help you think more clearly about what you actually want in a home. It can also show you how much outside influences affect your decisions about property and what success really means to you.

The homes you view as successful are shaped by centuries of economic shifts, constant media messaging, and your natural tendency to measure your life against others. These forces work together to create powerful associations between certain types of housing and personal achievement.
Your perception of successful homes stems from major economic changes over the past 200 years. During the Industrial Revolution, wealthy factory owners built large Victorian mansions that signaled their economic power. These homes featured ornate details, multiple rooms, and expansive grounds that separated them from worker housing.
The post-World War II era introduced the suburban ideal in America. Single-family homes with yards became the primary symbol of middle-class achievement. This shift connected homeownership itself with financial stability and social advancement.
Different cultures developed distinct markers of housing success based on their economic histories. In many Asian countries, apartment ownership in prestigious urban towers indicates wealth and status. European societies often value historic properties or homes in specific neighborhoods that carry centuries of social meaning.
Your cultural background influences which home features you associate with success. Western individualistic cultures tend to emphasize privacy, personal space, and property ownership as achievement markers. Collectivist cultures may prioritize homes that accommodate extended families or maintain connections to ancestral regions.
Television shows, magazines, and social media platforms constantly shape what you consider a successful home. Real estate programs showcase luxury properties with high-end finishes, open floor plans, and modern amenities as aspirational standards.
Social media has intensified this influence. Instagram and Pinterest feeds display curated images of designer interiors, creating visual benchmarks for what successful living spaces should contain. You absorb these images daily, often unconsciously adopting their aesthetic values.
Common media-promoted success markers include:
Marketing campaigns from real estate developers and home improvement companies reinforce specific features as necessary for successful homes. These messages link particular materials, sizes, and styles to personal achievement and social standing.
You naturally compare your living situation to those around you. This psychological tendency, called social comparison, drives much of your perception about successful homes. When neighbors renovate or friends purchase larger properties, you evaluate your own housing against these reference points.
Motivation research shows that cultural values directly affect how you experience this comparison. If you live in a culture that emphasizes individual achievement, you may feel more pressure to display housing success visibly.
Your aspirations for future homes are built on these comparisons. You notice which colleagues live in which neighborhoods and which types of properties command respect in your social circles. These observations create mental templates for what your own successful home should look like.
The gap between your current home and your reference points can drive motivation or create stress. Individualistic cultures tend to frame this gap as a personal challenge to overcome. Cultures with different values may focus more on how housing choices affect family wellbeing or community connections.

Where a home is located and how it looks shapes how we judge success. Specific architectural styles signal wealth and achievement, while certain neighborhoods carry strong social and economic meanings.
You recognize certain architectural styles as markers of success because they require significant resources to build and maintain. Colonial Revival homes with their symmetrical facades and grand columns suggest established wealth. Modern minimalist designs with floor-to-ceiling windows and clean lines communicate contemporary affluence and refined taste.
Mediterranean villas with terracotta roofs and arched doorways evoke luxury living. Victorian mansions with ornate details and tower elements show historical prestige. These styles became success symbols because they were expensive to construct and demonstrated the owner's financial capacity.
Common prestige architectural features include:
You associate these styles with success partly because they appear frequently in wealthy areas and media portrayals of affluent living.
Your perception of a home's success value changes based on its location. Homes in established neighborhoods with top-rated schools, low crime rates, and proximity to business districts carry higher status associations. The surrounding community acts as a signal of the homeowner's social and economic position.
Gated communities and historic districts create exclusivity through restricted access or preservation requirements. Waterfront properties, homes with mountain views, or houses in urban centers near cultural amenities automatically suggest achievement. These locations cost more due to limited availability and high demand.
The neighborhood's infrastructure matters too. Tree-lined streets, well-maintained public spaces, and nearby amenities like golf courses or private clubs reinforce success associations. You form emotional bonds with these places that go beyond the physical structures themselves.

Understanding why certain homes signal success involves examining design elements, location factors, and cultural influences that shape our perceptions. Financial security and long-term well-being also depend on practical features that support both immediate comfort and future stability.
Visual symmetry and balanced proportions trigger positive responses in your brain. Your mind associates these design elements with order, stability, and financial resources.
Large windows and high ceilings create feelings of openness and abundance. These features require more building materials and construction expertise, which your mind connects to greater wealth.
Quality materials like hardwood, stone, and metal finishes communicate permanence and value. You subconsciously recognize these materials cost more and last longer than cheaper alternatives.
Your perception of home value increases based on the surrounding area's reputation. Proximity to good schools, low crime rates, and well-maintained properties signals a home belongs to a successful neighborhood.
Location near cultural amenities, parks, and shopping districts adds perceived value. You associate these conveniences with areas where successful people choose to live.
The overall appearance of neighboring homes affects your judgment of any single property. Well-kept lawns, updated exteriors, and quality vehicles in driveways reinforce impressions of neighborhood success.
Exterior elements create your first impression before you step inside. A well-maintained facade, professional landscaping, and quality roofing materials immediately suggest financial stability.
The entryway sets expectations for the rest of the home. A spacious foyer with good lighting and quality flooring makes you perceive the entire property as more valuable.
Updated kitchens and bathrooms carry significant weight in your assessment. These rooms are expensive to renovate, so modern fixtures and finishes indicate recent investment and care.
Television shows and movies repeatedly feature certain home styles as symbols of success. You absorb these visual messages and begin associating specific architectural features with achievement.
Different cultures value different home characteristics based on their traditions and climate needs. What you consider prestigious depends partly on where you grew up and what homes were admired in your community.
Social media influences your expectations by showcasing idealized home interiors. You compare real homes to these curated images when forming opinions about what makes a home successful.
Good air quality and natural light directly affect your physical health and mental focus. Homes with proper ventilation and large windows support better sleep, productivity, and overall well-being.
Temperature control and moisture management prevent health issues and structural damage. You need consistent heating, cooling, and humidity levels to maintain both comfort and property value.
Safe materials and finishes protect your family from harmful chemicals. Low-VOC paints, sealed flooring, and proper insulation create an environment that supports long-term health.
Access to outdoor space provides mental health benefits and opportunities for physical activity. Even small yards or balconies give you places to relax and connect with nature.
Your budget should include more than just the purchase price. Property taxes, insurance, maintenance costs, and potential repairs affect your long-term financial stability.
Location determines both your daily experience and future resale value. Consider your commute time, school quality, local job market, and neighborhood growth patterns.
The home's condition and age influence upcoming expenses. Older homes may have charm but often need roof replacements, HVAC updates, or electrical work within a few years.
Energy efficiency affects your monthly costs and environmental impact. Modern insulation, efficient appliances, and updated windows reduce utility bills and increase comfort.
Future needs matter as much as current ones. Think about whether the home can accommodate family changes, remote work requirements, or aging-in-place considerations.

You walk into a friend's house and instantly feel relaxed. Then you visit another home that looks nice but makes you feel tired or tense. This is not just in your head.

Your home affects your mood and body through design, what you see and hear, and how the rooms fit your day-to-day needs. Whether a house feels energizing or draining depends on things you can notice and change. These include natural light, clutter, colors, and how rooms are arranged.
Knowing what makes a space feel good helps you make your home support your energy instead of using it up. How your surroundings affect you is based on real ideas from psychology and the environment.

How your home makes you feel comes down to three main things: colors and design, how light moves through the rooms and how rooms connect, and whether your things are tidy or messy.
Colors change your mood and energy. Warm colors like red, orange, and yellow can make you feel more awake. Cool colors like blue, green, and soft gray tend to calm you and lower stress.
Pick colors for each room based on what you do there. Bedrooms usually work better with blues and soft greens because they help you relax. Home offices can use yellow accents to boost focus without being too bright.
How colors often make people feel:
Materials and textures also matter. Soft fabrics, wood, and smooth surfaces send different signals to the brain about comfort and safety.
Natural light helps control your sleep, energy, and mood. Rooms with little sunlight can make you feel tired or sad, especially in winter.
How much light a room gets depends on window size, which way they face, and things outside that block light. In the Northern Hemisphere, south-facing windows bring the most light. North-facing windows give softer, steady light.
How rooms connect matters too. Open layouts often feel lively because people can move and talk easily. Closed-off rooms can feel cozy or cramped depending on their size and use.
Ceiling height changes how a room feels. High ceilings make a room feel open and can help you think more freely. Low ceilings feel closer and more private but can seem tight in a small room.
Clutter can wear you out because your brain notices many things at once. Every item you see asks your brain to sort or ignore it.
Being in a messy or cluttered place raises stress and makes it harder to focus.
Good organization means things have a set place. You can find items quickly and put them away easily.
Visual clutter is different from dirty mess. Even neat piles or many items in view can feel too busy. Hidden storage or fewer items on counters can make a room calmer while keeping things handy.

Your past, culture, and daily routines affect how a home makes you feel. The same room can feel energizing to one person and draining to another depending on their life and habits.
How you feel right now changes how your home feels. When you are stressed or worried, you notice things like clutter, noise, and dim lights more. Those same things might not bother you when you are calm.
People also differ in how easily they are affected by their surroundings. Some notice small details, like the hum of a fridge or the color of a light. Others barely notice these things.
Your childhood home can shape what feels right to you. If you grew up in a quiet, neat house, a messy, busy place may drain you. If you grew up in a loud, busy home, very quiet spaces may feel strange.
Common sensitivity triggers include:
Your culture affects what kind of home feels energizing. Some cultures like open spaces where family spends time together. Others prefer private rooms and clear boundaries.
The number of people in your home matters based on whether you like being around others. Some people get energy from roommates or family. Others need alone time to recharge.
Ideas about cleanliness and shared spaces also differ across cultures. What feels warm and welcoming to you might seem messy or too strict to someone else.
Your daily routine shapes which parts of a home matter most. If you work nights, you need a dark, quiet bedroom. If you work from home, you need a good workspace and good light.
Your lifestyle affects home energy through:
Active people need different things than people who sit a lot. You might need easy access to outdoor space, storage for gear, and room to move. If your home does not fit your daily habits—like a cramped kitchen when you cook a lot—it can drain your energy over time.

How your home looks and feels can change your mood and energy. Things like light, air, noise, and how rooms are arranged can make you feel awake and happy or tired and stressed.
Poor natural light is a big reason. Rooms with little sunlight can mess with your sleep cycle and make you feel low.
Low ceilings and small, cramped rooms can feel heavy. Your body can react with stress when space feels tight.
Constant noise from traffic, machines, or neighbors adds stress. Even if you get used to it, your body stays on alert.
Very hot or very cold rooms make your body work harder to stay comfortable. That uses up energy and makes you tired faster.
Harsh fluorescent lights can strain your eyes and cause headaches. They can also disturb your sleep rhythm, which lowers daytime energy.
Warm light (2700–3000K) helps you relax. Cool light (above 5000K) can make you more alert but may feel cold and tiring if used too much at home.
Dark colors soak up light and make rooms feel smaller and heavier. Light colors reflect light and make rooms feel bigger and lighter, which helps energy.
Visual clutter makes your brain work more. Seeing many items all the time raises stress and makes it hard to focus.
Pay attention to rooms you avoid or leave quickly. Your body often notices what is stressing you before your mind does.
Start by clearing visible clutter from surfaces and floors. Keep only what you use or what makes you happy.
Check lighting at different times of day. Add lamps where you need them and replace flickering or harsh bulbs.
Try out seating and work areas for comfort. Bad furniture makes your body tense and uses up energy over time.
Stale air lowers oxygen and raises carbon dioxide. That can make you feel tired and foggy even if you slept enough.
Poor ventilation traps chemicals from furniture, paint, and cleaners. These chemicals can cause headaches, sore throats, and tiredness.
Mold and mildew make musty smells that signal problems. These smells can cause low-level stress that adds up over time.
Opening windows for 15 minutes a day can freshen the air. It removes pollutants and brings in oxygen that helps you feel more alert.
Other people’s emotions can affect you. You may copy their stress or calm without noticing.
Frequent interruptions break your focus and use up mental energy. Your brain works hard to get back on track after each break.
Tension or arguments make you stay on edge. Being hypervigilant burns energy even when things seem quiet.
If you feel more relaxed when someone leaves, that can show their presence was stressful for you.
Place furniture to get the most natural light. Sit or work near windows so you get daylight during the day.
Make clear areas for different activities. It is easier for your brain when rooms are used for one purpose, like work or rest.
Do a 10-minute evening tidy each day. Put things away, wipe surfaces, and set out what you need for tomorrow so you wake up to an organized space.
Keep entryways clear and welcoming. A neat entrance lowers stress and makes moving through the home easier.

You don't need to spend thousands of dollars on a professional designer to make your home look put-together and stylish. Most spaces feel incomplete because they're missing a few key design elements, not because they need major changes. With the right approach, you can create a home that looks intentional and cohesive on your own.

The secret to a designer-quality home is understanding basic design principles and applying them room by room. This means starting with a clear plan, making smart choices about layout and color, and adding personal touches that reflect your style. These steps work whether you're decorating from scratch or improving what you already have.
This guide will walk you through the exact process designers use, from building a solid foundation in each room to selecting the finishing touches that make a space feel complete. You'll learn practical methods that fit any budget and skill level.

A well-designed home starts with three key decisions that affect every other choice you make. Your color palette creates visual harmony, your furniture shapes daily life, and your layout determines how each room actually works.
Pick three colors that will appear throughout your home. Choose one neutral base color for walls and large furniture pieces. Add one accent color for pillows, artwork, and smaller items. Include one third color to bridge the two.
Your neutral should make up about 60% of what you see in a room. The accent color takes up 30%, and your bridge color fills the remaining 10%. This balance keeps rooms interesting without feeling chaotic.
Write down your three colors and keep the list on your phone. Take it with you when shopping for anything from rugs to picture frames. If an item doesn't match one of your three colors, leave it at the store.
Sample Color Combinations:
Start with the pieces you use every day. A sofa should fit the number of people in your household plus two guests. Coffee tables work best when they sit two inches lower than your sofa seat. Dining tables need 24 inches of space per person.
Measure each room before you buy anything. Write down the dimensions and bring them shopping. Furniture that looks perfect in a showroom can overwhelm a small living room or get lost in a large one.
Look for pieces that serve multiple purposes. Ottomans with storage hold blankets and provide extra seating. Extendable dining tables adapt to different group sizes. Console tables can work as desks when you need them.
Avoid matching furniture sets. Mix different pieces that share your color palette instead. Your sofa and chairs don't need to match exactly.
Place your largest piece of furniture first. In living rooms, this is usually the sofa. Position it to face the room's focal point, whether that's a fireplace, window, or TV.
Create conversation areas by arranging seating in a U-shape or L-shape. Keep 18 inches between a coffee table and sofa so people can walk through comfortably. Leave 30 to 36 inches for main walkways.
Use rugs to mark different zones in open floor plans. A rug under your dining table separates eating space from living space. Make sure the rug extends at least 24 inches past the table on all sides so chairs don't catch on the edge.
Float furniture away from walls in larger rooms. Push everything against the walls only in very small spaces. A sofa pulled 12 inches from the wall makes a room feel bigger, not smaller.

The final layer of design comes from the details that reflect your unique style. Small changes like adding varied textures, displaying meaningful art, and bringing in natural elements can transform a basic room into a space that feels intentionally designed.
Mixing different textures creates visual interest and makes rooms feel more complete. Start by combining at least three different materials in each space.
Add throw pillows in varied fabrics like linen, velvet, and cotton to your sofa. Layer a chunky knit blanket over smooth leather furniture. Place a jute rug under a glass coffee table to balance hard and soft surfaces.
Window treatments offer another chance to add texture. Pair sheer curtains with heavier drapes for depth. Use textured fabrics like linen or bouclé for a more custom look.
Common texture combinations that work well:
Don't forget smaller items like textured lampshades, woven baskets, or quilted table runners. These pieces add layers without taking up much space. The key is to avoid having too many smooth or shiny surfaces in one area.
Personal artwork and décor items tell your story better than generic pieces. Choose items that have meaning to you rather than buying art just to fill wall space.
Create a gallery wall with family photos, travel prints, or artwork from local artists. Mix frame styles and sizes for a collected look. Lean artwork against walls on shelves if you don't want to commit to hanging holes.
Display collections you actually care about. Group similar items like vintage cameras, pottery, or books by color. Use the rule of three when styling shelves—odd numbers look more natural than even groupings.
Rotate seasonal décor to keep your space feeling fresh. Swap out pillow covers, switch artwork, or change what sits on your coffee table. This gives you flexibility without buying all new furniture.
Living plants bring life to designed spaces and improve air quality. Start with easy-care options if you're new to plant ownership.
Low-maintenance plants for beginners:
Place plants at different heights throughout a room. Use floor plants in empty corners, medium plants on side tables, and small succulents on shelves. This creates visual balance and draws the eye around the space.
Natural elements beyond plants add warmth too. Display driftwood, rocks, or shells from places you've visited. Use wooden bowls, stone coasters, or woven baskets for functional décor. These organic materials soften modern spaces and add texture at the same time.
Choose planters that match your style. Ceramic pots work in traditional spaces while concrete planters suit modern rooms. Woven baskets hide plastic nursery pots and add another layer of texture.

Small adjustments like proper lighting and texture layers can transform a space, while strategic furniture placement and free digital tools let you test ideas before spending money.
Start with lighting by adding at least three sources per room. Use a mix of overhead lights, table lamps, and floor lamps to create depth and warmth.
Add throw pillows and blankets in colors that match your existing furniture. Choose two or three coordinating colors and repeat them throughout the room. This creates visual connections that make the space feel planned.
Remove items that don't serve a purpose or bring you joy. A less cluttered room automatically looks more intentional. Group similar items together instead of spreading them across multiple surfaces.
Hang artwork at eye level, which is typically 57 to 60 inches from the floor to the center of the piece. This simple rule makes your walls look professionally styled.
Follow the rule of three when displaying decorative objects. Group items in odd numbers, which is more visually appealing than even-numbered arrangements.
Use trays to corral smaller items on surfaces like coffee tables and nightstands. This creates boundaries and makes multiple objects look like one intentional display.
Leave some surfaces completely empty. Not every shelf or table needs decoration. Empty space gives your eye a place to rest and makes the items you do display stand out more.
Stick to a consistent color palette across your decorative items. When objects share similar tones, they create harmony instead of visual chaos.
Measure your room and note the locations of windows, doors, and outlets. Write down these measurements so you can reference them when shopping for furniture.
Identify the room's main purpose and list the activities that will happen there. This helps you determine what furniture and storage you actually need.
Choose a focal point like a fireplace, large window, or the wall where you'll place your bed or sofa. Arrange your largest pieces of furniture around this focal point first.
Select a color scheme with three colors: a dominant color for walls or large furniture, a secondary color for medium pieces, and an accent color for smaller items. Test paint samples on your walls and look at them in different lighting throughout the day.
Add lighting sources before you buy decorative items. Good lighting shows off your design choices and makes the room functional.
Shop for furniture that fits your measurements and suits your needs. Start with essential pieces and add decorative elements gradually.
Create clear pathways through the room that are at least 30 inches wide. People should be able to walk from doorways to seating areas without navigating around furniture.
Place furniture away from walls to create a more intimate and intentional arrangement. Sofas and chairs pulled 12 to 18 inches from walls make rooms feel larger and more designed.
Position seating pieces so people can easily talk to each other without shouting across the room. The ideal distance between sofas and chairs is 8 to 10 feet.
Keep the room's purpose in mind when arranging furniture. In a living room, arrange seating to face the TV or fireplace. In a bedroom, ensure you can easily access both sides of the bed.
Roomstyler 3D Home Planner lets you create floor plans and add real furniture from actual retailers. You can view your design in 3D and see how different pieces look together.
IKEA's online planning tools help you design specific rooms using their furniture catalog. The kitchen and bedroom planners are particularly detailed and user-friendly.
Canva offers room design templates where you can drag and drop furniture shapes to test layouts. This works well for quick visualizations without learning complex software.
Planner 5D provides both free web and app versions that let you design in 2D and view in 3D. The free version includes a basic catalog of furniture and decor items.
Take photos of your room from multiple angles and measure all walls, windows, and doors. Accurate measurements make your 3D model useful for actual furniture shopping.
Use SketchUp Free, which runs in your web browser and offers basic 3D modeling tools. Start by creating the room's walls using your measurements, then add windows and doors.
Input your room dimensions into your chosen design tool and recreate the space digitally. Add existing furniture first so you can see how new pieces will fit with what you already own.
Upload photos of your actual room to apps like Homestyler, which uses augmented reality to place virtual furniture in your real space. Point your phone camera at your room and the app overlays 3D furniture models onto the live image.

You don't need to spend thousands of dollars on designer furniture to make your home look expensive. A high-end feel comes from thoughtful details like symmetry, good lighting, and intentional styling rather than the price tags on your furniture. Small changes in how you arrange and present what you already own can transform an ordinary room into a space that feels polished and put together.

The difference between a budget-friendly home and one that looks high-end often comes down to a few key design principles. When you understand these basics, you can create a sophisticated look with items from discount stores or pieces you already have. Simple upgrades like proper window treatments, strategic furniture placement, and removing clutter make a bigger impact than buying new expensive pieces.
This guide will walk you through the core elements that create a polished interior and show you specific styling techniques that designers use to elevate any space. You'll learn practical ways to make your home feel more custom and luxurious without breaking your budget.

A refined interior doesn't depend on expensive furniture. It relies on thoughtful choices in fabrics, color coordination, and lighting that work together to create a cohesive space.
The fabrics you choose affect how expensive your home looks and feels. Natural materials like linen, cotton, and wool instantly upgrade a space compared to synthetic alternatives.
Focus on weight and drape when selecting textiles. Heavy curtains that pool slightly on the floor look more polished than ones that hang just above it. Your throw pillows should have full inserts that fill out the covers completely, not flat or half-empty ones.
Texture adds depth to your rooms. Mix smooth materials with rougher ones to create visual interest. A linen sofa paired with a chunky knit throw and smooth velvet pillows creates layers that feel intentional.
Pay attention to how fabrics are finished. Crisp, pressed linens on your bed signal care and attention to detail. Wrinkled or pilled textiles do the opposite, regardless of their original cost.
A limited color scheme creates a more sophisticated look than rooms filled with many competing colors. Choose three to five colors and stick to them throughout your space.
Neutrals form the foundation of high-end interiors. Whites, grays, beiges, and soft earth tones provide a calm backdrop. You can add accent colors through smaller items like art, pillows, or accessories.
The quality of paint matters more than the color itself. Use the same finish consistently in each room. Eggshell or satin finishes on walls look more refined than flat paint in main living areas.
Your colors should flow from room to room without jarring transitions. This doesn't mean every room needs the same palette, but adjacent spaces should share at least one common color.
Lighting transforms how your entire space feels. You need multiple light sources at different heights in each room, not just one overhead fixture.
Essential lighting layers include:
Dimmer switches give you control over atmosphere and make any light fixture more versatile. They cost little to install but significantly impact how you experience your space.
The temperature of your bulbs affects the mood. Warm white bulbs (2700K-3000K) create a welcoming feeling in living spaces. Cool white works better in bathrooms or areas where you need clear visibility.
Hide your light sources when possible. The glow should be visible, not the bulb itself. This applies to floor lamps, sconces, and pendant lights.

The final layer of design comes from intentional choices about what you display and how you arrange it. Small details like artwork placement, architectural upgrades, and thoughtful editing create polish that expensive furniture alone cannot achieve.
Artwork makes walls feel complete and intentional. Large-scale pieces create more impact than small scattered frames. A single oversized print or painting draws the eye and gives a room a gallery-like quality.
Frame quality matters more than the art itself. Upgrade budget prints with simple black, white, or wood frames that look clean and professional. Mat your artwork properly with neutral mats that create breathing room around the image.
Group smaller pieces in odd numbers for balance. Hang art at eye level, which is typically 57-60 inches from the floor to the center of the piece. This creates a cohesive look throughout your home.
Decorative objects should follow the rule of three. Group items in sets of three different heights for visual interest. Edit your collections ruthlessly and display only your best pieces rather than crowding surfaces.
Crown molding adds dimension to basic rooms. You can install lightweight polyurethane molding yourself for a fraction of professional costs. Paint it the same color as your ceiling for a seamless look.
Updated hardware transforms cabinets and doors instantly. Replace builder-grade knobs with matte black, brushed brass, or polished nickel options. This small change upgrades kitchens and bathrooms significantly.
Baseboards make walls look finished and intentional. Taller baseboards (5-7 inches) create a custom home feel. Paint them in a semi-gloss finish that contrasts slightly with wall paint.
Light switches and outlet covers deserve attention too. Replace yellowed plastic plates with fresh white or matching wall color covers for a cleaner appearance.
Clear surfaces create an expensive look immediately. Remove half of what sits on your counters, tables, and shelves. Homes that appear organized feel more valuable.
Storage solutions keep clutter hidden. Use matching baskets, boxes, or bins to contain items that must stay visible. Stick to neutral colors that blend with your decor.
A limited color palette throughout your home creates flow. Choose 3-4 colors and repeat them across rooms. This restraint looks intentional and sophisticated.
Quality over quantity applies to everything you display. One beautiful vase makes more impact than five mediocre ones. Edit your belongings seasonally and rotate items to keep your space fresh without buying new things.

Small upgrades like fresh paint and better lighting can shift a room's appearance faster than new furniture. The right finishes and careful styling choices create luxury without major spending.
Fresh paint in neutral tones transforms a space immediately. Choose colors like soft white, warm gray, or greige to hide scuffs and create a clean backdrop.
Replace outdated hardware on cabinets, doors, and drawers with simple metal finishes. Brushed nickel, matte black, or brass pulls cost little but update the entire look.
Add matching accessories in pairs for instant symmetry. Two identical lamps, pillows, or vases create balance that feels intentional and refined.
Visible clutter makes even expensive spaces look messy and unfinished. Clear countertops and surfaces let your home's actual features stand out.
Mismatched metal finishes create visual confusion throughout a room. Stick to one or two metal tones for light fixtures, hardware, and accessories.
Poor lighting ruins any space, no matter how nice the furniture. Overhead-only lighting creates harsh shadows and feels institutional rather than warm.
Pushing all furniture against walls makes rooms feel empty and awkward. Pull pieces away from walls to create conversation areas and better flow.
Layer your lighting with table lamps, floor lamps, and wall sconces at different heights. Multiple light sources at eye level create warmth and depth.
Use area rugs to define spaces and add texture underfoot. A rug anchors furniture groupings and makes the room feel complete.
Arrange furniture in symmetrical layouts when possible. Balanced arrangements around a focal point like a fireplace or window create harmony.
Display fewer items with more breathing room between them. Give each piece space to stand out rather than crowding surfaces with too many objects.
Install dimmer switches on existing fixtures to control ambiance throughout the day. Dimmers let you adjust brightness for different moods and activities.
Replace basic light bulbs with warm white LEDs in the 2700-3000K range. Warm light feels more inviting than harsh cool white bulbs.
Add plug-in wall sconces if you cannot hardwire new fixtures. These mount easily and provide the layered lighting that high-end homes feature.
Use table and floor lamps with opaque shades that direct light up and down. This creates ambient glow rather than harsh direct light.
Keep color palettes simple with one or two main colors throughout connected spaces. Consistent colors make areas flow together and feel larger.
Use mirrors strategically across from windows to reflect natural light. Mirrors double the perceived space and brightness in any room.
Choose furniture with exposed legs rather than pieces that sit directly on the floor. Visible floor space underneath makes rooms feel more open.
Mount curtains at ceiling height rather than just above the window frame. Floor-to-ceiling curtains draw the eye upward and make ceilings feel taller.
Solid-core doors feel substantial when opened and closed compared to hollow doors. They also reduce noise between rooms for a quieter, more refined home.
Flush baseboards and trim without gaps or visible nails show quality craftsmanship. Fill nail holes and caulk seams for a custom millwork appearance.
Matching outlet covers and switch plates in the same finish as your walls disappear from view. White plates on white walls look cleaner than mismatched ivory or almond.
Quality textiles in natural materials like linen, cotton, and wool elevate any space. Even simple designs in good fabrics feel more luxurious than synthetic options.

You don't need a full renovation to make your home feel more expensive. Small, planned changes can change how your space looks and feels without a big budget or long construction.

The best upgrades focus on small details that add polish and comfort. Simple swaps like new cabinet handles or better lighting can make a room feel more refined. These work because they fix the small things people notice first.
Choose upgrades that improve how your home looks and works. When you pick quality details and useful features, even basic rooms can feel more premium and well thought out.

Premium interiors use simple design choices to add depth and interest. Good lighting, better hardware, and smart wall finishes can turn ordinary rooms into nicer spaces.
A single overhead light can make a room feel flat and plain. Use several light sources at different heights to add warmth and shape.
Start with three kinds of light: ambient (ceiling lights), task (desk lamps, under-cabinet lights), and accent (wall lights, picture lights). This lets you change the mood and use of a room at different times. Putting dimmer switches on each circuit helps you control how bright each light is.
Key lighting upgrades include:
The color of your bulbs matters. Warm white bulbs (2700–3000K) make living rooms and bedrooms feel cozy. Cooler bulbs (3500–4100K) are better for kitchens and bathrooms where you need clear, accurate light.
Old or cheap-looking hardware can make good cabinets and doors look less nice. Changing handles and knobs takes little time but can make a big difference.
Materials that look high-end:
Use the same finish on hardware in connected rooms. For example, kitchen cabinet pulls should match nearby door handles and light fixtures. Consistent finishes make the space feel planned and calm.
Think about size when you pick hardware. Big cabinets need bigger pulls (about 5–8 inches). Drawer pulls should fit the drawer size. Large knobs on small drawers look odd, and tiny pulls on wide doors can seem too small.
Plain walls miss a chance to add texture and interest. Wall treatments can define a space and create a focal point without changing the structure.
Board and batten or picture frame molding adds depth and usually costs $2–4 per square foot for materials. These look good in dining rooms, hallways, and bedrooms. Paint the molding the same color as the wall for a subtle look, or use a different color for more contrast.
Textured wallpaper on one accent wall adds pattern without overwhelming the room. Grasscloth, linen-like textures, or small geometric patterns look refined. Peel-and-stick wallpaper is great for renters because it can be removed.
Shiplap or vertical paneling adds a natural texture to bathrooms and entryways. Put it halfway up the wall (wainscoting height) and paint it a shade a little lighter or darker than the wall. This helps separate areas while keeping the room open.

Modern features change how you use your home each day. The right tools and fixtures make life easier and make your home look nicer.
Smart home devices help you without big work. A smart thermostat learns when you are home and sets the temperature automatically. This saves energy and keeps you comfortable. Smart lights let you change brightness and color from your phone or by voice.
A video doorbell adds security and ease. You can see who is at the door and talk to them from anywhere. Smart plugs make normal appliances controllable from your phone so you can turn them on or off or set a schedule.
Key smart additions to consider:
These upgrades work quietly in the background. They make your home respond to your needs without you having to do much.
Light fixtures and hardware change how a room looks right away. Replacing cheap fixtures with chosen pieces makes a big difference.
Start with rooms you use most. A modern pendant light over the dining table or kitchen island draws attention and adds shape to the room. Wall lights in bathrooms or hallways add both function and style.
Change cabinet pulls, doorknobs, and faucets around the house. Finishes like brushed brass, matte black, or polished nickel give a pulled-together look. These small metal pieces are touched often, so better quality feels nicer.
Focus on items at eye level first since they are seen more. Even swapping outlet covers and switch plates for better ones in matching finishes makes a noticeable difference.

You can make your home feel more premium without big work or hiring a designer. Simple choices in paint, hardware, and styling can change how your home looks and feels.
Start with hardware and fixtures. Swap cheap cabinet pulls, door handles, and light switch covers for finishes like brushed brass, matte black, or unlacquered brass.
Change your window treatments. Replace basic blinds with floor-length curtains hung close to the ceiling. This makes rooms look taller and more finished.
Improve lighting. Add dimmer switches and use several light sources at different heights. Table lamps, floor lamps, and wall lights add depth that a single ceiling light cannot.
Update faucets in the kitchen and bathroom too. Using similar finishes for faucets and hardware around the house helps everything feel planned and higher quality.
Trendy accent walls can look dated fast and split a room visually. Instead of loud patterns or very bright colors, try subtle texture like shiplap, board-and-batten, or paint in similar tones.
Matching furniture sets from big-box stores can make a room feel like a showroom. Mix furniture from different places and times to make the space feel collected and personal.
Too many shiny metal finishes can make a room feel cheap. Use gold, silver, or rose gold sparingly—pick a few pieces, not everything.
Open kitchen shelves need constant tidying to look good. If you use them, keep items simple, use matching dishes, and leave empty space so it doesn't feel cluttered.
Generic wall art and mass-produced signs hurt a premium look. Choose art that matters to you, use good frames, and pick pieces that fit the wall size.
Warm neutrals are the most flexible choice. Greige (gray-beige), soft taupe, and warm whites look good with many light types and furniture styles.
Darker, rich neutrals can feel more expensive without being too bold. Try warm charcoal, deep navy, or forest green for an accent wall or small rooms like a powder room.
Cool white can seem cold in rooms with little natural light. Pick whites with warm undertones like cream, ivory, or off-white to keep the room cozy.
Earth tones like terracotta, clay, and sage green make a room feel grounded. They look great with wood and stone for a natural, premium feel.
Let your lighting guide your color choice. Test paint patches in daylight and at night with your lamps before you paint the whole room.
Using too many metal finishes makes a room look messy. Use two, maybe three, matching metals in nearby rooms. Your kitchen and dining area should share the same main finish.
Picking fixtures only because they are trendy means they will look old fast. Choose simple, classic shapes made from good materials instead.
Not planning where lights, pipes, and outlets go can cause problems later. Decide on lighting, plumbing, and electrical locations before you finish the layout.
Hardware that is the wrong size looks accidental, not stylish. Make sure cabinet pulls match the size of doors and drawers.
Not thinking about how well a finish holds up causes extra work later. Pick durable finishes like matte black or oil-rubbed bronze for kitchen hardware instead of shiny finishes that show fingerprints.
The 3-5-7 rule means grouping items in odd numbers for a nicer look. Odd numbers feel more natural than even ones.
Use this rule on coffee tables, shelves, and mantels. Three candles of different heights look better than two or four identical ones.
You can use it for furniture too. A sofa with two different side tables (three pieces total) feels more planned than two matching tables.
Layer items in groups of three, five, or seven with different heights and textures. Mix tall, medium, and short pieces to make the display interesting.
This rule is a guideline, not a law. Break it when you want a balanced, formal look, like around a fireplace.
Start with a deep clean and declutter. Clear counters, organize open shelves, and remove personal items from bathrooms. A clean space looks more expensive.
Fix up the entryway because it sets the tone for the whole home. Add a small table, a mirror, and good lighting if you can. In tight spaces, use a bench and coat hooks.
Upgrading the guest bathroom makes a big difference. Use fresh white towels, put soap and lotion on a tray, and make sure the mirror has good light.
Check your lighting around the house. Replace burned-out bulbs and make sure main areas have ambient, task, and accent lighting.
Fresh flowers or good fake plants add life to rooms. Put them in the entryway, living room, and guest bathroom for best effect.

Many people learn what a nice home looks like from Instagram, TikTok, and Pinterest. Seeing many staged rooms and popular styles online can change how you think about a house. Social media shows curated spaces that shape what people expect from interior design.

This influence goes beyond ideas and inspiration. Repeatedly seeing certain looks can change what you call luxury, what you think you need to be comfortable, and how you feel about your own home. For example, many parents say social media makes them expect a home that is not realistic for their budget.
Knowing how social media affects home tastes can help you make better choices for your own space. This article looks at how online platforms shape design trends, change feelings about where we live, and affect the housing market.

Apps like Instagram and Pinterest have changed how people decide what a nice home looks like. These sites show new design ideas quickly. They let anyone see styles from around the world.
Now many design choices are about what looks good in photos. Rooms need to look clear and bright on small phone screens. That means good light, simple shapes, and colors that stand out in pictures.
People use the word "Instagrammable" to mean things that look great in photos. You might pick a bold wall, a unique light, or a special piece of furniture because it will photograph well. Many people plan where to place things so the picture looks nice.
Key elements of Instagram-worthy design include:
Design used to be mostly about comfort and how well a room works. Now it often mixes those needs with how the room will look in photos. For example, a velvet sofa in a bright color or a neat gallery wall can feel cozy and also look great when shared online.
Interior design influencers now set trends for millions of people. They share their homes every day, so their choices feel easy to copy. You might watch them style shelves, arrange pillows, or pick paint colors and think you can do the same.
Big influencers can start whole design movements. When someone with many followers shows a style or product, it spreads fast. Soon you see the same rattan chairs, terracotta pots, or neutral paint in many feeds.
This has changed who decides what looks good. Professional designers now compete with self-taught creators who post often and seem relatable. You can follow a creator as they renovate on a budget or style a room step by step.
Hashtags and viral posts turn into design trends that spread worldwide in days. One video of a room makeover can get millions of views and inspire many people to copy it. You spot a look on TikTok or Pinterest, and then it shows up in homes everywhere.
Recent viral design trends include:
These trends move much faster than old design cycles. What’s popular can change in months instead of years. You might try a viral look and then find a new one is trending soon after.
Because trends change so quickly, styles that fill your feed today can feel out of date within a year as new viral posts push different looks forward.

Social media has changed how people think about a nice home. It is less about having the most expensive furniture or formal rooms. Now, people care more about comfort, flexible spaces, and rooms that look good in photos.
On social media, you will see two main styles. Minimalist rooms are simple and tidy. They use neutral colors, clean lines, and only a few items. These rooms feel calm and open.
Maximalist rooms are full of color, patterns, and many objects. They might have lots of pictures on the wall, shelves with plants, books, and other decorations. These rooms feel lively and busy.
Both styles look planned and intentional. A “nice home” now means having a clear style, not spending a lot of money. Thoughtful choices make a home feel special.
Social media shows new ways to make personal space, even in small homes. People create small zones for certain activities, like a reading corner with a lamp and chair or a meditation spot with cushions and plants.
Privacy can come from clever layouts instead of separate rooms. You can use room dividers, curtains, or how you place furniture to make private areas inside a bigger room. This lets you change the space to fit your needs.
Your home office can also be a guest room, gym, or craft space. People need rooms to do many things now. A dining table might be a work desk during the day and a family table at night.
Furniture is made to be flexible. Murphy beds fold into walls, desks can become vanities, and ottomans hide storage. The best homes use smart design that fits your life instead of sticking to strict room rules.
Now, a nice home is one that works well every day, not one with rooms you rarely use.

Social media changes how people show their homes and invite others in. Instagram and TikTok turn living rooms and kitchens into posts for likes and comments. Video calls and virtual tours can replace some in-person visits.
People often decorate with an audience in mind. Your home can become part of your online identity. When you share photos, you look for likes, comments, and shares.
This can change your choices. You might pick furniture or paint because they look good in photos, not because you love them. Trends spread fast on Pinterest and Instagram and push people toward certain styles.
Now a "nice home" means more than comfort and use. It should look good in photos. People set up small photo spots in their homes with clean lines, good light, and trendy decor to get attention on social media.
You can invite people into your home without them coming over. Virtual tours using video calls, Instagram Stories, and YouTube let you show your space to many people. These tours let you control what others see.
Video calls make your background part of how you present yourself. You pick rooms with good light or a neat wall to sit in front of. Some people buy decor just to look good on video calls.
Virtual gatherings set new standards for homes. You might make certain spots "Zoom-ready" with better chairs, tidy shelves, or interesting art. Your home now serves you in real life and as a backdrop for online meetings.

Smart home features now affect how people decide if a house looks "nice" on social media. Connected devices and energy-saving systems make homes look modern and attractive in photos and videos.
Your home can look more appealing on social media when you show smart technology. Voice assistants, automated lights, and thermostats you control with an app make a space feel up-to-date and well planned.
Many buyers now want homes with smart tech already built in. That means these devices are becoming expected, not just extra perks.
Smart devices also give you ideas for posts. You can film your lights changing, show your phone controlling the thermostat, or share a video from your security camera. These clips show that your home uses modern tools that make life easier.
Common smart devices that boost home appeal:
These devices look good in pictures and videos. They turn normal home features into things people notice and talk about online.
Smart technology helps cut energy use, and that matters to people who see your home on social media. Green features now make a home look responsible and well cared for.
Energy monitors show real-time data about how much power you use. You can share these numbers to show you care about the environment. Smart thermostats learn your routine and change the temperature by themselves, saving energy without you having to do much.
Solar panels with smart energy systems make homes look modern online. These systems store extra energy and use it at the best times of day. People who care about the planet like to see this technology.
Smart homes can also track water use, help appliances run better, and lower utility bills. When you post about these features, you show that a nice home is comfortable and eco-friendly.

Social media has opened up design ideas that were once only for professionals. Now you can find expert tips, global trends, and step-by-step guides without hiring a designer or buying expensive magazines.
Sites like Pinterest and Instagram give you millions of design ideas. You can learn about Japanese minimalism, Scandinavian cozy styles, or Mediterranean looks from your phone in seconds.
This ease of access works both ways. You are not stuck with what your local stores sell or what local designers suggest. A homeowner in rural Kansas can get ideas from a Tokyo apartment or a Paris loft just as easily as someone in a big city.
The gap has narrowed a lot. Design ideas that used to be only for rich clients are now free and available to anyone with internet access. You can follow the same designers, see the same trends, and learn the same color tips professionals use.
This change means your design choices are no longer set by location or money. You can mix styles from around the world in ways that were hard before social media connected people everywhere.
Video platforms like TikTok and YouTube turn tricky design tasks into easy-to-follow tutorials. You can learn to put up peel-and-stick wallpaper, build shelves, or reupholster furniture by watching short videos.
This tutorial culture makes home improvement less scary. Jobs that once needed a pro now have many step-by-step guides, often made by people who learned the skill themselves.
Popular DIY tutorial categories include:
Comments on these tutorials create learning groups. You can ask questions, solve problems, and show your results. This peer-to-peer learning means you get advice from real people, not just from design books.

Social media has changed what people expect when they look for homes. Photos and videos that look great online are now a must. This puts money pressure on sellers and real estate agents.
Agents spend a lot more on professional photos than before Instagram and Pinterest. Listings need many high-quality images that look good on phones and match other polished content buyers see online.
Professional photography can cost from about $150 to $500 for one home. For expensive listings, agents might spend much more. Many also pay for drone photos, virtual staging, and twilight shots to make a listing stand out.
Common items in a photo package:
Because of these costs, small brokerages and people selling homes on their own can find it hard to compete with listings that have professional media. This changes who can sell homes easily and how houses are presented online.
Buyers now expect listings to look like the homes they see on social media. People want granite countertops, open layouts, and neutral colors because these styles look better in photos and videos.
Houses that do not photograph well often stay on the market longer, even if they are a good deal. Unique architectural features or small, cozy rooms can be ignored because they do not show well in quick social media posts.
Virtual tours and 3D walkthroughs are no longer special — they are expected. Listings with video content get many more inquiries than those without. This puts pressure on sellers to pay for these tools just to meet basic buyer expectations.

Social media has changed how people see and feel about their homes. It creates new pressures about how homes should look. These online influences can affect mood and how satisfied you feel with your home.
When you scroll through Instagram or Pinterest, you see carefully styled rooms with great lighting and expensive furniture. These images set high and often unrealistic standards for what a "nice home" should be.
This leads to social comparison. You might measure your living room against influencer homes with very costly sofas and decor. Seeing these ideal images can make you feel like your home is not good enough.
Common comparison triggers include:
Trying to match these trends can change how you spend money and how stressed you feel. You might replace useful items just because they do not look good in photos or do not match current styles.
How happy you are with your home now partly depends on social media. Studies find that people who use social media a lot often feel less happy with their living space. You might have been fine with your bedroom until you saw dozens of "bedroom makeover" posts in one week.
This change affects mental health in clear ways. You may feel nervous about having guests because your home does not look "Instagram-worthy." Some people stop sharing photos of their homes because they feel embarrassed about old or simple rooms.
But social media can also help. It can give real ideas for improving your space on a small budget. Support groups share honest tips and celebrate different home styles. The difference is whether you use social media to get ideas or to compare yourself to others.

Social media is starting to add tools like virtual home tours and AI design tips. These will change how people judge and create "nice" homes.
Platforms are adding virtual reality (VR) features so you can walk through homes from your couch. Instagram and TikTok are testing ways to show 360-degree room tours from influencers and real estate accounts.
With VR, you can see a home's layout, lighting, and flow using your phone or a headset. This helps you judge if a design works in real space instead of just in a flat photo.
Key VR features coming to social media:
These tools may help people focus less on perfect photos and more on spaces that are comfortable and useful to live in.
Social media sites use what you look at and click on to show you home ideas that match your taste and budget. The apps track which room styles you save, share, or spend time viewing.
You get home design feeds based on your location, clues about your income, and what you have looked at before. Pinterest and Instagram already give recommendations that learn from what you do.
This data-driven way of working means you see fewer one-size-fits-all "dream homes" and more realistic options you could actually make. The algorithms take into account your climate, home size, and past purchases to suggest practical designs instead of only showing fancy looks you cannot afford.

Social media now influences how millions of people think about home design. These platforms often focus on looks and shareability more than everyday comfort. Knowing this can help you make better choices for your own space.
Instagram and TikTok have made visual impact the most important sign of good design for many people. Before these apps, design magazines and experts guided most home style choices. Now, viral hashtags and short videos can make a specific look popular in just a few days.
These apps reward spaces that photograph well. Bright natural light, simple rooms, and strong accent walls look better in photos than cozy but plain rooms.
You see the same styles repeated in millions of posts. Aesthetic themes like "cottagecore" or "modern farmhouse" spread fast because people share and copy what gets attention. This creates cycles where certain looks stay popular for months before a new trend appears.
Clean, simple rooms with good light get the most likes and shares. White or light-colored walls act like blank pages that make furniture and decor stand out. Big windows and natural sunlight make rooms look larger and more welcoming in photos.
Bold or unique items grab attention. A cool light fixture, a bright chair, or a patterned backsplash gives people something to notice. Plants also do well because they add color and life to pictures.
Open floor plans look better in photos than many small separate rooms. They create lines of sight that make spaces look bigger and more connected in one shot.
Useful features are often ignored if they do not look good. Good storage, practical lighting, and hard-wearing materials help daily life but usually get fewer likes and shares.
Many buyers now think about how "Instagrammable" a home is. People may choose features that look good in pictures instead of those that fit their real needs. Items like kitchen islands, open shelves, and spa-like bathrooms are popular partly because they appear a lot online.
Social media shows new renovation ideas you might not know about. A viral before-and-after video can inspire someone to start a project. It can also teach you about problems to watch for from other people's experiences.
Fast-changing trends make some people feel they must redo their homes often. When your feed shows new styles every few months, a recent update can feel old fast. This can push people to make unnecessary renovations to keep up.
Seeing perfect-looking homes all the time can make you unhappy with your own space. Creators spend time staging, lighting, and editing photos. What you see is the nicest version of their home, not what it looks like every day.
This comparison can cause feelings of not being good enough or stress about your living space. You may feel pressure to make your home look the same, even though most people do not live in showroom conditions.
Only seeing tidy, styled homes changes what you think is normal. Regular lived-in homes can start to seem messy or wrong by comparison.
Some people begin to shop more and more to copy looks they see online. The constant flow of new products and styles can lead to spending more than you need or can afford.
Start by thinking about what you actually need every day. Make a short list: storage for hobbies, a comfy place to sit, or a spot to work. Use these needs first, then add decoration.
Choose simple, classic pieces for big purchases. Neutral sofas, solid wood tables, and plain light fixtures last longer than trendy items. You can change the room’s look later with small things like pillows, art, or paint.
Limit how much home content you see if it makes you feel bad. Unfollow accounts that make you compare yourself or want to spend money. Follow people who give useful tips instead of only pretty photos.
It’s okay to skip trends that don’t fit your life. If a style looks nice but is hard to clean or doesn’t match how you live, don’t use it.
Social media rewards images that make people stop scrolling. Bold pictures and strange choices get more likes than practical design. So creators often show things that look good, not what works best every day.
Photos don’t show daily problems. A picture won’t tell you if open shelves collect dust or if a white couch stains easily. You only see a perfect moment, not the chores behind it.
Before you commit to a trend, test if it will work for you. Ask if the feature does something useful in your home besides looking good. Look up the real-life pros and cons.
Try trends in temporary or small ways first. Use removable wallpaper, test a trend in one small area, or buy a cheap version to try. This helps you decide before spending a lot.
Make function your priority in busy areas. Kitchens, bathrooms, and entryways should work well first and look nice second. Save purely decorative choices for rooms that get less use.

You might walk into a room and feel let down because it does not look as good as the photos you saw online. Or a restaurant may seem amazing on social media but feel small and dark when you visit. There are clear reasons why camera photos and real life look different.

Cameras turn 3D spaces into flat 2D pictures, which changes how depth, light, and size look. Your eyes move and use side vision to judge a room. A camera takes one fixed picture with set focus and brightness. The lens, angle, and lighting the photographer uses can make a small room look bigger or a large room look emptier.
Knowing this can help you set realistic expectations when you see places online. You will learn what a camera hides or highlights, what tricks photographers use, and how to tell if a space truly looks good or if the photo is just clever.
Sometimes a room looks great in a photo but not as nice when you stand in it. Here are easy reasons why that happens and simple tips to make a space look good in real life too.
Knowing why some spaces look better on camera than in person helps you change the room so it feels as nice as the photo. Small changes can make a big difference.

Have you noticed a room can look great in a photo but just okay in real life? Here are simple reasons and easy fixes so a place looks good both on screen and in person.
When you look at a photo, your brain focuses on one view. In real life your eyes move and you notice many details. That makes differences stand out more.
Photos can hide flaws and boost good features with lighting, lenses, angles, and editing. To make a space look as good in person as it does on camera, focus on even light, tidy spaces, correct scale, and a few simple design choices.
Keyword: why some spaces look better on camera than in person
Cameras see light, color, and space in a different way than your eyes and brain. That is why a room can look better in photos than it does in real life.
Your eyes change fast to different light levels. When you walk from a bright place to a dim corner, your pupils and brain adjust so you can still see details.
Cameras can’t do that. They pick one exposure for the whole picture. This can make bright areas look washed out or dark areas lose detail.
Key differences include:
Indoor lights add another problem. A room that feels warm to you may look too yellow or orange in a photo because the camera reads light color differently than your eyes do.
The colors you see depend on how your brain reads light from your eyes. Your brain changes how it sees colors to match different lights and uses memory to help you recognize colors.
Cameras use a white balance setting to decide what "white" looks like under the current light. If the white balance is wrong, a whole room can look too yellow, too blue, or have other color tints that you did not notice in person.
Your brain also uses clues from nearby objects and past experience to fix colors. For example, you know a white wall is white even under yellow bulbs. A camera will record the yellow unless you change the white balance.
Camera lenses bend and change how space looks in ways your eyes do not. Wide-angle lenses can make rooms look bigger but can also stretch or warp the edges. Things close to the camera can look long, and things far away can look very small.
The focal length of a lens affects how depth looks in photos. Wide lenses make the distance between near and far objects look bigger. Telephoto lenses make that distance look smaller and flatter.
Your eyes act somewhat like a 50mm lens on a full-frame camera, but they also move, focus, and use two eyes together. Your brain combines all that information, so places often look different in person than in a photo.

People who work with cameras use simple tricks to change how a room looks on screen. They move things, set up lights, and edit images so the space looks nicer than it may in real life.
Staging means setting up a room so it looks good on camera. This can be as easy as taking away clutter, moving furniture, and placing objects where the camera likes them. Small changes can make a big difference.
Framing is about where the camera points and what it shows. The camera can hide messy parts and show the best parts. Using a wide-angle lens can make a small room look bigger. Where the camera sits can remove distractions you would notice in person.
Lighting is one of the strongest tools. Good lighting can add depth and reduce harsh shadows. Using a few lights in the right places makes a room look more three-dimensional. Changing the light color (warmer or cooler) also changes the mood of the space on screen.
Digital editing tools let you change how a filmed space looks. Color grading changes hue, saturation, and brightness to make the image match your idea. You can make a cold room feel warm, cool down a warm room, or create a mood by changing colors.
Common post-production adjustments include:
You can also use compositing to swap backgrounds, remove things you do not want, or add objects that were not there during filming. These tools let you fix problems that would be expensive or hard to fix on set.

People often ask why some spaces look better on camera than in person. Cameras and our eyes see things differently. Lenses change how wide or deep a room looks. Camera sensors capture light differently, and editors can change colors and contrast. Together, these things can make a space look larger, brighter, or more balanced on screen than it does in real life.
Wide-angle lenses show more of a room in one picture, so the space looks bigger than it really is. They make distances between walls seem longer. The lens focal length also matters: very short focal lengths like 16–24mm make spaces look wide, while a 50mm lens shows a view closer to what your eyes see.
Your eyes adjust to different lights automatically, but a camera records the light as it is. A room lit by warm bulbs can look orange in a photo even if it seems normal in person. Cameras react differently to sunlight and indoor lights, so mixing window light and lamp light can make colors look off in photos.
The direction of light also changes shadows and contrast more in photos than in real life. Light from the side can make textures and shadows look stronger in an image, while your eyes tend to smooth those details out.
Phone cameras often use ultra-wide lenses that bend the edges of the picture. Straight walls may look curved, and corners can seem stretched or squashed depending on where they sit in the frame. This lens distortion changes how architectural lines look: vertical lines near the edge can lean in or out, making ceilings seem taller or shorter.
Your brain also helps correct perspective as you move through a room, but a photo freezes one view. That fixed view keeps angular distortions that your eyes would normally ignore.
Wide-angle lenses make the space between the front and back of a room look bigger. Things close to the camera look much larger, and things farther away look smaller than they really are.
The height and angle of the camera make these effects stronger. Shooting from low makes the ceiling look taller, while shooting from high can squash the room’s height.
Lines that face the camera stay straight, but anything at an angle can look stretched. Corners, furniture edges, and details can shift and give a wrong idea of depth and size.
Photographers remove extra items to make shots look cleaner. Small personal things, cords, and clutter that might be easy to ignore in person can distract in a photo.
Placing furniture in certain ways helps lead the viewer’s eye through the picture. Arranging pieces at angles can create the feeling of depth that may not match how the room is usually set up.
Framing chooses what to show and what to hide. The camera can be placed to leave out damaged walls, awkward areas, or parts of the room that do not look good.
HDR mixes pictures taken at different brightness levels so both bright windows and dark corners show detail. Our eyes can adjust to see both, but a single regular photo usually cannot.
This processing makes the light in the photo look more even than it is in real life. Shadows can look lighter and bright spots less intense than in the real room.
Editing tools increase color and contrast so rooms look more vivid. Wall colors, whites, and design pieces can seem stronger and more attractive in photos than they do in person.

Your home is not just a place to sleep or keep things anymore. Homes now show who you are and how you live. They mix places to live, work, relax, and meet friends.

People are moving from simple "living space" to "lifestyle space." This means rooms and buildings are made to fit many activities. For example, kitchens open to living rooms, apartments have shared work areas, and rooms can change use during the day.
These changes come from new habits and real needs. Understanding the modern shift from ‘living space’ to ‘lifestyle space’ can help you choose or design a home that fits your life better.

Homes today are changing. They are no longer just places to sleep and store things. Instead, they shape how you live, work, and meet others. This is part of the modern shift from ‘living space’ to ‘lifestyle space.’
Older homes had separate rooms for one use. There was a dining room for meals, a living room for guests, and bedrooms for sleeping.
This setup grew from older social rules that valued privacy and formal visits. Kitchens were closed off, halls were long, and rooms had clear boundaries between public and private life.
Rooms were built for fixed jobs and did not change much. People bought furniture to stay in one place. Walls separated activities, and most rooms had only one purpose.
That style worked when daily routines were steady. Jobs, family life, and social habits changed slowly, so homes did not need to adapt often.
Today, home design focuses on how spaces make you feel and what you can do in them. Houses and apartments need to work for remote work, exercise, hobbies, and gatherings without big renovations.
The idea of "lifestyle living" values belonging and well-being more than just square footage. Builders make co-living and build-to-rent places that share amenities like co-working areas, gyms, and multipurpose rooms.
These places mix functions. One room can be an office in the morning, a yoga studio in the evening, and a guest room on the weekend.
Smart home technology helps this change. Systems can change lighting, temperature, and sound for different activities. You can set your space to fit your needs instead of using fixed room types.
Adaptable design lets you change areas without building work. Movable walls, modular furniture, and built-in pieces make spaces that grow with your needs.
Wellness features include more natural light, better air quality, and zones for exercise and rest. These features aim to support your physical and mental health.
Community amenities expand your living area outside your unit. Shared gardens, lounges, and workshops give chances to meet others and cut the size and cost of private spaces.
Sustainable systems focus on the environment and saving money long-term. Energy-efficient systems, recycled or renewable materials, and water-saving features match eco values and lower running costs.

Technology has changed how you use your home. Changes in who lives in cities and how people live have also changed what we expect from space. More focus on personal identity and mental health has turned homes into places for self-expression and well-being.
Working from home has changed what a house is for. You now need a quiet work area, strong internet, and a neat background for video calls. The living room can be an office by day and a place to relax at night.
Smart home gadgets let you control lights, heat, and doors from your phone. This makes it easier to set the right mood for different tasks during the day.
Streaming and digital books mean you do not need big shelves or many disks. You watch movies online, read on tablets, and use music apps. This frees up space and changes how you plan storage.
Social media affects how people pick furniture and decor. You might choose items that look good in photos. Sites like Instagram and Pinterest show new design ideas from around the world and shape what people want in their homes.
Living in cities often means smaller homes and higher costs. People use smart furniture and clever storage to make the most of every inch.
Household types are changing. More people live alone, marry later, or do not have kids. Because of this, many homes now focus on a work area or hobby space instead of extra bedrooms.
City homes may not have yards. To make up for this, people create indoor spots for plants, exercise, or relaxing. Many city services and amenities are nearby, so you may need less space inside your home.
The modern shift from ‘living space’ to ‘lifestyle space’ means your home shows who you are. You pick furniture, colors, and layouts that match your tastes instead of following old room rules.
People care more about mental health now, so homes are used to support well‑being. You make rooms that lower stress by adding natural light, plants, soft colors, and spots for meditation or exercise.
Simple wellness design ideas:
Many people choose experiences over things. Homes are made to support hobbies, meeting friends, and learning new skills instead of holding unused stuff.

Today’s homes focus on being flexible and showing personal style. Rooms do more than one job and can change with your needs. The goal is to keep spaces tidy and pleasing while fitting your daily life.
A modern living space mixes usefulness with your personal style. Simple shapes, lots of natural light, and open rooms are common in today’s design.
Smart devices fit into these rooms without standing out. You might have lights, heating, and entertainment systems that you can program and that work quietly.
Being eco-friendly is also important. People use energy-saving appliances, natural materials, and furniture made from recycled or responsibly sourced parts.
Open-plan layouts are still popular, but they are changing. Now people want flexible rooms that can be opened or closed when needed.
Partial walls, sliding doors, and movable panels help make private spaces. These options cut down on noise and cooking smells spreading through the whole area.
Hybrid layouts give a mix of both ideas. You can keep a roomy, open feel but also make separate zones for different activities when you want to.
Use area rugs to mark different parts of the room. A rug makes a clear spot for the living area or dining area without adding walls.
Put furniture so it separates spaces. For example, place the sofa with its back to the dining table or use a bookshelf as a small divider.
Keep the same floor and use similar colors throughout. That helps the whole room feel connected while each area still has its own job.
Use different lights for each area. Bright task lights for the kitchen, a pendant over the table, and softer lights for the living area help each zone feel right for its use.
Matching heavy furniture sets can make a room look old. Swap them for mixed pieces that share a color or simple style instead of identical items.
Bold, wall-to-wall carpet looks dated. Change to wood, laminate, or a neutral carpet and add area rugs you can change later.
Big entertainment centers with large TV units make a room feel old-fashioned. Mount the TV on the wall and choose a low media console or floating shelves.
Vertical blinds and heavy drapes block light and feel old. Replace them with simple roller shades, modern curtains, or natural woven blinds.
Start by noticing where people walk through the room. Do not place furniture where it will block these paths between doors and other rooms.
Room size tells you how much furniture will fit. Try to leave about 30 inches (around 75 cm) of space between big pieces so people can move easily. Keep 14–18 inches (35–45 cm) between the sofa and the coffee table.
Think about how you use the room each day. If you watch TV most nights, put seats facing the screen and sit about 8–10 feet (2.5–3 meters) away for a good view.
Put the biggest piece of furniture, usually the sofa, in place first. Then arrange chairs and tables around it so the room works for your activities.
Empty corners are good for tall plants, floor lamps, or a small reading chair. These fill space without blocking views or paths.
Narrow wall spaces between windows or doors can hold slim console tables or floating shelves. Keep only one or two items on them to avoid clutter.
Spaces behind doors can fit vertical storage like coat racks or narrow bookcases. This uses dead space and keeps things handy.
In larger empty spots, make a small activity area. A compact desk, hobby table, or drink station adds use without crowding the main seating area.

You probably brush your teeth, make coffee, and tidy the kitchen without thinking. These things happen on autopilot each day. But what if you could change how you feel about them?

The main difference between a routine and a ritual is the purpose you give it. If you add attention and meaning to simple tasks, they can become moments that calm you and bring small joys. You don't need to buy anything or spend much extra time to do this.
Knowing why rituals affect your brain differently than routines helps show their value. You can learn easy ways to turn tasks like making your bed or watering plants into meaningful parts of your day. These small changes show how to turn everyday routines into enjoyable home rituals and can make your home feel calmer and your day more satisfying.

Your brain treats regular actions differently when you give them personal meaning. That makes those actions feel more satisfying and memorable.
Routines are things you do automatically to save energy. For example, brushing your teeth or making coffee without thinking uses your brain's autopilot.
Rituals are the same actions done with attention and meaning. The action can be the same, but how you do it makes it different.
Key differences:
When you turn a routine into a ritual, your brain uses areas tied to meaning and emotion. That creates stronger memories and makes the same task feel more rewarding.
The way you think before doing something changes how your brain reacts. If you set an intention before a task, your brain looks for details and makes stronger memories.
This happens because you pay attention. Instead of doing things on autopilot, you focus on the parts that matter to you.
Your intention can turn ordinary moments into meaningful ones. Making morning coffee can be a time to get ready for the day. Washing dishes can become a small pause between activities.
Your brain makes pathways stronger the more you use them. If you pair intention with the same actions over and over, those moments will start to feel more important.

Small, simple changes can make housework feel better. Adding a little mindfulness, changing your space, and making tasks fit your likes can turn chores into rituals.
Mindfulness makes chores into focused moments instead of things to rush. When you wash dishes, notice the warm water, the smooth plates, the soap smell, and the sound of water.
Choose one task each day to do with full attention. It could be folding laundry, wiping counters, or sweeping. Put your phone in another room so you do not get distracted.
Try these simple steps:
This practice can lower stress and make tasks feel less automatic. Ten minutes of mindful dishwashing might calm you more than scrolling on your phone.
Your surroundings change how you feel about tasks. Small changes can make chores more pleasant and help you want to do them.
Music or podcasts can change your mood fast. Make playlists for different jobs or save favorite podcast episodes for cleaning days. Upbeat songs help with active tasks like vacuuming. Calm music works better for cooking or folding clothes.
Light affects mood too. Open curtains to let in daylight or use warm lamps instead of bright overhead lights. Candles or a simple air freshener can add nice smells.
Things to adjust:
| Element | Options |
|---|---|
| Sound | Playlists, podcasts, audiobooks, nature sounds |
| Scent | Candles, diffusers, fresh flowers, brewing coffee |
| Light | Natural light, lamps, candles |
| Temperature | Open windows, fans, cozy layers |
Your space should feel welcoming before you start. These changes only take seconds but make the whole task better.
Your routines should match who you are and what you want. Adding small personal touches makes tasks feel more meaningful.
Set a clear reason for each activity. Cooking dinner can be caring for your health. Cleaning can be making a calm place. Watering plants can be helping them grow.
Give yourself small rewards during or after tasks. Sip a favorite tea while folding laundry. Play music you like while cleaning. Use products that smell good to you.
Track the habits you want to keep. A simple notebook or phone app can show what works. Note which tasks you did mindfully and which changes helped.
Combine tasks with things you enjoy. Walk or exercise while listening to a podcast. Call a friend while washing dishes. Practice a new language on your commute. This way, routine tasks can also be useful or fun.

Turning everyday routines into enjoyable home rituals means adding meaning and attention to things you already do. The main changes are how you think about the task, how much you notice your senses, and the purpose behind the action.
A routine is a set of tasks you do automatically to stay on track. For example, you might brush your teeth, make coffee, and check email without thinking much about it.
A ritual makes the same tasks more meaningful by adding intention and awareness. If you make morning coffee as a ritual, you notice the smell of the beans, feel the warm mug, and use the moment to set your mood for the day. The action is the same, but how you relate to it changes.
Routines are about getting things done. Rituals are about the experience and what the moment means to you.
Making your morning drink is easy to turn into a ritual. It already gives you a short break. You can pick a favorite mug, grind beans slowly, or stand by a window while you sip.
Washing your face or taking a shower is another good choice. These activities involve touch and smell, so you can use nicer products, enjoy pleasant scents, and pay attention to how the water feels on your skin.
Lighting a candle at the same time each day creates a clear ritual signal. Striking the match and watching the flame start marks a change in your day.
Cooking and eating can become rituals by setting the table on purpose, playing a song you like, or taking three deep breaths before your first bite.
Start with one small action you already do each morning. Pick something that takes five minutes or less, like stretching, drinking a glass of water, or opening the curtains.
Add one tiny thing that uses your senses or sets an intention. This could be a short song, a nice-smelling lotion, or saying one positive sentence about your day. Make it simple so you won’t skip it when you are in a hurry.
Do your chosen ritual at the same time each morning for two weeks. Doing it every day helps it feel normal and not like an extra chore.
Don’t make a long routine when you are just starting. A three-minute habit you keep is better than a twenty-minute plan you stop after a few days.
Make a few playlists for different tasks. Play upbeat music in the morning, calm instrumentals while cooking, or nature sounds during evening chores.
Use smells to mark times or places. Light a citrus candle in the morning, spray lavender before bed, or use peppermint while you work. Over time, these smells will remind your brain what to feel.
Change lighting to match the mood you want. Use bright light for morning tasks, warm lamps for evening, and dim lights or candles to relax before bed.
Keep these items easy to reach. Store candles and matches nearby, keep your speaker charged, and put essential oils where you will use them.
Pick a time to start winding down, about 30 to 60 minutes before you want to sleep. Doing it at the same time each night helps your body know it is time for sleep.
Turn down the lights in your home to show it is evening. Lower screen brightness or put devices away during this time.
Do one or two calm activities that are easy on the mind. Ideas: gentle stretching, writing three small notes about your day, picking out clothes for tomorrow, or making a cup of herbal tea.
Follow the same order each night so your body learns the pattern. For example: dim lights, change clothes, stretch, then read. The routine itself feels calming.
Take three deep, slow breaths before you start your car or sit at your desk. This practice is very short but helps you change focus.
Say what you are thankful for while doing a daily task. Name three things you appreciate while washing dishes, folding laundry, or walking to the mailbox.
Make a quick check-in when you get home. Put your hand on the door, take one breath, and imagine leaving work stress outside so you can be present at home.
Light a candle with an intention each morning or evening. As you light it, say one word for how you want to feel that day.
Set an alarm for a one-minute pause each day. When it rings, stop, notice where you are, and take a few deep breaths before you continue.

You spend thousands of dollars on furniture, paint colors, and decorations, but your home still doesn't feel quite right. Something is off between the space you live in and how you actually want to live your daily life. This disconnect affects millions of homeowners who find their houses look complete on the surface but don't support their real routines and needs.

The problem isn't that you chose the wrong couch or paint color—it's that most homes are designed around outdated ideas of how people should live rather than how they actually do live. Your kitchen might follow all the standard rules, but if you rarely cook elaborate meals, all that counter space goes to waste. Your formal dining room sits empty while you eat at the coffee table every night.
Understanding why this gap exists can help you make better choices about your living space. You'll learn what creates this mismatch and how to align your home with your actual lifestyle instead of an imagined one.

Most homes are built for an average household that doesn't exist, while buyers have little control over floor plans and features that shape their daily lives. Design choices made years before you move in can clash with how you actually live.
Home layouts often ignore how people actually move through their day. Kitchens get placed far from where families gather. Home offices end up in noisy areas near living rooms instead of quiet corners.
Builders design based on what sold in the past, not what works for current lifestyles. Open floor plans became popular for entertaining, but they create problems for people working from home who need quiet space. Storage gets added in standard spots like hall closets, even though you might need it near entryways for sports equipment or in garages for hobby supplies.
The timing of your daily activities matters too. If you work night shifts, a bedroom facing east with morning sun becomes a problem. Standard layouts assume everyone follows the same schedule, but your routine might need a mudroom near the garage or a separate entrance for business clients.
Construction companies build the same floor plans across entire neighborhoods to save money. They buy materials in bulk and train crews to repeat identical layouts. This approach cuts costs but limits variety.
Standard practice uses three or four basic models with minor changes to exterior colors or cabinet finishes. The core structure stays the same. Your home likely shares its layout with dozens of others in your area.
Common standardized features include:
Builders focus on features that appeal to the widest market. They avoid custom requests that slow down construction or require different materials. Your specific needs become secondary to construction efficiency.
Most home purchases offer minimal chances to change the layout or features. You pick from existing homes or choose options from a builder's limited upgrade list. Real customization costs thousands more and delays closing dates.
When buying an existing home, you inherit all previous design decisions. The flipped house might have trendy finishes but an awkward layout you can't easily change. Walls, plumbing, and electrical systems stay where the original builder put them.
New construction offers slightly more flexibility, but only during specific phases. You might select countertops or flooring, but load-bearing walls and room sizes are fixed. Major changes require expensive custom builds that most buyers can't afford.
Your life shifts in ways you can't predict when buying a home. The house that worked for a couple becomes cramped with kids. The big family home feels empty when children leave.
Remote work changed everything for millions of households. Dining rooms became offices overnight. Homes bought before 2020 rarely included dedicated workspace. You make do with converted bedrooms or kitchen tables.
Hobbies and interests evolve too. You might take up woodworking and need workshop space. Health changes could require accessible features like first-floor bedrooms or walk-in showers. Aging parents might need to move in, requiring separate living areas your current layout doesn't support.
Physical abilities change as you age. Stairs become harder to manage. Narrow doorways won't fit mobility devices. The two-story home you loved at 35 creates challenges at 65.

Making your home work for your life requires intentional planning during the selection process, building in adaptability, and sometimes calling in professional help to align spaces with how you actually live.
Start by listing your daily activities and habits before you look at any properties. Write down when you work from home, how often you cook, whether you exercise indoors, and how much storage your hobbies require.
Create a ranked list of must-haves versus nice-to-haves. Your must-haves should directly support your regular routines. If you cook every day, a functional kitchen matters more than a formal dining room. If you work remotely full-time, dedicated office space beats extra bedrooms.
Visit potential homes at different times of day to see how natural light, noise levels, and traffic patterns align with your schedule. A quiet street during a weekday showing might be loud on weekend mornings when you want to sleep in.
Key factors to evaluate:
Design rooms that can serve multiple purposes as your needs change over time. A guest bedroom can double as a home office with a murphy bed or sleeper sofa. An unfinished basement offers the chance to add exactly what you need later.
Use furniture and storage solutions that adapt rather than built-ins that lock you into one configuration. Rolling carts, modular shelving, and movable room dividers let you reconfigure spaces without renovation costs.
Plan for life transitions you can reasonably expect. Young families might convert a playroom into a homework station. Empty nesters could turn children's bedrooms into craft studios or fitness rooms. Leaving some areas open-ended gives you options without requiring major construction.
Interior designers and architects can translate your lifestyle into functional layouts you might not envision yourself. They spot opportunities to customize standard spaces for your specific activities and preferences.
Share your actual daily schedule and pain points with current living arrangements. A designer needs to know you batch-cook on Sundays or that three people get ready simultaneously each morning to create solutions that work.
Professional help costs money upfront but prevents expensive mistakes. A designer can identify which walls you can remove, how to maximize awkward corners, or where adding built-in storage makes sense for your belongings. They know building codes and spatial requirements that keep renovations from backfiring.

Homes often disappoint because their physical features conflict with daily habits, while cultural messages about what homes should look like create expectations that don't match real-world needs.
Your brain notices friction between what you do every day and the spaces where you do it. When you constantly work around your home's layout instead of with it, that mismatch drains your energy.
Small inconveniences add up over time. If you cook often but your kitchen lacks counter space, you feel that frustration multiple times each day.
The disappointment grows when you realize the house looked perfect during the tour but doesn't support how you actually live. Your mind expected one experience but your body performs different tasks in spaces that weren't designed for them.
Builders design homes for a general market, not for your specific habits. Standard floor plans follow popular trends rather than individual needs.
Previous owners shaped the space around their own routines. Their changes might clash with how you prefer to move through rooms or store your belongings.
Your lifestyle changes faster than housing stock. The home that worked when you lived alone might fail completely when you start working from home or raise children.
Many buyers choose homes based on appearance rather than function. A beautiful open-concept kitchen might look stunning but create problems if you prefer enclosed cooking spaces with less noise travel.
Social media shows curated snapshots that hide the mess and maintenance of real life. You see the styled photo but not the storage problems or daily upkeep those designs require.
Trending aesthetics often prioritize looks over livability. Minimalist designs appear calm in photos but may not accommodate the belongings and activities your household needs.
You absorb these images and start comparing your functional space to someone else's photoshoot. Your expectations shift toward an ideal that exists only for the camera.
Design trends move faster than renovation budgets. By the time you update your home to match current styles, new trends have already replaced them.
Home dysmorphia describes the feeling that your living space looks wrong or incomplete even when it functions well. You fixate on perceived flaws that others might not notice.
This happens when you consume too many idealized home images online. Your brain starts rejecting your actual space because it doesn't match the polished versions you see daily.
The effect makes you feel unsettled in a home that objectively meets your needs. You might renovate repeatedly without ever feeling satisfied because the problem exists in your expectations, not your walls.
Home dysmorphia can drain your finances as you chase an impossible standard. You replace items and finishes that work perfectly fine simply because they don't look like what you see in your feed.
Climate determines basic housing features like roof pitch, window placement, and insulation needs. Homes in humid areas require different ventilation than homes in dry climates.
Building materials depend on what's locally available and affordable. Some regions use brick, others use wood, and many use concrete based on geography and tradition.
Cultural practices shape room sizes and layouts. Homes in cultures with multi-generational living include different spaces than homes designed for nuclear families.
Local building codes reflect regional challenges like earthquakes, hurricanes, or snow loads. These requirements create structural differences that affect both appearance and function.
Rearrange furniture to match how you actually move through rooms. Place seating where you naturally sit and work surfaces where you perform tasks.
Remove items that don't serve your current habits. If you don't use formal dining, convert that space to something you'll actually use like a home office or play area.
Add storage solutions that match your specific belongings. Hooks, shelves, and containers placed at the point of use reduce daily friction.
Adjust lighting to support your activities. Bright task lighting where you work and softer ambient lighting where you relax changes how spaces feel without construction.
Identify your biggest daily frustration and solve that single problem first. Fixing the most annoying mismatch between your home and your habits creates immediate relief.

You don't need to buy new furniture or repaint your walls to change how your home feels. Small adjustments like rearranging your lighting, decluttering surfaces, and adding different textures can completely shift your space's energy and mood. The best part is that most of these changes cost little to nothing and can be done in a single afternoon.

Your home's vibe comes from how all its elements work together. Things like natural light, room layout, and even the scents in your space play a bigger role than you might think. When you understand which factors affect the atmosphere most, you can make smart tweaks that create real impact.
This guide will show you practical ways to refresh your home's feel without major projects or spending much money. You'll learn creative strategies to elevate your atmosphere and discover simple daily habits that keep your space feeling welcoming and new.

Small adjustments to lighting, textures, scents, and greenery can shift how your home feels without buying new furniture or changing your layout. These changes work because they tap into your senses and create immediate shifts in comfort and mood.
Lighting affects how you feel in a room more than almost any other element. Overhead lights can make spaces feel harsh and unwelcoming. Layer different light sources instead to create depth and warmth.
Place table lamps and floor lamps in corners and near seating areas. Use warm-toned bulbs (2700K-3000K) rather than cool white ones. Dimmer switches let you adjust brightness based on the time of day and your activities.
Consider these lighting options:
The key is avoiding reliance on a single overhead fixture. Multiple light sources at different heights make rooms feel more welcoming and complete.
Texture adds visual interest and physical comfort without requiring a full redesign. Your home likely already has smooth surfaces like walls, windows, and hard floors. Adding varied textures creates contrast that makes spaces feel more inviting.
Soft textiles work particularly well. Drape a chunky knit throw over your sofa or add textured pillows in linen, velvet, or wool. Place a plush area rug under furniture groupings to define spaces and add warmth underfoot.
Mix materials like wood, metal, and fabric within the same room. A woven basket, ceramic vase, or wooden tray adds tactile variety. Even switching out smooth curtains for ones with texture can change how a room feels.
The goal is creating layers that invite touch and make your space feel lived-in rather than sterile.
Your sense of smell directly connects to memory and emotion. The right scents make your home feel cleaner, more relaxing, or more energizing depending on what you choose.
Start by removing bad odors rather than covering them up. Open windows regularly to circulate fresh air. Empty trash bins frequently and clean fabrics that hold smells.
Add pleasant scents through these methods:
Keep scents subtle. Strong artificial fragrances can overwhelm and cause headaches. Natural options tend to smell cleaner and less chemical.
Plants improve air quality while adding life and color to your rooms. They create a connection to nature that makes indoor spaces feel fresher and more balanced.
Choose low-maintenance varieties if you're new to plant care. Snake plants, pothos, and ZZ plants survive in various light conditions and tolerate missed waterings. Place them at different heights using plant stands, shelves, or hanging planters.
Group plants in odd numbers (three or five) for visual appeal. Larger plants like fiddle leaf figs or monstera work as focal points in empty corners. Smaller plants fit on shelves, counters, and side tables.
Real plants outperform fake ones for changing your home's energy, but they do require basic care. Water when soil feels dry and wipe dust off leaves monthly to keep them healthy.

Small daily practices can shift your home's atmosphere without requiring new furniture or decor. Adjusting light, keeping spaces tidy, selecting the right sounds, and displaying personal items all work together to create a more inviting environment.
Natural light changes how a room feels and can make spaces appear larger and more welcoming. Opening curtains and blinds first thing in the morning lets sunlight fill your home and improves your mood throughout the day.
Clean your windows regularly to remove dust and grime that blocks light. Dirty windows can reduce the amount of sunlight entering your home by up to 40%. Wipe down both sides of the glass every few weeks.
Position mirrors across from windows to bounce light around the room. This simple placement doubles the effect of whatever natural light you have. You can also trim any bushes or trees outside that block windows during peak sunlight hours.
Keep window treatments light and airy when possible. Heavy, dark curtains absorb light instead of letting it through. Sheer panels or light-colored fabrics let you maintain privacy while still allowing sunlight to enter your space.
Clutter affects how your brain processes a room and can make you feel stressed without realizing why. A messy space creates visual noise that disrupts the calm feeling most people want at home.
Set up a daily five-minute pick-up routine. Walk through each room and put items back where they belong. This prevents small messes from building into overwhelming cleaning projects.
Designate a specific spot for items you use every day. Keys, mail, shoes, and bags should each have their own place near the door. When everything has a home, keeping your space tidy becomes automatic instead of a chore.
Clear flat surfaces like counters, tables, and dressers regularly. These areas collect random items quickly and make rooms feel chaotic. Keep only what you actively use on display and store the rest.
Sound shapes the atmosphere of your home just as much as what you see. The right music or ambient noise can make your space feel energizing in the morning or relaxing in the evening.
Create different playlists for different times of day and activities. Upbeat music works well for morning routines and cleaning. Softer, slower songs help wind down in the evening. Match the sound to what you want to feel.
Try ambient sounds if music feels too distracting. Flowing water, rain, or gentle instrumental tracks provide background noise without demanding attention. These sounds can make your home feel more spa-like and peaceful.
Keep the volume at a comfortable level that fills the space without overwhelming it. Sound should enhance your environment, not dominate it.
The items you display on your walls tell a story about who you are and what matters to you. Personal touches make a house feel like your specific home rather than a generic space.
Rotate photos and art pieces seasonally or whenever they stop catching your eye. You don't need new items—just move existing pieces to different rooms or swap what's currently displayed with items you've stored away. Fresh placement makes familiar objects feel new again.
Display photos of actual memories and experiences instead of stock images or generic prints. Pictures from trips, family gatherings, or personal achievements create emotional connections every time you see them.
Group smaller items together instead of spreading them out. Three to five pieces arranged on one wall create more impact than single items scattered around a room. This approach also makes your displays feel intentional rather than random.

Small changes can shift how your home feels. You can adjust lighting, rearrange furniture, clean strategically, and enhance your entrance to create a better atmosphere.
Open your curtains and windows to let in natural light and fresh air. This simple step makes rooms feel cleaner and more welcoming within minutes.
Move your furniture away from walls by a few inches. This creates better flow and makes your space feel less rigid.
Add soft textures like throw blankets or pillows you already own to seating areas. Place them where people naturally gather to make these spots more comfortable.
Light a candle or use essential oils in common areas. Scent affects how people feel when they enter your home.
Replace harsh overhead bulbs with warm-toned bulbs between 2700K and 3000K. This color temperature makes spaces feel cozy instead of clinical.
Add dimmer switches to your existing light fixtures. This lets you control brightness based on the time of day and activity.
Move lamps to different locations in your room. Place them in dark corners or near seating areas to create layers of light instead of relying on one central fixture.
Use the lighting you have at different times. Turn off overhead lights in the evening and use only lamps to create a softer atmosphere.
Replace old cabinet hardware with matching knobs or pulls. This small upgrade makes kitchens and bathrooms look more cohesive and intentional.
Remove items from countertops and surfaces. Keeping only a few carefully chosen objects visible makes your home look more expensive.
Upgrade your switch plates and outlet covers to match throughout each room. Mismatched or yellowed plates make spaces look dated.
Iron or steam your curtains and straighten artwork on walls. Crisp fabrics and level frames signal attention to detail.
Rotate items from storage into your current displays. Things you haven't seen in months will feel new again.
Rearrange furniture to create new conversation areas or improve traffic flow. Move your sofa away from the wall or angle chairs toward each other.
Swap items between rooms to give each space a different feel. Your bedroom lamp might work better in the living room and vice versa.
Group similar items together instead of spreading them around. Three candles clustered on a tray look more intentional than three candles scattered across a room.
Clean your baseboards, light switches, and door frames. These areas collect dust but often get overlooked, and cleaning them makes everything look fresher.
Clear off flat surfaces like counters, tables, and dressers. Leave only items you use daily or truly love.
Organize cords and cables behind furniture and entertainment centers. Visible wires create visual clutter that makes spaces feel messy.
Wash your windows inside and out. Clean glass lets in more light and makes your whole home feel cleaner.
Pressure wash your front walkway, porch, and siding. Removing dirt and grime makes your home look maintained.
Add or replace house numbers with larger, more visible ones. Clear numbers look modern and help your home stand out.
Trim bushes and edge your lawn along walkways. Defined borders make your landscaping look intentional.
Place potted plants on either side of your front door. This frames the entrance and adds color without permanent changes.

You walk into your living room and notice scuff marks on the walls, an old light fixture, and a worn-out couch. When friends visit, they call the room cozy and welcoming. The difference between how you see your home and how others see it is real.

We judge our homes more harshly because we see every flaw, know everything that needs fixing, and expect more from ourselves than visitors do. Guests look around for a short time with fresh eyes. You live in the home every day and notice things others do not.
People often judge themselves more strictly than they judge others. Knowing this can help you view your home more fairly and feel better about the place you made.

You see your home differently than visitors do. Your own standards, habits, and worries shape how you judge it. Guests only see the surface. You see the things you wanted to fix but didn’t.
Your brain compares your home to the way you imagined it. If you meant to organize the kitchen last week, you'll focus on that empty goal. Guests just see a working kitchen and may not notice small problems.
Because you live in your home every day, you notice every small flaw. A chip in a tile or some clutter looks bigger to you than to someone who visits once. This is called familiarity bias — the more you see something, the more its faults stand out.
Your home can feel like part of who you are. Seeing mess or things you haven’t finished can make you feel lazy or like you failed. Visitors usually just see a lived-in place, not a reflection of your worth.
Key reasons we judge our homes more harshly:
We often compare our homes to pictures we see online, in magazines, or during brief, tidy visits to friends. Our brain makes these comparisons without us planning it and uses other homes as a rule for how ours "should" look.
Those homes are not real everyday life. A friend might have cleaned up before you arrived. An Instagram photo can take a long time to set up. You are comparing your normal mess to someone else's best moment.
Seeing perfect rooms can make you feel worse about your own home. Your brain notices the difference between your space and the ideal and treats it like a gap you should close, which can feel discouraging.
Your ideas about how a home should look come from many years of images and messages about adult life. These standards often do not match your time, money, or daily routine. You might want magazine-level rooms while working a full job or caring for family.
You are often tougher on yourself than on others. If a friend has dishes in the sink, it seems normal. If your sink has dishes, you might feel embarrassed.
The difference between your ideal home and your real home can cause small, steady stress. You might picture fresh flowers and perfectly arranged books, while real life includes laundry on the couch and useful but mismatched furniture—and that is okay.

You can change how you feel about your home by changing your thoughts and doing small, practical things. These steps help you stop the inner voice that points out every flaw.
Your brain looks for problems more than good things. That is why you notice a worn carpet but might miss a cozy reading corner. This also makes you judge your home more than guests do.
Remember that your negative thoughts are just thoughts, not facts. If you think "this room looks awful," pause and ask if a friend would really think that. Most people notice far fewer flaws than you do.
Compare your home to places you used to live, not to magazine photos or social media. Your place may not look like a show home, but it might be better than your old dorm or first apartment. This is a fairer way to judge it.
Know that imperfections are normal. A scuffed wall or mismatched furniture does not lower your value. Other people's opinions of your home fade quickly, but how comfortable you are every day matters more.
Think about use, not perfection. Make a short list of what your home does well:
Spend five minutes each day noticing one good thing in each room. This helps you train your mind to see positives instead of only faults.
Make small changes that lift your mood and do not cost much. Move a chair to make walking easier, add a plant to an empty corner, or tidy one drawer. Small steps show you can improve your space bit by bit.
Limit how much home design content you look at if it makes you compare and feel bad. You do not have to stop following those accounts, but watch how they make you feel and set limits on how long you view them.
Keep a "home wins" list. Write down compliments from guests or times your space worked well. Look at this list when you start to think negatively about your home.

Many people ask why we judge our homes more harshly than others do. Homeowners often worry about small problems that guests never notice. Guests usually pay attention to different things than the person who lives there.
You see your home every day, so you notice small things like a scuff on the wall or a crooked picture. These small flaws stick in your mind because you know your home so well.
Visitors see your home as a whole. They focus on the big picture — the room's feel, the light, or the furniture — not tiny details. They do not have the same memory of how things are supposed to look.
Your brain also forms a mental map of your space. When something is different from that map, it stands out to you. Guests do not have that map, so they do not notice small differences.
Most visitors are much less critical than you think. When people enter someone else's home, they focus on talking and spending time together, not checking small details like baseboards.
Studies show guests notice big things such as overall cleanliness and how warm the place feels. They do not usually count the dust on a fan or worry about mismatched pillows.
You may fear people are judging every corner, but most guests are thinking about the chat or feeling happy to be invited.
Familiarity bias matters a lot. Because you know your home so well, you notice flaws more than good things.
Negativity bias also affects you. Your brain pays more attention to bad things, so flaws stand out more than positives. This helped people notice danger long ago, but now it makes you fixate on a stain or a mess.
Confirmation bias can make it worse. If you believe your home is not good enough, you will look for proof. You might spot every messy corner and miss the cozy reading spot or the fresh flowers.
Social media and TV often show rooms that look perfect. These pictures are usually staged and edited. They do not show normal daily life.
Your brain can use these perfect images as a standard when you look at your own home. You might compare your lived-in living room to a photo taken by professionals, even though that photo was set up for a shoot.
Many images are made by teams who clean, style, and edit the space. Your home is for living, not for taking perfect photos.
Perfectionists set very high standards that are hard to reach in real life. If you expect your home to look like a magazine, you will often feel like you failed.
This thinking can make you unhappy a lot. You might clean one room and then worry about another room right away. The good feeling of finishing a task gets turned into stress about what is still wrong.
Self-criticism also makes small things seem worse. A few dishes in the sink can turn into "my kitchen is a disaster" instead of "I used some dishes today."
You might apologize for dust that guests cannot see unless they look very closely. Most people do not run their fingers along shelves or check light fixtures for dirt.
Many homeowners worry about furniture or decorations that do not match. Guests usually see this as a personal style choice, not a problem. What you call a decorating mistake, others often call character or charm.
You probably feel upset about clutter that only you notice. A stack of mail on the counter or shoes by the door looks "lived-in" to most guests, not messy. The worn spot on your couch that bothers you every day is something visitors hardly ever spot or care about.

You walk into a store and see rows of beautiful bins, baskets, and containers. They promise to fix your clutter problem once and for all. You buy them, bring them home, and a few weeks later your space looks just as messy as before.

The problem isn't that you need more storage—it's that buying storage containers doesn't address why you have too much stuff in the first place. Most people think organization means finding the right place to put everything. But storage solutions only work if you actually need the items you're storing.
This pattern happens to almost everyone. You see a storage product that looks perfect, imagine how neat your home will look, and make the purchase. Understanding why this approach fails can help you stop wasting money on containers that end up adding to the clutter instead of solving it.

Storage products promise order and control in our lives, tapping into deep psychological needs while being marketed as quick fixes for cluttered spaces. However, the gap between these promises and reality often leaves us with bins and organizers that don't solve our actual problems.
Your brain craves order because clutter creates mental stress. When you see a messy space, your mind struggles to focus and relax. This explains why browsing storage aisles feels so satisfying—each container represents a potential solution to your chaos.
The desire for organization connects directly to your need for control. When life feels unpredictable, organizing your physical space gives you something tangible to manage. You feel productive just by purchasing storage items, even before using them.
This feeling is temporary. The rush you get from buying new bins or shelves comes from imagining an organized future, not from actual change. Your brain releases dopamine when you anticipate solving a problem, which makes shopping for storage solutions feel rewarding on its own.
Companies use specific strategies to make you believe their products will transform your home. They show perfectly styled spaces with matching containers and color-coded labels. These images rarely reflect real life with kids, busy schedules, or limited space.
Storage brands market their products as lifestyle upgrades rather than simple boxes. They use words like "system" and "solution" to make items seem more powerful than they are. The message suggests buying the right product will automatically make you more organized.
Seasonal marketing pushes create urgency around storage purchases. January brings "new year, new you" organization campaigns. Spring promotes decluttering sales. Back-to-school season emphasizes kids' storage needs. These repeated messages convince you that now is the time to buy.
Small, inexpensive items like baskets and drawer dividers seem like low-risk purchases. You grab them without measuring your space or planning how you'll use them. This leads to drawers full of unused organizers.
Many people think storage equals organization. You buy containers to hide your stuff rather than reduce what you own. This approach just moves clutter around instead of addressing the root problem—having too many things.
Another misconception is that the right storage system will make you organized automatically. No product can change your habits or decision-making. You still need to sort items, create systems, and maintain them over time.
People also believe bigger or more storage is always better. Oversized bins encourage you to keep more items than you need. Too many small containers create visual clutter and make it harder to find things. The right size depends on what you actually use, not what might fit.
The idea that organization happens all at once is false. You see dramatic before-and-after photos and expect similar instant results. Real organization requires ongoing effort and adjustments as your life changes.

Buying bins and containers creates organized-looking clutter rather than actual organization. The real issue isn't a lack of storage but too many items and poorly designed systems.
A container is just a box. It holds things but doesn't create a system for managing them.
When you buy storage without a plan, you end up moving clutter from one place to another. The items inside still lack a specific purpose or location. You might know something is "in a bin" but not which bin or where that bin is stored.
Real organizational systems include rules about what goes where and why. They define how you access items and return them to their spots. A basket on your counter becomes part of a system only when you decide it holds "keys and sunglasses that go out the door" rather than "random stuff I don't want on the counter."
Storage products can support good systems. But they can't replace the thinking work of creating those systems. Without clear rules and designated purposes, your new containers just become neater-looking piles.
Most people shop for storage before they know what they actually need to store. This leads to containers that don't fit the space or items.
You can't pick the right storage until you see what you're keeping. The size, shape, and quantity of your actual belongings determine what containers work. A drawer organizer designed for makeup won't help if your real need is craft supplies or charging cables.
Shopping first also means you buy based on what looks good in the store. That attractive basket might be too shallow for your blankets or too wide for your shelf. The label maker seems helpful until you realize your system doesn't need labels.
Start by sorting what you own. Group similar items together. Measure your space. Then you can choose storage that actually fits your situation instead of forcing your belongings into whatever you already bought.
Adding storage without removing items just gives you more capacity to keep things you don't use. Your clutter becomes more organized but doesn't disappear.
Every container you add makes it easier to avoid decisions about what to keep. That bin in the garage lets you postpone dealing with old sports equipment. The under-bed boxes hide clothes you never wear. You feel productive because you "organized" but you still own the same amount of stuff.
The solution requires editing first and storing second. Go through your belongings and remove what you don't need, use, or want. Many people find they already own enough storage once they reduce what they're storing.
Less stuff means you need fewer containers. It also means the storage you do use actually serves a purpose rather than preserving clutter in a more attractive way.

Many people struggle with buying storage that doesn't solve their real problems. Understanding why this happens and how to avoid it can save you money and create a more organized home.
Shopping for storage feels like taking action to solve your clutter problem. When you buy a new bin or basket, you get an immediate sense of accomplishment without doing the hard work of deciding what to keep or throw away.
Retailers market storage products as quick fixes that promise an organized life. The before-and-after photos make it look easy, so you believe the right container will finally be the answer. This keeps you buying more storage instead of addressing the real issue.
You might also avoid decluttering because it brings up difficult emotions about waste, money you spent, or gifts you received. Buying storage feels easier than facing these feelings.
Your storage containers are packed so full that you can't easily find or access what you need. If you have to dig through bins or pull everything out to get one item, you own too much.
You own multiple storage solutions for the same category of items. Three bins of craft supplies or five baskets of toys usually means the problem is the amount of stuff, not the storage system.
Your closets, cabinets, and drawers are already full of items you rarely use. Adding more storage just means you're keeping things that don't serve your daily life.
The 50% rule means your storage containers should only be 50% full. This gives you room to access items easily and put things back without struggling.
When containers are packed tight, you can't maintain your organizing system. You'll skip putting things away because it's too hard, and clutter builds up again. Space in your storage makes the system work long-term.
This rule forces you to be selective about what you keep. You have to choose your most useful or loved items instead of cramming everything into containers.
You buy storage before you declutter, so you end up with containers sized for everything you own instead of what you actually need. This locks you into keeping items that don't serve you.
Your storage doesn't match how you actually use your space. Pretty baskets on high shelves don't work if you need daily access, and clear bins don't help if you never label them.
You create systems that are too complicated to maintain. If putting something away takes more than one or two steps, you won't keep doing it when life gets busy.
Start by decluttering completely before you buy any storage. Use what you already own for at least two weeks to test if your system works with your habits.
Choose storage based on how you naturally behave, not how you think you should behave. If you drop items on the counter when you walk in, put a basket there instead of fighting your habits.
Make sure every item has a specific home that's easy to access. The easier it is to put something away, the more likely you'll maintain your system. Keep adjusting until returning items to their spots feels effortless.
Measure your space twice, including height, width, and depth. Bring these measurements when you shop and check them against product dimensions before buying.
Declutter the category you want to organize first. You need to know exactly how much you're keeping before you can choose the right size and number of containers.
Consider how you'll use the items stored in that space. Daily-use items need open, accessible storage while seasonal items can go in lidded bins. Match your storage type to your access needs, not just to what looks good in photos.

Life moves fast when you're juggling work, relationships, and everything in between. You deserve a home that feels like a true retreat instead of another task on your endless to-do list.

A calm, put-together home isn't about perfection or spending hours cleaning—it's about creating simple systems that work with your busy schedule, not against it. The right approach can transform your space from chaotic to peaceful without adding more stress to your day.
You don't need a complete home makeover or expensive organizers to make this happen. Small, practical changes based on core principles can help you build a home that feels organized, welcoming, and genuinely restful every single day.

A calm home starts with clear spaces and simple systems that match how you actually live. The key is creating routines that keep things running smoothly without constant effort.
Calm doesn't mean perfect or spotless. It means you can find what you need when you need it and your space doesn't add stress to your day.
Order at home looks different for everyone. For you, it might mean clean counters in the kitchen. For someone else, it could mean toys in bins instead of scattered on the floor.
The real measure is how you feel when you walk through your door. A calm home lets you breathe easier. It has spaces where things belong, even if those spaces aren't magazine-worthy.
Key elements of a calm home:
Your home should work for your life, not against it. This means accepting that some mess is normal while keeping the overall space functional.
Functionality means every area of your home serves a purpose and serves it well. Your entryway should handle coats, bags, and keys without becoming a dumping ground.
Start with the spaces you use most. The kitchen needs clear prep areas. The bathroom needs accessible daily items. Your bedroom needs to support rest, not store random items you haven't dealt with.
Choose furniture and storage that matches your actual habits. If you drop your purse by the door, put a hook or basket there. If you sort mail at the kitchen counter, create a system right there.
Functional priorities:
Function beats beauty when you're choosing between the two. A pretty basket that's too small doesn't help. A simple bin that holds what you need does.
Routines prevent messes from building up. A five-minute evening reset keeps your morning calm. A weekly sweep of flat surfaces stops clutter from taking over.
Daily routines to maintain order:
Start small with one routine until it becomes automatic. Then add another. Trying to change everything at once usually fails.
Weekly routines handle deeper maintenance. You might do laundry on Sundays, clean bathrooms on Wednesdays, and tackle paperwork on Fridays.
The goal is building habits that require minimal thought. When routines become automatic, they stop feeling like work. Your home maintains itself through these small, consistent actions.

A calm home requires specific actions that address the physical spaces where stress builds up. The following strategies focus on removing excess items, organizing what remains, and creating rooms that support peace rather than chaos.
Start with the areas you use most often. Kitchen counters, entryways, and bedroom surfaces collect items quickly and create visual noise that adds to your stress levels.
Remove everything from one surface at a time. Keep only what you use daily in these spaces. Coffee makers and dish soap belong on kitchen counters, but rarely-used appliances do not.
Daily decluttering habits include:
Handle each item once instead of moving it from pile to pile. This simple change cuts down the time you spend managing your belongings. Your bedroom should contain only items related to sleep and getting dressed, not work papers or hobby supplies.
Storage systems work when they match how you actually live. Open bins work better than complicated filing systems if you need quick access. Clear containers let you see contents without opening every box.
Group similar items together in designated zones. All cleaning supplies go in one location, all craft materials in another. Label each container or shelf so family members know where items belong.
Effective storage follows these principles:
Your storage should make putting things away easier than leaving them out. If you constantly find items in the wrong place, your system needs adjustment.
Each room needs a clear primary purpose. Your living room might be for relaxation and family time, not a home office or storage area. When rooms serve too many functions, they create mental clutter.
Choose a simple color scheme for each space. Neutral walls with one or two accent colors reduce visual stimulation. Natural light improves mood, so keep window treatments simple and open them during the day.
Furniture arrangement matters for calm. Create clear pathways through rooms so movement feels easy. Position seating to encourage conversation or relaxation rather than facing walls or blocking walkways.
Add only meaningful items to your spaces. One plant or piece of art you love creates more peace than multiple decorative objects fighting for attention. Empty space itself serves a purpose by giving your eyes and mind a place to rest.

Managing a home while juggling multiple responsibilities requires practical systems and realistic routines. The following questions address common challenges busy women face when creating calm spaces, staying organized, and making time for fitness.
Start your day with a quick 10-minute reset of your main living areas. This means putting items back in their designated spots and wiping down kitchen counters before the day gets hectic.
Create a family command center where everyone knows to check for schedules and leave important items. This central hub cuts down on the daily chaos of searching for permission slips, keys, or reminders.
End each evening with a simple closing routine. Spend 15 minutes doing a quick pickup, preparing what you need for the next morning, and setting out breakfast items.
Build systems that work automatically rather than requiring constant decisions. Assign specific homes for frequently used items so you and your family know exactly where things belong.
Use a shared calendar or app where everyone can see appointments and responsibilities. This prevents scheduling conflicts and reduces the mental load of tracking everything yourself.
Set up simple maintenance routines that prevent bigger messes. A basket in each room for items that need to be returned elsewhere saves time and reduces clutter.
Involve your family in age-appropriate tasks. When everyone contributes, the work gets lighter and your home stays more organized.
Follow the one-in-one-out rule for new purchases. When you bring something new into your home, remove something similar that you no longer need or use.
Designate a donation box in your closet or garage. When you find items you don't use, immediately place them in the box rather than letting them pile up.
Schedule regular decluttering sessions every three months. Focus on one area at a time instead of trying to tackle your entire home at once.
Keep flat surfaces clear as your default state. Counters, tables, and dressers collect clutter quickly when you allow items to stay there.
Use the 10-minute rule for quick organization bursts. Set a timer and focus on one small area like a junk drawer or bathroom cabinet.
Break your exercise into shorter sessions throughout the day. Three 10-minute workouts provide the same benefits as one 30-minute session.
Exercise during times that naturally fit your schedule. Try working out while your kids play independently, during their nap time, or right after they leave for school.
Choose workouts that require minimal or no equipment. Bodyweight exercises like squats, push-ups, and planks can be done anywhere in your home.
Stack your workout with existing habits. Do stretches while watching your kids at the park or lunges while folding laundry.
Aim for 20-30 minutes of movement four to five days per week. This amount provides health benefits without overwhelming your schedule.
Mix different types of exercise throughout the week. Include two days of strength training, two days of cardio, and one day of stretching or yoga.
Keep workouts flexible and adapt them to your energy levels. If you planned a 30-minute session but only have 15 minutes, do a shorter version instead of skipping it entirely.
Schedule your workouts like appointments. Put them in your calendar at times when you're most likely to follow through.
Start with a flexible framework rather than a rigid schedule. Divide your day into blocks for morning routines, active childcare time, household tasks, and personal time.
Use your children's natural rhythms to plan your day. Schedule focused chores during independent play time or screen time, and save interactive activities for when they need more attention.
Batch similar tasks together to work more efficiently. Do all your cleaning tasks in one block, meal prep in another, and errands on specific days.
Protect time for exercise by treating it as non-negotiable. Early morning before kids wake up or during afternoon quiet time often works best.
Build in buffer time between activities. This prevents your day from falling apart when tasks take longer than expected or unexpected needs arise.

Your home should work for you, not against you. When lights, temperature, security, and entertainment all need separate attention, daily life becomes more complicated than it needs to be. A smart home control system brings everything together under one interface, letting you manage your entire house from a single point.

A whole home automation system connects all your devices and allows you to control them from one place, whether that's a touchscreen, your phone, or even your voice. You can adjust the thermostat, turn off lights, check security cameras, and control your entertainment system without juggling multiple apps or walking from room to room. The system learns your routine and can handle tasks automatically based on your schedule.
Getting your home under control doesn't require technical expertise or a complete renovation. You'll learn what makes these systems work, how to set one up in your space, and what to expect from the installation process. The right system makes daily tasks simpler and gives you more time for what matters.

A smart home automation system connects all your devices through one central hub, letting you manage lights, security, climate, and entertainment from a single interface. This unified approach replaces the chaos of multiple apps and scattered controls with streamlined management.
The system works through a central controller that links different technologies in your home. Your lights, thermostat, locks, cameras, and speakers all communicate through this hub instead of operating separately.
You control everything from one app on your phone or tablet. The hub translates commands between devices that normally wouldn't work together. This creates a network where your motion sensor can trigger your lights, or your door lock can adjust your thermostat when you leave.
The system learns your daily patterns over time. It notices when you wake up, leave for work, and go to bed. Based on these routines, it can automate tasks without you pressing buttons or giving voice commands.
Professional systems like Control4 integrate nearly every device in your house. DIY options like Home Assistant give you more hands-on control if you prefer to customize settings yourself.
You eliminate the need to juggle multiple apps for different devices. One interface manages your entire home instead of switching between five or ten separate applications.
Energy efficiency improves because the system coordinates heating, cooling, and lighting based on occupancy and time of day. Your thermostat knows to lower temperatures when everyone leaves, and lights turn off in empty rooms automatically.
Security becomes simpler to monitor. You get push notifications for all your cameras, sensors, and locks in one place. You can check your front door camera and unlock it for a delivery person without opening three different apps.
Tasks synchronize across devices. When you set "goodnight mode," your system locks doors, arms security sensors, lowers the temperature, and turns off lights with one tap.
Traditional homes require manual control of each system. You walk to the thermostat, flip light switches by hand, and check door locks individually before bed. Smart automation handles these tasks through scheduled routines or single commands.
Multiple standalone smart devices create app clutter. You might have one app for lights, another for your doorbell, and a third for your thermostat. A unified system puts all controls in one location.
| Traditional Method | Automated System |
|---|---|
| Separate wall switches and controls | Centralized app or touchscreen |
| Manual temperature adjustments | Automatic climate based on schedule |
| Individual device management | Group scenes and routines |
| No remote access | Control from anywhere |
| Static settings | Learning and adaptation |
The automation system responds to triggers and conditions. Your traditional light switch only turns lights on or off. An automated system can adjust brightness based on time of day, turn on lights when motion is detected, and switch them off when a room stays empty for ten minutes.

Breaking your home management system into phases prevents you from getting overwhelmed and quitting before you see results. Start with one room or routine, build confidence, and expand from there.
Pick your starting point based on what causes the most stress in your daily life. This might be your kitchen, entryway, or morning routine.
Clear everything from that space or routine and sort items into three groups: keep, donate, and trash. Give every item you keep a specific home where it will always return after use.
Create a simple checklist for the routine tasks in this area. Write down each step in order. For example, a kitchen morning routine might include: empty dishwasher, wipe counters, check fridge for items needed.
Test your new system for one week without making changes. Track what works and what doesn't. After seven days, adjust the steps that felt awkward or took too long.
Add your second area only after the first one runs smoothly for two weeks. This gradual approach builds habits that stick.
You need three basic items to start: a notebook or app for tracking tasks, containers or bins for grouping similar items, and labels for marking where things belong.
Key supplies include:
A simple timer helps you learn that most tasks take less time than you think. Most people find that making a bed takes 90 seconds, not five minutes.
Start with what you already own before buying new organizing products. Empty boxes, mason jars, and baskets work just as well as expensive containers.
Schedule a five-minute reset each evening to return items to their assigned spots. This daily habit prevents clutter from building up again.
Review your systems once per month. Ask yourself what's working and what feels harder than it should. Small tweaks keep the system fitting your real life.
Weekly maintenance tasks:
Plan a bigger review every three months as your needs change with seasons and life events. What works in summer might need adjustment in winter when everyone's indoors more.
Share the system with everyone in your home by showing them where items belong. Kids as young as three can follow picture labels and return toys to marked bins.

Setting up a working home system brings up practical questions about where to start, how to maintain order, and what to do when life gets messy. The answers come down to clear processes, smart storage choices, and building habits that stick.
Start by choosing one room or zone to organize completely before moving to the next area. This approach gives you visible progress and helps you learn what methods work for your household.
Create specific homes for every category of items you own. Your keys go in one spot, your mail in another, and your cleaning supplies in a designated cabinet. When everything has a place, you can return items without thinking.
Label containers and shelves in areas where multiple people access items. Clear labels remove guesswork and make it easy for anyone to put things back correctly.
Build in buffer space in your storage areas. Fill shelves and drawers to only 80% capacity so you have room to put things away quickly without forcing items to fit.
Do a 10-minute reset each evening before bed. Walk through main living areas and return items to their designated spots.
Sort mail immediately when you bring it inside. Recycle junk mail, file important documents, and handle bills right away or place them in your action folder.
Run one load of laundry per day if you have a family. This prevents the overwhelming pile-up that happens when you wait until the weekend.
Clear kitchen counters after each meal. Wipe surfaces, load the dishwasher, and put away ingredients as you cook.
Schedule a weekly 30-minute declutter session on the same day each week. Focus on high-traffic zones like entryways, kitchen counters, and family rooms.
Ask yourself when you last used each item. If you haven't used something in a year and it's not seasonal or sentimental, you can likely let it go.
Keep duplicates only when you actually use multiple versions. Three spatulas might make sense if you cook large meals, but you don't need five half-empty bottles of the same cleaner.
Take photos of sentimental items you want to remember but don't need to store. This works well for kids' artwork, old cards, and decorative items that don't fit your current space.
Start with easy categories like expired products, broken items, and obvious trash. Building momentum with simple decisions makes harder choices feel more manageable.
Set a specific number limit for categories that tend to multiply. Decide you'll keep 20 mugs, 10 food storage containers, or 5 throw blankets, then stick to that number.
Install hooks near your front door for keys, bags, and coats. Wall-mounted hooks take up no floor space and keep items visible and accessible.
Use a shoe tray or cabinet in your entryway to contain outdoor footwear. This stops dirt from spreading through your home and gives shoes a clear spot.
Place open bins or baskets in living areas for items that move around daily. Remote controls, charging cables, and reading materials stay contained but remain easy to grab.
Add drawer dividers to kitchen drawers where small items mix together. Utensils, batteries, and cooking tools stay separated so you can find what you need quickly.
Choose furniture with built-in storage for living rooms. Ottomans with lids, coffee tables with shelves, and TV stands with cabinets hide clutter while serving a purpose.
Make the system simple enough that a tired person can follow it at the end of a long day. Complicated sorting or multi-step processes fail when people are exhausted.
Involve household members in creating the system from the start. People follow rules they helped make better than ones imposed on them.
Use visual reminders in the first few weeks. A small sign on the counter saying "Mail goes in the basket" helps until the habit forms.
Set up kid-friendly storage at their height level. Children can put away their own belongings when they can reach the storage spots without help.
Address problems as soon as you notice the system breaking down. If shoes pile up by the door, the shoe storage might be too far away or too complicated to use.
Create a simple paper filing system with folders for insurance, medical records, tax documents, warranties, and household bills. Keep only current documents and shred outdated papers annually.
Designate one inbox spot for incoming mail and papers that need action. Process this inbox weekly at minimum so nothing urgent gets buried.
Take photos of receipts you might need and store them in a dedicated folder on your phone. This eliminates paper receipts cluttering your wallet or counters while keeping records accessible.
Set up automatic bill payments for recurring expenses. This eliminates paper bills and removes the mental load of remembering due dates.
Name digital files with dates and clear descriptions. A file called "2026-03-Insurance-Home" is far easier to find later than one labeled "Document."
Use one cloud storage system for all family documents. When everyone knows to check the same place, you avoid lost files and endless searching.

Your home should be a place where you feel comfortable and happy. But sometimes it starts to feel dull or uninviting. You might notice worn furniture, clutter piling up, or rooms that just don't feel like yours anymore.

Feeling proud of your home means creating a space that reflects who you are and supports your daily life. It's not about having expensive items or a perfect look. It's about making your home work for you and enjoying the time you spend there.
You can take simple steps to change how you feel about your living space. Small updates and thoughtful choices add up over time. This guide will show you practical ways to build that sense of pride back into your home.

Your home can shift from a place of comfort to a source of stress without you fully realizing when or why it happened. Understanding the warning signs and taking steps to rebuild your connection with your space makes it possible to feel proud of where you live again.
You might notice you avoid having guests over or make excuses about your space needing work. This reluctance often signals a disconnect between you and your home.
Other warning signs include feeling drained when you walk through your door instead of relaxed. You may find yourself spending more time away from home than necessary. Ignoring maintenance tasks or letting clutter pile up shows you've stopped caring about your environment.
Common indicators of home discontent:
You deserve to live somewhere that makes you feel good. When you start noticing these patterns, you've taken the first step toward change.
Your living space directly affects your mood, energy levels, and mental health. A cluttered or neglected home can increase stress and make it harder to focus on daily tasks.
Research shows that people feel more content when their homes reflect their personality and values. When your space doesn't match who you are, it creates an emotional distance. You might feel like you're living in someone else's house rather than your own.
The rooms where you spend the most time have the biggest impact on your wellbeing. A bedroom that feels chaotic can disrupt your sleep. A kitchen filled with broken items or unused gadgets can make cooking feel like a chore instead of something enjoyable.
Start by identifying what first attracted you to your home. Maybe it was the natural light in the living room or the layout of the kitchen. Those features still exist, even if they've been hidden by years of accumulated items or poor decorating choices.
Walk through each room and look for architectural details you've stopped noticing. Crown molding, window frames, hardwood floors, or built-in shelving all add character to your space. Cleaning these features and making them focal points helps you appreciate your home again.
Remove items that don't serve a purpose or bring you happiness. You don't need to get rid of everything, but clearing out things you don't use creates space for what matters. This process helps you see your home's bones more clearly and makes it easier to envision improvements that align with your current needs and style preferences.

Building pride in your home requires intentional action across three key areas: removing excess clutter, adding personal meaning to your space, and keeping things clean. Each element works together to create a home that feels like your own sanctuary.
Start small with a single drawer or cabinet instead of trying to tackle everything at once. This approach prevents you from feeling overwhelmed and helps you build momentum. Work through one area at a time, deciding what to keep, donate, or throw away.
Create designated spaces for items you use daily. Keys, mail, shoes, and bags should all have specific homes near your entryway. Use drawer dividers, bins, and labels to keep similar items grouped together.
Common Areas to Focus On:
Set a regular schedule for maintenance decluttering, such as 15 minutes each Sunday evening. This prevents clutter from building up again after your initial effort.
Display items that reflect who you are and what you care about. Family photos, artwork from trips, or collections you've built over time make your home distinctly yours. These touches create emotional connections to your space.
Choose colors and textures that make you feel comfortable. Your home doesn't need to match magazine spreads or follow specific design rules. Mix patterns if you enjoy them, or keep things minimal if that suits you better.
Add plants, throw pillows, or artwork that speaks to your personality. Swap out these smaller elements seasonally to keep your space feeling fresh without major changes.
Keep basic cleaning supplies in each bathroom and the kitchen for quick touch-ups. Wipe down surfaces when you notice spills or smudges rather than waiting for a deep clean day.
Make your bed each morning. This simple task takes two minutes and immediately makes your bedroom look more put together.
Daily Maintenance Tasks:
Vacuum or sweep floors weekly, and dust surfaces when you notice buildup. Clean bathrooms thoroughly once per week to prevent soap scum and mildew. A clean home feels more inviting and gives you a sense of accomplishment.

Feeling proud of your home again starts with understanding what pulls you away from that feeling and what practical steps bring you back. These questions address the real obstacles you face and the most effective ways to overcome them.
Clutter is the most frequent culprit. When items pile up on surfaces, floors, and in closets, your space feels cramped and chaotic. This makes it hard to relax or feel comfortable inviting others over.
Outdated or worn features also contribute to dissatisfaction. Faded paint, stained carpets, or broken fixtures create a sense that your home is neglected. Even small signs of wear can affect how you view your entire space.
Lack of personalization makes your home feel generic. If your space doesn't reflect your personality or needs, it won't feel like yours. This disconnect grows over time and makes your home feel more like a place you occupy rather than a place you love.
Start by noticing which rooms or spaces you avoid. The areas you don't want to spend time in or quickly pass through usually need the most attention.
Pay attention to what you apologize for or try to hide when guests visit. These are the spots that make you feel embarrassed or uncomfortable.
Track what frustrates you during your daily routine. If you struggle to find things in your kitchen every morning or feel stressed when you enter your bedroom at night, those areas are impacting your quality of life.
Deep cleaning creates immediate change. Washing windows, scrubbing baseboards, and cleaning light fixtures makes your entire home look better. This costs almost nothing but time.
Paint transforms a room faster than anything else. A fresh coat on walls or even just trim work brightens the space and covers years of scuffs and marks. Paint is inexpensive compared to its visual impact.
Updating hardware gives rooms a modern feel without major expense. New cabinet pulls, door handles, or light switch covers cost little but make fixtures look intentional and cared for.
Focus on one small area at a time. Start with a single drawer, shelf, or corner rather than tackling an entire room. Complete that space before moving to the next.
Set a timer for 15 to 20 minutes and work only during that period. Short sessions prevent burnout and fit into busy schedules. You can always do another session later if you have energy.
Use simple sorting categories: keep, donate, trash. Don't create complicated systems or worry about perfect organization yet. Just remove what doesn't belong in your home first.
Better lighting changes how your entire home feels. Adding lamps, replacing dim bulbs with brighter ones, or installing dimmer switches gives you control over ambiance. Good lighting makes spaces look cleaner and more inviting.
New window treatments update rooms quickly. Curtains or blinds that fit your style and actually block light when needed improve both appearance and function.
Replacing old faucets and showerheads improves daily experience. These fixtures get used multiple times every day, so upgrading them makes a consistent difference. Installation is straightforward and doesn't require professional help in most cases.
Build cleaning into existing routines. Wipe down the bathroom counter while brushing your teeth or load the dishwasher right after meals. These small actions prevent buildup.
Assign specific quick tasks to specific days. Vacuum on Tuesdays, clean bathrooms on Thursdays, and do laundry on Saturdays. A schedule removes decision-making and keeps things moving.
Create a nightly reset routine. Spend 10 minutes before bed putting items back where they belong and prepping for the next day. This prevents messes from accumulating and helps you wake up to a clean space.

Many women carry a quiet, hidden feeling: shame about their homes. This shame often comes from comparing your house to the perfect pictures you see on social media. You might think your home does not measure up.
Maybe you worry about clutter on the counters, old furniture, or small spaces that do not look like magazine photos. These worries can make you feel embarrassed.

This shame can make you avoid inviting people over or make excuses when someone wants to visit. The pressure to have a perfect home adds stress to your life. You might feel like you are the only one with these feelings, but many women feel the same way.
Understanding why this shame happens can help you let it go. You can learn to feel more comfortable in your own space and stop letting unrealistic standards decide how you see your home. Your worth is not tied to how your house looks.

Many women feel embarrassed or ashamed about their homes. These feelings come from long-standing ideas about who should take care of the house and from comparing themselves to others. Social media and public standards make these pressures stronger.
Most cultures link women with managing the home. For a long time, people have judged a woman by how her home looks. You can feel like you are not enough if your home does not meet certain ideas of “right” or “good,” even if you never agreed with those ideas.
This shame can start when you are young. You learn by watching the women around you—your mother, grandmother, or other female role models—keep the house. If your home looks different from what you grew up with, you might feel like you are failing.
Common reasons women feel shame about their homes:
These expectations can hurt your mental health. You might avoid having people over or apologize for your home before anyone sees it. That can make you withdraw more, which can make the shame worse.
Society gives clear messages about how a home should look. Magazines, TV shows, and cultural rules often say a "good woman" should have a pretty, tidy home. You can feel judged not just for yourself but for everyone who lives with you.
Many cultures still see the woman as the main person responsible for the home. People often read your home's condition as a sign of your skills, work habits, and worth. When guests come, you usually feel the pressure to make the house look right, even if you don't live alone.
These ideas ignore real life. You might work full-time, care for kids or older relatives, manage health issues, or have other priorities. The old standard doesn't change and can make you feel like you are always falling behind.
Social media has made feelings of shame about homes stronger for many women. You scroll past perfect rooms, organized pantries, and spotless kitchens. These images usually do not show real daily life.
The comparison trap includes:
You might spend time comparing your lived-in home to these made-up scenes. That comparison can lower your mood and self-esteem. Studies show that seeing idealized homes can increase feelings of shame and not being good enough.
There is also pressure to post pictures of your own home. That can make you try to look perfect online, which takes time and energy away from actually enjoying your space.

Feeling ashamed of your home gets weaker when you talk about it and are kind to yourself. Learn where these feelings come from and what "good enough" means. This helps you drop impossible standards.
You get messages about how a home should look from many places. Social media shows perfect rooms that aren't real life. Friends and family can comment on cleaning or decorating. Magazines and TV shows set high standards that take time and money to keep up.
These pressures are often not talked about, so they are hard to spot. You may feel nervous before guests arrive but not know why. You might avoid having people over or say sorry a lot for normal mess.
Common sources of pressure about your home:
Start by noticing when these pressures affect your thoughts. Watch for negative self-talk about your home and ask where those standards came from.
A "good enough" home meets your real needs, not a perfect picture you see online. It keeps you safe, is clean enough to stay healthy, and is organized enough for daily life. Everything else is a preference, not a must.
Your home can have dishes in the sink, toys on the floor, or mismatched furniture and still be good enough. The people who truly matter want to spend time with you, not check your baseboards.
Think about what matters most to you. Maybe a clean kitchen helps you feel calm, but dust on shelves doesn't bother you. Or you might need clear counters but don't mind cluttered closets. Your priorities are valid, even if they are different from what others show online.
Also think about the season of life you're in. A house with small kids will look different than a retiree's home. Someone working two jobs has less time than someone who can hire help. Your situation affects what is realistic.
Talking about your feelings lowers shame's power. Tell a trusted friend you feel embarrassed about your home. You might find they have similar worries and won't judge you.
Use kind self-talk. When you notice harsh thoughts, talk to yourself like you would to a friend. Instead of "This place is a disaster and I'm a failure," try "I'm doing my best with the time and energy I have."
Daily habits that build self-compassion:
Invite someone over without deep cleaning first. Start with someone you trust. Letting them see your space as it is can change how you feel.
Focus on function, not looks. Ask if your home works for daily life instead of if it looks like a magazine. A home that supports your wellbeing matters more than one that only impresses others.

Many women feel the quiet shame many women feel about their homes. These feelings are often kept private, but understanding why they happen can help. Knowing when to ask for help can also make a big difference.
People have long tied a woman’s value to how tidy her home is. Even if you do great at work or in school, a messy kitchen can still make you feel bad.
These ideas come from years of messages that said taking care of the house is a woman’s main job. Even if you don’t agree with that idea, it can still shape how you judge yourself when you see clutter or dust.
Your home is something people can see up close. Other successes, like a job or awards, are not always visible. When someone visits, they notice the everyday mess, not the careful image you might show online or at work.
Social media shows perfect, styled homes that are often staged and edited. They are not real life, but it’s easy to compare your home to those pictures.
Family rules also matter. If a parent kept a very clean house or said bad things about mess, you might grow up thinking that is the right standard. Their voice can stay in your head when you see a pile of dishes.
Cultural ideas differ, but many still expect women to do most of the housework. When guests come, people often judge the woman of the house more than others who live there.
Surprise visitors cause panic because you lose control over who sees your space. When the doorbell rings, you suddenly notice every toy on the floor or unwashed plate as if someone else is judging you.
Seeing someone else’s tidy home can start a spiral of comparisons. You might ask why you can’t keep your place as clean, even though you don’t know what they gave up to look that way or how their home usually is.
Hosting events raises the pressure to be perfect. People spend hours cleaning places guests might never see because they fear someone finding a messy closet or bathroom.
Scrolling social media on a messy day makes the contrast worse. The perfect pictures make you feel worse, even when you know those images are staged and not everyday life.
Normal mess changes with your schedule. You might have busy weeks when dishes pile up, but you can clean things up when you have time and energy.
Overwhelm feels like the mess is out of control and you don’t know where to start. Small tasks, like washing one dish, feel impossible and make you very anxious instead of just annoyed.
Burnout looks like losing motivation to care for your space. You stop trying even though the mess bothers you, and you don’t have the energy to do small chores.
Depression can make the mess grow while you feel trapped by it. Your home may reflect how you feel inside, and taking care of your space can feel as impossible as taking care of yourself.
Start with one small spot you use often, like a nightstand or a kitchen counter. Clearing and keeping that space tidy gives you a quick win without a big effort.
Set a 10-minute timer and clean what you can in that time. A short limit removes the pressure to finish everything and makes it easier to start.
Lower your standards to what really matters for comfort and health. Dishes should be clean for hygiene, but decorative pillows do not need to be perfect.
Ask the people you live with for help. Make a simple plan so everyone shares chores instead of one person doing it all.
Use small systems that stop mess from piling up. A basket for mail keeps counters clear. Doing dishes right after meals prevents the sink from filling up.
Home-related shame becomes a mental health problem when it stops you from having people over, makes you avoid your own home, or creates constant anxiety that affects daily life. If you spend hours cleaning to avoid being judged or feel panic at the thought of someone seeing your place, the shame is serious.
Avoiding friends or events because you are embarrassed about your home makes things worse. You lose social support that could help you feel better.
A therapist can help you find where the shame comes from and change the thoughts that link your worth to how your home looks. Cognitive behavioral therapy (CBT) is good for this.
If your home's state is tied to depression, burnout, or other conditions, treating those issues can make it easier to manage your space. Mental health professionals can check if your struggles point to a larger problem.
Occupational therapists can teach practical ways to handle household tasks when issues like poor planning skills, physical limits, or mental health problems make usual methods hard. They help you change your routines and environment to fit what you can realistically do.

Many people think they must choose between cheap storage that works and pretty organization that looks good. The truth is cheap storage only hides things. Beautiful organization makes systems that are useful and look nice.

Cheap plastic bins are low cost and hold a lot. But if they make a room feel messy or do not match your style, you may stop using them. Beautiful organization fixes this by using smart storage that also fits your home's look.
How you organize your home affects more than looks. Storage choices change how easy it is to find things, how much stress you feel, and if you can keep the space tidy. Knowing the difference helps you make a home that works better every day.

Cheap storage is about saving money and holding things. Beautiful organization is about both how things look and how they work. The big difference is cost, style, and how long the solution lasts.
Cheap storage uses low-cost or free items to hold your stuff. You might use cardboard boxes, plastic grocery bags, or old containers. These options try to spend little or no money.
Budget storage does not need matching bins or pricey products. You can use shoe boxes as drawer dividers, mason jars for small items, or paper bags for short-term sorting. The goal is to give things a place, not to make everything look fancy.
Many people think organizing costs a lot, but cheap storage shows it can be inexpensive. You use what you already have or buy basic items from dollar stores. The focus is on keeping things contained and usable without spending much.
Beautiful organization means things are both useful and nice to look at. When you open a closet or drawer, items are neat and match the room's style. Containers and boxes are chosen for how they work and how they look.
Examples include clear bins, woven baskets, and labels. Colors and labels match, and every item has a place. The result looks calm and tidy.
People often share these setups on social media. They can cost more because you buy specific items to get the look. But a good system should still be easy to use every day, not just pretty in photos.
How well it works: Cheap storage can hold things and help you find them. Beautiful organization adds easy access, clear views, and systems that stay organized over time.
How it looks: Cheap storage may look mixed or messy even if it is organized. Beautiful organization looks coordinated and makes you want to keep it tidy.
Cost: Cheap storage is low cost and uses free or cheap items. Beautiful organization usually costs more up front for matching, better items.
How long it lasts: Cheap items may wear out or need replacing more often. Higher-quality products last longer but cost more at first. Both can work depending on your needs, budget, and what matters most to you.
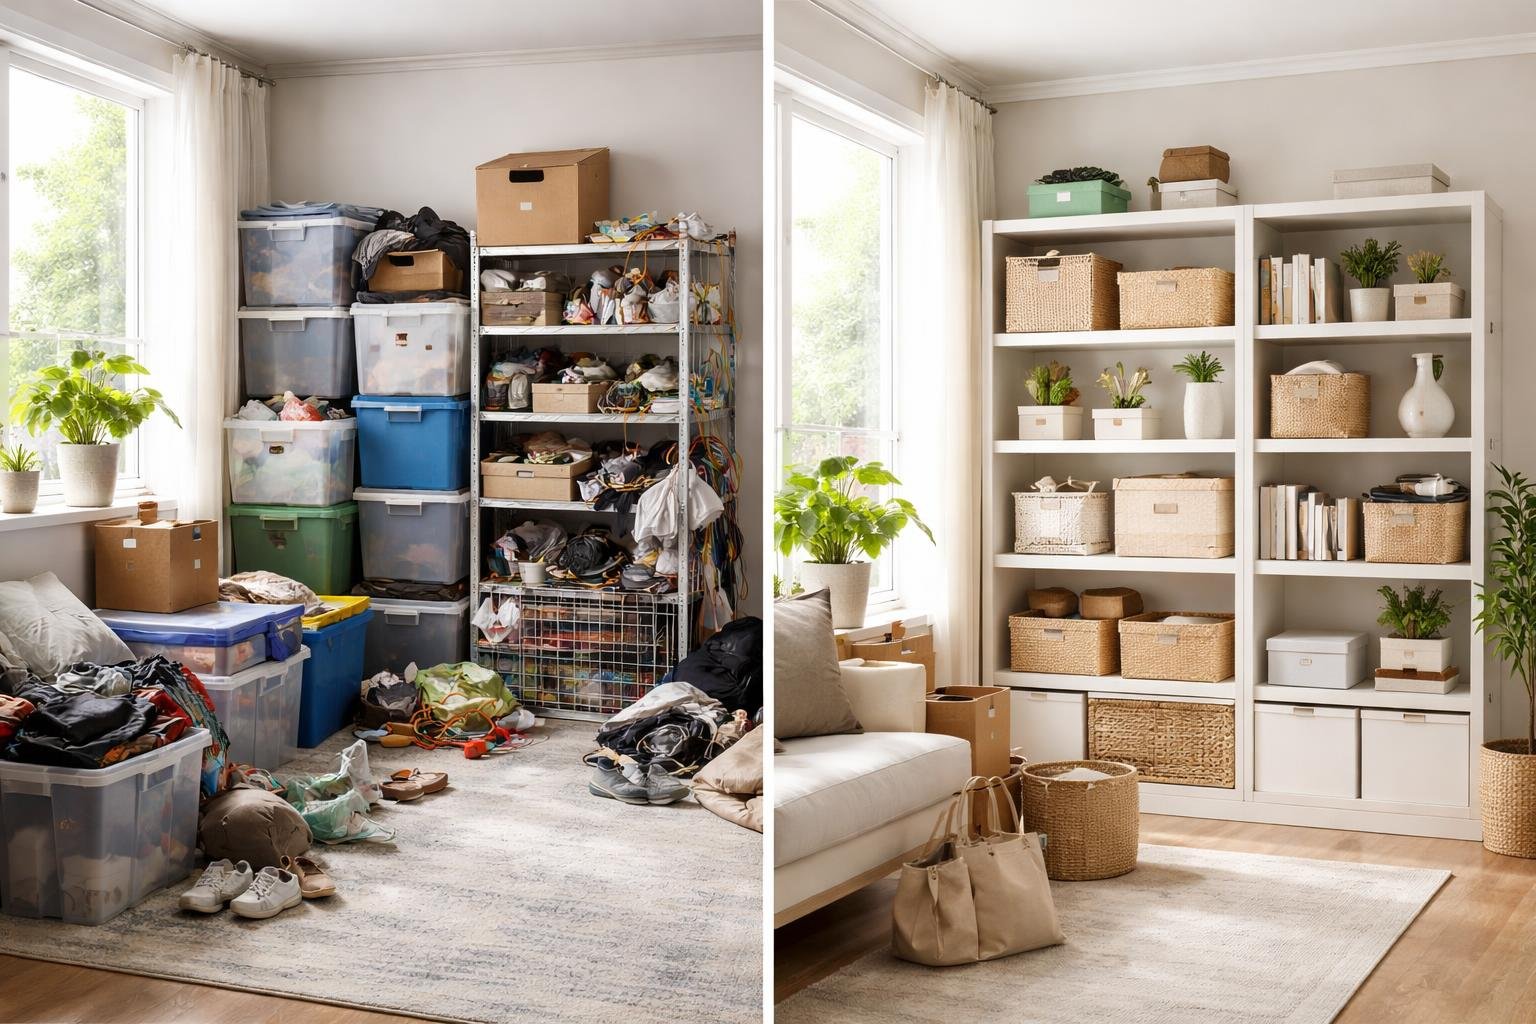
The storage choices you make change how much usable space you have at home and how you feel there every day. Good organization can lower stress and save money over time. This is the difference between cheap storage and beautiful organization.
Simple, smart storage keeps rooms useful and open. Using things like modular furniture and adjustable shelves lets your storage change as your life changes. That matters when you change jobs, have a baby, or take up new hobbies.
When you organize well, you don't buy the same thing twice because you can find what you already own. Clutter makes people feel stressed and makes decisions harder. If everything has a place, you spend less time looking for things and more time using your space.
Good storage also helps you use space better. Instead of using whole rooms for stuff, you can use tall shelves and furniture that has more than one job. That keeps your things easy to get to without taking up too much living space.
Good storage solutions cost more at first but can save you money over time. Cheap storage may seem like a bargain, but it often breaks and needs to be replaced. Sturdy materials last longer and keep working better.
Paying monthly for an outside storage unit adds up fast. A $50–$100 monthly fee becomes $600–$1,200 a year. In five years, that is $3,000–$6,000 just to keep things offsite.
Putting proper storage in your home can cut the need for outside units. It also makes your home more organized and less stressful. Built-in storage can even raise your home's value for future buyers.

Higher-quality organization products usually last longer and look nicer than cheap ones. Which is best depends on what you need, how often you will use the items, and whether you want the storage to match your home’s style.
Good storage resists damage and keeps its appearance even after daily use. That means you replace it less often.
Better materials work more smoothly. Drawers slide easily, lids fit well, and shelves stay steady instead of wobbling or breaking.
Quality organization makes daily tasks easier. You spend less time dealing with stuck drawers or flimsy boxes that won’t stack.
Higher-quality storage usually lasts much longer than cheap versions. A well-made drawer organizer can work for many years, while a very cheap one might crack or warp in a few months.
Good materials resist daily wear. They do not fade in sunlight, break from temperature changes, or snap when filled.
Cheap storage often needs to be replaced every one to two years. Over time, replacing cheap items can cost more than buying one good piece.
Nice storage pieces can add to a room's look. They come in colors and finishes that match your furniture and style.
Open storage shows your things in an organized way. If you use attractive containers, the items on display can make the room look better instead of messy.
Hidden storage keeps things out of sight and creates clean lines in a room. Showing or hiding items changes the mood and flow of the space.
Spend more on storage you use every day. If you open a drawer or bin many times a day, strong construction saves time and frustration.
Put better pieces in areas guests see. Storage that is visible should match your decor and reflect your style.
The right storage can turn a messy space into a useful one. When clutter makes life harder, it can be worth paying more for a good solution.
Better materials make storage work more smoothly every day. Metal drawer slides are more reliable than plastic ones. Solid wood lasts longer than particle board.
Good finishes resist scratches and stains that make storage look old. This helps your space stay neat and nice for longer.
Strong construction can hold more weight without sagging or breaking. You can fill good storage without worrying it will fail.
Higher-quality materials also look and feel nicer. Their weight and texture make storage seem like real furniture, not a temporary fix.
Think about how often you will use each storage item. Items you use every day should be better made. For things you use only sometimes, cheaper options can work.
Consider where the storage will be in your home. If it is in a place people see, choose something attractive. For hidden places like basements, function can be more important than looks.
Check what you really need before you buy. Buying storage for things you do not use wastes money, no matter how good it is.
Match how much you spend to the item's purpose. A drawer you rarely open does not need the same quality as a box you reach for every morning.

Guests calling to say they're on their way can send anyone into a panic, especially when your kitchen isn't ready for visitors. The good news is that you don't need hours of deep cleaning to make your kitchen look welcoming. You can transform your kitchen into a guest-ready space in just 10 minutes by focusing on a few key areas that make the biggest impact.

The secret is knowing which tasks matter most. Your guests will notice clean counters, a tidy sink, and a pleasant atmosphere more than they'll notice the inside of your cabinets or your pantry organization.
This guide will walk you through the essential steps to quickly prepare your kitchen and add simple finishing touches that create a welcoming space. You'll learn exactly what to prioritize when time is limited so you can greet your guests with confidence instead of stress.

A clean kitchen makes guests feel welcome and comfortable in your home. Focus on visible surfaces, declutter key areas, and add simple touches that create a warm atmosphere.
Start with your countertops and remove everything that doesn't need to be there. Put away small appliances you're not using, like toasters or blenders. Move mail, keys, and random items to another room.
Grab a damp cloth and wipe down all visible surfaces. Clean your countertops, stovetop, and the front of your appliances. Pay special attention to sticky spots and crumbs.
Don't forget about your kitchen table if you have one. Clear off any clutter and wipe it down with a clean cloth. This takes about three minutes but makes a big difference in how your kitchen looks.
Your sink is one of the first things guests notice. Load dirty dishes into the dishwasher or stack them neatly if you need to wash them later. Run the disposal if you have one to clear any food debris.
Wipe down your sink with a sponge or cloth. Dry it with a towel to make it shine. A dry, empty sink looks cleaner than a wet one.
Organize items near your sink so they look intentional. Arrange your dish soap and hand soap neatly. Put out a fresh hand towel or replace the one you have if it looks dirty. Hide any cleaning supplies under the sink or in a nearby cabinet.
Open your curtains or blinds to let in natural light. Good lighting makes your kitchen feel more welcoming and spacious. Turn on overhead lights if it's getting dark outside.
Check that your kitchen smells fresh. Take out the trash if it's full or starting to smell. You can brew coffee or simmer cinnamon on the stove if you want to add a pleasant scent.
Set out items your guests might need in an easy-to-find spot. Put out coffee, tea, cups, and snacks on one section of your counter. This helps guests feel comfortable helping themselves without having to ask where things are.

Small details create a clean and inviting space that makes guests feel comfortable. These final touches take just minutes but show you care about their experience in your home.
Replace used dish towels with fresh, clean ones before guests arrive. Hang them neatly on the oven handle or towel bar where they're easy to see and reach.
Put out a clean hand towel near the sink. Choose towels without stains or frayed edges. If your everyday towels look worn, keep a set of nicer ones specifically for guests.
Fill your soap dispenser or set out a fresh bar of hand soap. Make sure you have enough soap for multiple hand washes. Place the soap directly next to the sink so guests don't have to search for it.
Keep a few extra paper towels visible on the counter or in their holder. Guests often prefer paper towels for drying their hands or cleaning up small spills.
Place a small bowl of fresh fruit on the counter or kitchen table. Lemons, apples, or oranges add color and make the space feel lived-in and welcoming.
Set out a small vase with flowers or a potted herb plant. Even a single stem in a simple container creates a thoughtful touch. Fresh herbs like basil or rosemary look nice and smell good.
Display a few favorite mugs or dishes that show your personal style. Arrange them on open shelving or near the coffee maker. This makes your kitchen feel less generic and more like a real home.
Open a window for 5-10 minutes to let in fresh air. This removes cooking smells and stuffiness quickly. Even in cold weather, a brief airing out helps.
Empty the trash and recycling bins if they're full or smell. Replace the bag and wipe down the inside of the bin if needed. Take the trash outside rather than leaving it by the door.
Avoid using strong air fresheners or scented candles right before guests arrive. These can overwhelm the space and make it smell artificial. If you want a light scent, simmer a small pot of water with citrus peels and cinnamon for a few minutes, then turn it off.
Run the dishwasher if it contains dirty dishes, or quickly hand wash any items in the sink. A clean, empty sink makes the biggest difference in how fresh your kitchen looks and smells.

Getting your kitchen ready for guests in minutes involves smart cleaning choices, knowing which spots matter most, and having a few tricks ready. These common questions cover the practical steps that make the biggest difference when time is tight.
Start by clearing your countertops of dishes, appliances, and clutter. Wipe down visible surfaces with a damp cloth or disinfectant spray. Empty the sink of dirty dishes by loading them into the dishwasher or placing them in a cabinet temporarily.
Take out the trash if it's visible or smells. Sweep or spot-clean the floor in high-traffic areas near the entrance. These tasks take less than 10 minutes but create an immediate visual improvement.
Focus on the countertops first since they're the most visible surfaces in any kitchen. The sink area comes next because guests often look there when getting water or washing their hands. Clean the stovetop if it has visible spills or grease marks.
Your entryway and the path guests will take through your kitchen need attention. Don't worry about inside cabinets or drawers that guests won't see. The refrigerator exterior matters only if you notice fingerprints or smudges.
Take out garbage and recycling bins that contain food waste. Wipe down your sink and garbage disposal with a lemon slice or vinegar solution. Run cold water through the disposal for 30 seconds.
Open windows for fresh air circulation if weather permits. Light a candle or use a small amount of essential oil on a cotton ball placed out of sight. Avoid air freshener sprays that can smell artificial or overwhelming in a food preparation space.
Use a large basket or bin to collect items from countertops and place it in a closet or pantry. Stack dishes neatly in the dishwasher or sink instead of leaving them scattered. Group similar items together on counters you can't completely clear.
Push small appliances toward the back of counters or against walls. Hang dish towels neatly on oven handles or towel bars. Straighten items on your refrigerator door or remove outdated papers and magnets.
Turn on overhead lights and add a table lamp or under-cabinet lighting if you have it. Set out a small plant, fresh flowers, or a bowl of fruit as a centerpiece. Fold kitchen towels neatly and hang them where guests can see them.
Place a few simple items like a cutting board or pretty bowl on clean counters. Make sure fresh hand towels are available near the sink. Keep the lighting warm rather than harsh to create a comfortable feeling.
Keep paper towels, dish soap, and hand soap readily available near the sink. Stock glasses in an easy-to-reach cabinet so guests can help themselves to water. Have a clean dish towel and hand towel visible and accessible.
Store basic refreshments like water, coffee, or tea where you can offer them quickly. Keep your trash can lined with a fresh bag and place a small wastebasket in visible reach. Maintain a supply of ice in your freezer for drinks.

Storage products promise to fix clutter, but many make the problem worse. You buy bins, baskets, and organizers to make your home tidy. Instead, you end up with items that do not fit your space, cannot hold what you need, or create more mess.

Most storage products fail because of simple design mistakes that ignore how people really use them. Designers often care more about how a product looks in a store than how it works in your closet, kitchen, or garage. They miss basic problems like odd sizes, weak materials, and features that sound good but are hard to use.
Knowing why storage products fail can save you time and money. The same mistakes appear in many brands and types. If you know what to watch for, you can spot these problems before you buy and pick storage that actually helps you.

Many storage products fail because they are not made for how people actually use them. Makers cut costs with weak materials, waste space, and make items hard to reach or handle.
Designers sometimes do not watch how people store and take out things. A product can look good in pictures but be hard to use in real life. For example, a small organizer box may not fit real utensils, so you end up stacking things and making a mess.
Some lids need two hands to open, which is bad when you are carrying something. Under-bed boxes without wheels are hard to pull out. Deep shelves hide things in the back so you must remove many items to find one.
Testing with real users would show these problems before the product is sold. Skipping testing creates storage that works on paper but fails at home.
Cheap materials make storage break fast. Thin plastic cracks when stacked or when temperatures change. Particle board shelves warp with moisture and sag under weight, so items can fall to the floor.
Thin metal wires bend and rust if not coated well. This makes shelves unsafe in damp places like basements.
Common material problems:
Some designs waste space instead of saving it. Thick walls, awkward shapes, or fixed compartments can reduce usable storage. If packaging makes items hard to stack, you lose space that should help you stay organized.
Good storage lets you see and reach items easily. Products that block view or need full removal to reach one thing slow you down. Lack of handles or wheels makes heavy boxes hard to move, increasing the chance of dropping things.
Better storage design includes testing with real users, using stronger materials where needed, planning for moisture and temperature, and making products easy to open, move, and stack. Simple fixes like adding wheels, better lids, and clear labels can stop many failures.
Thinking about how people really live and choosing the right materials can prevent the design flaws that make most storage products fail.
Storage products should save space, but many do the opposite. Thick walls and big frames take up room. For example, a 12-inch cube with 1-inch walls only gives about 10 inches inside.
Fixed compartments often do not fit what you own. Drawer dividers with set slots leave empty gaps. Shoe racks made for one size can force you to waste spots or cram shoes together.
Designs also waste vertical space. Closet shelves that stop well below the ceiling leave usable space empty. Pantry items sit on the shelf instead of being stacked to make more room.
Shape matters too. Rectangular boxes do not fit well in corner cabinets. Round lazy susans leave dead corners that can’t hold things.
Storage is not helpful if you cannot reach or use it easily. Overhead racks placed too high make you use ladders for items you need often. Deep shelves force you to bend and reach in ways that strain your back.
Heavy bins without good handles are hard to lift and easy to drop. Poor weight balance can make bins tip forward when you pull them out.
Many designs hide what is inside. Solid bins mean you must open each one to find items. Stacks that hide labels force you to unstack everything.
Main access problems:

Poor storage design causes real problems. Items get messy, products break sooner, and you waste time and money trying to make things work. Good design should make storage easy, safe, and long-lasting.
Storage products with bad design break sooner than well-made ones. Weak joints, cheap materials, and uneven weight make them fail early.
Thin plastic bins crack with normal use. Cheap metal drawer slides bend and stop working after a few months. Shelves without proper support sag or fall when filled to their listed capacity.
When companies cut corners to save money, problems get worse. Containers without reinforced corners split when moved. Closet systems with weak anchors pull away from walls. These failures mean you replace items more often, which costs more in the long run than buying a better product up front.
Poor design makes storage items need constant fixing. Doors that are not aligned stick or do not close. Complex latches break more easily and need repairs.
You lose time dealing with problems like:
These flaws make simple tasks annoying. Instead of helping you stay organized, bad storage products make you spend extra time managing the storage itself.
Bad designs make it hard to use space well. Storage items with strange shapes do not fit standard spots. Products that cannot be changed leave gaps where clutter builds up.
Vertical space is lost when shelves cannot be moved. Fixed sections force you to put small things into big spaces. Boxes with thick walls or heavy frames take up room but hold less stuff.
Poor layouts cause more trouble. Units without easy access make you stack things that block what you need. Storage made without thinking about the items it should hold often creates more mess instead of less.

Storage products often fail because of weak materials, bad structural design, or problems with the environment they are used in. Knowing these common faults can help you pick better storage for your space.
Particle board and MDF are common materials that often cause storage items to fail. They soak up moisture, which makes them swell, bend, and get weak over time. Many makers use them because they cost less than solid wood or metal.
Thin steel is also a problem. If the metal is too thin to save money, shelves can bend under normal weight. The coating on the metal can wear off and the steel will rust fast.
Cheap plastics break down when they get sun or big temperature changes. Plastic bins can become brittle and crack after a year or two. Low-quality plastics can also release chemicals that harm the things stored inside.
Uneven weight puts too much stress on certain spots instead of spreading it out. Those spots fail first, even if the total weight is within the product’s limit. This can cause sagging shelves, bent brackets, or cracked supports.
Shelves without a center support fail faster. A long shelf with no middle support will bow in the center and get weaker over time. This is a big problem for shelves wider than about 36 inches.
Corner joints carry a lot of weight in many storage items. If the corners are not braced well or use weak fasteners, the unit becomes shaky. Over time the weight pulls the corners apart.
High humidity makes wood swell and shrink over and over. This weakens the joints and loosens screws and glue, so the item can fall apart. Metal parts can rust in damp places, which makes them weak.
Big temperature changes make different materials grow and shrink at different speeds. If plastic and metal are joined together, this pulls on the connection points. Over time those spots crack or come apart.
Direct sunlight and UV rays break down many materials. Plastics can become brittle and crack. Paints and finishes on wood or metal can fade or peel. This not only looks bad but also shortens how long the product lasts.
Shelves that are too high or too low force people to reach, stretch, or use a step stool. That makes them hard to use every day. A good range for shelves you use often is about 30 to 60 inches from the floor.
Drawers that are hard to open or close cause strain. Cheap or sticky slides bind, which makes people handle the unit roughly. That wear and rough use makes the product fail sooner.
Sharp edges and corners can cut or hurt people when they reach in. They also make cleaning and care harder. Safer, rounded edges are easier and more comfortable to use.
Fixed storage systems cannot grow when your needs change. You often must replace the whole unit instead of adding parts, which wastes money and materials. Modular systems cost more at first but can save money later because you can expand them.
Storage with shelves you cannot move limits what you can store. If shelf heights are fixed, you waste space above short items or cannot fit tall items. This makes you buy more storage sooner than you should.
Units that cannot be safely joined or stacked stop you from using space well. You need storage that can grow sideways and up as you need more room. Products made only as single units become useless faster.
Cheap screws strip easily when you put them in or tighten them. If threads or screw heads are damaged, parts do not stay tight. Loose connections get weaker over time and can break.
Thin brackets and weak mounting parts bend with normal use. The metal often cannot hold the advertised weight once people put things in and take them out. These parts can fail suddenly instead of wearing out slowly.
Low-quality locks and hinges on drawers and doors stop working after little use. Catches wear down, springs break, and hinges loosen. When these parts fail, drawers will not stay closed and doors may sag, making the unit hard to use.

Choosing the right storage is not just about price or size. You want storage that keeps your files safe for many years. The wrong choice can cause lost photos, schoolwork, or other important files.

The best storage for long-term use depends on how you will use it, how much you can spend, and whether you need speed or reliability. Hard disk drives, solid-state drives, and cloud storage each have different pros and cons. Some are good for files you open often. Others are better for keeping data safe for years.
This guide will explain what makes storage last and how to pick the right type. You will get simple tips to protect your data and make a smart choice.

Storage that lasts means choosing the right materials, protecting items from the environment, using strong designs, and keeping things clean and dry. These ideas together decide if your storage will protect items for months or many years.
The material of a storage container affects how long it will last. Plastics like high-density polyethylene (HDPE) and polypropylene are harder to crack and break than cheap plastics. They also resist damage from sunlight and air longer.
Metal containers such as steel or aluminum are very strong but can rust if not protected. Galvanized steel and powder-coated finishes help stop rust and add years to the container's life.
For paper or photo storage, use acid-free boxes and folders to keep documents from getting yellow or falling apart. For digital storage, choose higher-quality parts. Solid-state drives (SSDs) with better memory chips usually last longer than low-end models.
Thicker material and reinforced corners make containers hold up to bumps and heavy loads. A container that looks sturdy at first can fail after a few years if it is made of thin, weak material.
Moisture is one of the biggest dangers for long-term storage. Water can destroy papers, make metal rust, and cause mold on fabric and other organic items.
Choose containers with tight lids that have gaskets or weatherstripping. These seals help keep moisture out, even in damp basements or garages. Some containers come with desiccant packs or vents that help control humidity inside.
Big changes in temperature also cause problems. Materials expand and shrink when it gets hot or cold. That movement can weaken joints, cause cracks, and damage fragile items. Good long-term storage is made to handle these temperature changes without falling apart.
Key protective features:
Electronic storage devices are sensitive to temperature. Hard drives and discs last longest between 50–77°F. Using cloud storage avoids these climate problems because data is kept in climate-controlled data centers.
Every storage container has limits on how much weight it can hold. If you put in too much weight, the container can crack, break, or collapse.
Always check the maker's stated weight limit before you fill a container. Good-quality bins list their maximum load. A normal plastic bin usually holds 30–50 pounds safely. Heavy-duty bins can support 75 pounds or more.
Stacking bins adds extra pressure to the ones on the bottom. The lowest bin in a stack takes the weight of everything above it. When you stack, add up the weight of both the items and the containers themselves.
Weight capacity considerations:
| Storage Type | Typical Capacity | Best For |
|---|---|---|
| Standard plastic bins | 30–50 lbs | Clothes, linens, light items |
| Heavy-duty bins | 75–100 lbs | Tools, books, dense items |
| Metal shelving | 200–500 lbs per shelf | Heavy equipment, bulk storage |
Reinforced bottoms and support ribs make containers stronger. Commercial-grade containers usually have higher weight ratings than household ones.
Storage that needs constant care usually does not last. Simple routines are better than hard-to-follow tasks.
Smooth surfaces are easy to clean and do not hold dirt or water. Textured surfaces may look nice but can trap mold and grime. Containers you can wash with soap and water or wipe down quickly will stay in good shape longer.
Parts you can remove and replace make storage last longer. If a lid, seal, or handle breaks, you can swap it instead of throwing the whole container away. Some makers sell spare parts separately.
Check your storage often to find problems early. Look for cracks in seals, moisture inside, or weak spots in structure. Small fixes now stop big problems later.
For digital storage, upkeep means checking your files. Turn on external hard drives every few months so parts do not sit unused. For cloud storage, keep an eye on your subscription and make sure your backups still work.

Pick the best storage based on where you will use it, what features you need, and whether the maker offers good guarantees.
First, estimate how much you need now and in the next two to three years. Someone who works with documents and photos may need 250GB to 500GB. Video editors and gamers often need 1TB or more.
Think about where you will keep the storage. Drives left in hot cars or damp basements fail faster than those kept in rooms with stable temperature. Extreme heat or cold can damage hard drives and SSDs. SSDs handle movement and vibration better than hard drives.
Also think about how you use files. If you need access from many devices, cloud storage is a good choice. If you open large files often from one computer, a local SSD is faster.
Your budget matters, but so does time. Cheap storage that fails in a year can cost more in the long run than better storage that lasts five years, especially when you add the time and stress of replacing it and restoring data.
SSDs (Solid State Drives) have no moving parts. This makes them faster and less likely to break from drops or bumps. They cost more per gigabyte. Use them for your operating system, apps, and files you open often.
HDDs (Hard Disk Drives) use spinning disks inside. They cost less per gigabyte than SSDs. For example, a 2TB hard drive can cost about the same as a 500GB SSD. They are good for backups and large collections of photos, videos, or music that you do not use every day. HDDs can fail if dropped.
Cloud storage keeps files on servers you reach through the internet. You usually pay a monthly fee. Cloud storage protects you from local problems like fire or theft, but you need internet and must trust the provider’s security and uptime.
NAS (Network Attached Storage) devices sit on your home network. They let multiple people in your home access files. NAS costs more at first but can save money over time because you do not pay monthly cloud fees. You also control your own data.
Look at the warranty length before buying. Good SSDs usually have three to five year warranties. Cheap drives may only have one year. A longer warranty often means the maker trusts the product.
Read recent customer reviews from the last six months. Watch for repeating issues. One bad review is not a sign of a bad product, but many people reporting the same problem is a warning.
See how companies handle warranty claims. Some make you fill out many forms or pay return shipping. Others send a replacement quickly. Reviews that mention the claim process can be helpful.
Compare the maker’s stated lifespan with real user reports. For example, an SSD rated for 600TBW (terabytes written) should last years for a normal user. But reviews can show if drives fail earlier than expected.
SSDs (Solid State Drives) have no moving parts. That makes them faster and less likely to fail from drops. They cost more per gigabyte but are best for your operating system, programs, and files you open a lot.
HDDs (Hard Disk Drives) use spinning disks. They cost less per gigabyte. For example, a 2TB HDD can cost about the same as a 500GB SSD. They are good for backups and big collections of movies or photos you do not use often. They can break if dropped.
Cloud storage stores your files on other companies' servers. You usually pay a monthly fee and need the internet to get your files. It helps if something bad happens at your home, like a fire, but you must trust the company's security and uptime.
NAS (Network Attached Storage) connects to your home network so several people can use it. It costs more at first but gives you control over your files and avoids monthly cloud fees.
Look at the warranty before you buy. Good SSDs often have three to five year warranties. Cheaper drives may have only one year. A longer warranty shows the maker trusts the product.
Read recent customer reviews from the last six months. Watch for the same complaints over and over. One bad review is not enough, but many similar problems mean trouble.
See how companies handle warranty claims. Some make you jump through many steps or charge to ship the drive back. Others replace drives fast and with little hassle. Find reviews that talk about the warranty process.
Also compare the maker's lifespan numbers with real user reports. An SSD rated for 600 TBW (terabytes written) should last many years for most people, but user reviews can show if drives fail earlier than expected.

If you want to learn how to choose storage that actually lasts, focus on a few simple things: the build quality, the working conditions, and how you will use it over time. Your choice also depends on the kind of data you have and your budget.
Start with build quality. Strong materials and good construction last longer than cheap parts.
Think about where you will keep the device. Very hot, very cold, or humid places can damage storage. Also check the manufacturer's rating for read/write cycles—this tells you how many times data can be written before the device wears out.
Budget matters, but don't pick the cheapest option if it will fail quickly. Look at user reviews and tests to see how devices hold up over time.
Large files like videos and photos need high capacity and fast transfers. Small files like documents use less space but still need good backups.
If you use files often, choose storage that handles many read/write cycles. SSDs handle frequent use better than old-style hard drives. If you store files rarely, a hard drive can be cheaper and last longer if kept in good conditions.
If the data is private or sensitive, use encrypted storage. Some drives include hardware encryption to keep files safe without slowing the device down.
A good storage device has clear signs you can check before buying. Look at the Mean Time Between Failures (MTBF). This number estimates how many hours the device runs before it might fail. A higher number means better reliability.
Choose devices with error correction and health monitoring. SMART (Self-Monitoring, Analysis, and Reporting Technology) warns you if a drive might fail. That gives you time to save your files elsewhere.
Check the warranty length. A longer warranty usually means the maker expects the device to last. For example, a five-year warranty is often better than a one-year warranty.
Enterprise hard drives last longer than regular consumer drives. They use stronger parts and are built for constant use. SSDs with SLC (Single-Level Cell) or MLC (Multi-Level Cell) flash generally live longer than cheaper TLC (Triple-Level Cell) SSDs.
Tape storage is very durable for long-term backups. If stored correctly, tapes can last 30 years or more. But you need special machines to read and write them.
Network-attached storage (NAS) systems are reliable because they use several drives together. If one drive fails, the others keep your data safe. Cloud storage also protects data but needs an internet connection and a subscription to keep working.
Warranties tell you how long the maker thinks the storage will work. A longer warranty often means the product uses better parts and testing. Use the warranty length as a basic idea of how long the device may last.
Read the warranty rules closely. Some warranties only replace the hardware and do not cover lost files. Others include data recovery, which can be very helpful.
Extended warranties can be worth it for important data. Paying more can protect you if the device fails after the normal warranty ends.
Regular care helps storage devices last longer. Keep drives clean and free of dust because dust can cause overheating. Try to keep the storage area between 60–75°F (15–24°C) and avoid high humidity.
Run health checks monthly. Many operating systems have built-in tools, or you can use free tools from the drive maker. These checks find problems early.
Update firmware when the maker releases new versions. Firmware updates fix bugs and can make devices run better. For external drives, always use the safe-eject option before unplugging to avoid file damage.
Do not fill drives completely. Leave about 10–15% free on SSDs and about 20% on hard drives. Free space helps the drive work efficiently and reduces wear.

Have you ever walked into a room where everything is exactly where it should be? When everything has a place in your life, you experience a sense of calm and control that affects both your physical space and your mental state. This feeling goes beyond just having a tidy home. It touches how you think, how you feel, and how you move through your day.

Most people spend time looking for lost items or feeling stressed by clutter. But when you create a system where each item has its own spot, something shifts. You save time and energy that you used to waste on searching and deciding.
This article will help you understand what changes when you bring order to your surroundings. You'll learn about the real effects of organization on your emotions and daily life. You'll also find answers to common questions about creating and keeping a well-organized space.

When everything has its place, your emotional state shifts in measurable ways. Your stress levels drop, your mind feels clearer, and you gain a greater sense of control over your environment and daily life.
An organized space creates a direct link to feeling calm. When you know where things are, you eliminate the mental scramble of searching and wondering. Your brain doesn't have to work as hard to process visual clutter or remember locations.
This calm translates into a feeling of control over your life. You make decisions more easily because your environment supports clear thinking. You can find what you need when you need it, which reduces feelings of helplessness or frustration.
The predictability of an organized system gives your brain a break from constant problem-solving. You build routines that become automatic. This frees up mental energy for things that matter more than finding your keys or looking for important papers.
Your emotional well-being improves because you spend less time feeling scattered. You feel more capable and competent in managing your daily tasks.
Disorganization triggers stress responses in your body. When you can't find things or face piles of unsorted items, your cortisol levels rise. An organized environment reduces these physical stress reactions.
You experience fewer moments of panic when everything has a designated spot. Morning routines become smoother. You leave the house on time more often. These small wins add up to lower overall anxiety levels.
Key stress reduction benefits:
Your mind also rests better in organized spaces. You can relax more fully because your surroundings don't demand constant attention or create nagging feelings of tasks left undone.
Organization removes barriers between you and your work. When your workspace is clear and your tools are accessible, you start tasks faster and maintain concentration longer.
Your brain processes information more efficiently in organized settings. You make fewer errors because you're not distracted by clutter or searching for materials. Each task gets your full attention instead of competing with environmental chaos.
You complete more in less time when organization supports your workflow. The mental energy you save from not managing disorder goes directly into productive work. You can think more creatively because your cognitive resources aren't tied up in managing your physical space.
This productivity boost reinforces positive emotions. You feel accomplished and capable, which motivates you to maintain your organized systems.

When you organize your belongings and give each item a designated spot, you'll notice shifts in how you move through your day and manage your space. Time spent searching decreases, stress levels drop, and maintaining order becomes simpler.
Your morning routine transforms when everything has a specific location. You grab your keys from the hook by the door, find your shoes in their designated spot, and locate your bag without thinking. These small actions add up to save you 10 to 20 minutes each morning.
You stop asking yourself where things are. Your brain doesn't waste energy on mental searches or decision-making about where to look. This mental clarity carries over into other parts of your day.
Evening routines also smooth out. You put items back in their homes without hesitation. The mail goes in its bin, the remote returns to its drawer, and clothes land in the hamper. These actions become automatic.
Tasks take less time when you know exactly where your tools and materials are. Cooking becomes faster because measuring cups sit in one drawer and spices line up in alphabetical order. You don't dig through cluttered cabinets or make multiple trips across the kitchen.
Work and hobbies benefit too. Your craft supplies stay sorted by type, your office supplies have assigned spots, and your tools hang on labeled hooks. You start projects immediately instead of spending 15 minutes gathering what you need.
Common time savings:
Maintenance becomes easier because you've already done the hard work of creating systems. Each item has one home, so putting things away requires no thought. You don't create new piles or temporary spots.
Clutter struggles to build up when every object has a place. Items that don't fit your system stand out immediately. You notice them and either find them a spot or remove them from your space.
Your space stays organized with minimal effort. A five-minute daily reset keeps everything in order. You wipe surfaces, return stray items to their homes, and start the next day fresh. This consistency prevents the need for major cleanups.

Setting up systems that work, understanding why organization matters to your mind, and knowing where to start can transform how you live in your space. These answers address common questions about creating and keeping order in both physical and digital areas of your life.
Start by grouping similar items together and storing them near where you use them most. Keep your kitchen utensils by the stove, your cleaning supplies under the sink, and your daily medications in the bathroom cabinet.
Label containers and shelves so everyone in your home knows where things belong. Clear bins work well because you can see what's inside without opening them.
Make sure the items you use daily are easy to reach. Store seasonal or rarely used items on high shelves or in less accessible spots.
An organized home reduces stress because your brain doesn't have to process visual clutter. When everything has a place, you spend less mental energy trying to remember where things are or feeling overwhelmed by mess.
You'll make decisions faster when your space is organized. Your mind works better when it's not distracted by piles of papers or scattered belongings.
Having order in your physical space often helps you feel more in control of your life. This sense of control can lower anxiety and improve your mood throughout the day.
Follow the one-in-one-out rule. When you bring something new into your home, remove something old.
Spend five minutes each evening putting things back in their places. This small habit prevents clutter from building up over time.
Sort your mail immediately when it comes in. Recycle junk mail right away and file important documents in their designated spot.
Create a donation box in your closet or garage. When you notice something you don't use, put it in the box immediately instead of letting it sit around.
Create a clear folder structure on your computer with main categories and subcategories. Use names that make sense to you, like "Finances/Taxes/2026" instead of vague labels like "Important Stuff."
Name your files with descriptive titles that include dates when relevant. "Johnson_Contract_2026-03-15" is better than "Contract_Final_V2."
Delete files you no longer need once per month. Empty your downloads folder and remove duplicate photos or outdated documents.
Back up your important files to an external hard drive or cloud storage service. Set a reminder to do this weekly or monthly depending on how often you create new files.
Pick one small area to start, like a single drawer or shelf. Completing this small task gives you momentum to continue.
Set a timer for 15 minutes and work only until it goes off. You can always do another 15-minute session later, but short bursts feel less overwhelming than facing hours of work.
Sort items into three boxes: keep, donate, and trash. Make decisions quickly without overthinking each item.
Ask yourself if each item serves a purpose or brings you joy. If it does neither, it's taking up space that could be used for something more valuable.
The KonMari Method asks you to organize by category instead of by room. You gather all your clothes from every room, then all your books, then all your papers, and so on.
You hold each item and ask if it sparks joy. Keep only the things that make you feel positive, and thank the rest before letting them go.
Store items vertically when possible so you can see everything at once. Fold clothes and stand them upright in drawers instead of stacking them flat.
The method follows a specific order: clothes, books, papers, miscellaneous items, and sentimental items last. This order helps you practice making decisions on easier categories before tackling items with emotional attachments.

Losing a small item, like a favorite pen, a childhood trinket, or a gift from a friend, can make you feel more upset than you expect. You might wonder why something small can hurt so much. Small objects often hold memories, meaning, and parts of who we are. Losing them can feel like losing a piece of yourself.

The sadness or anger you feel is not about the item's money value. Your brain links these things to people, moments, and parts of your life. When the object is gone, those connections can feel weaker or threatened.
This short guide explains why emotions get strong when small things disappear and gives simple ways to cope. Understanding these reasons can help you feel better and handle the loss in a healthy way.

When you lose a small thing, the feeling you get is often stronger than the item's real worth. Your brain links the item to feelings, your sense of control, and the small stresses you have all day.
Things you own can mean a lot more than their price or size. A worn keychain or a favorite pen can remind you of people, places, or times in your life.
Objects act like anchors to memories. Losing them can feel like losing a piece of those memories.
Common emotional connections include:
The sadness you feel is real, even if the item itself seems small. Your reaction shows how much the object mattered to you.
Misplacing something can make you feel out of control and upset for the rest of the day. Not knowing where the item is makes your mind tense.
Your brain treats lost items like a small threat to your routine. That can start the same worry responses as bigger problems.
The anxiety usually comes from three things. First, you feel vulnerable because you didn't prevent the loss. Second, you worry about problems that might happen without the item. Third, you doubt your own reliability and attention.
Small losses add up over time and can make you feel heavier emotionally than you expect. Each lost item increases your mental load, even if each one alone seems small.
This creates a cycle: stress makes you more likely to misplace things, and losing things raises your stress. Your mind stays partly focused on the missing item, so you have less focus for other tasks.
The drain comes from constant, low-level frustration instead of one big event. You may feel tired, cranky, or overwhelmed without realizing it’s connected to lost items. Even when you find something later, the time and energy spent searching still leave a mark.

Your brain treats lost items as a threat to your daily routine and sense of control. The upset feelings come from how your mind handles attention, habits, and how much value you place on objects.
Your brain can only pay attention to a few things at once. When you are distracted or stressed, your attention is split, so it’s harder to notice where you put small items.
Forming a memory needs some awareness. If you set down your keys while thinking about a deadline, your brain might not make a strong memory of that action. That happens because your attention was on something else when you put the item down.
Being tired or stressed also makes it harder for your brain to store and recall information. Working memory gets weaker when you are overwhelmed. This makes it tougher to remember where you left things, even items you use every day.
Common attention failures include:
When you lose small things, it can mess up simple daily routines. For example, finding your keys, wallet, or phone in the usual place is part of getting ready in the morning. If those items are missing, your whole plan for the day can fall apart.
This kind of change is more than annoying. Your brain moves from automatic actions to active searching and decision making. That shift takes extra mental energy and makes you feel more stressed and frustrated.
The feeling grows stronger if you are already in a hurry or under pressure. Your brain treats the lost item as a problem that stops you from finishing what you need to do.
Small things can mean a lot emotionally, even if they don't cost much. A phone holds photos and contacts. A ring can stand for a relationship. Old jewelry may remind you of family.
These items often feel like parts of who you are. Losing them can feel like losing a memory or a connection to someone.
Items feel valuable because of:
Your brain also values things you have used for a long time. Even a cheap item can feel irreplaceable if many memories are tied to it.

Losing small things can feel upsetting and tiring. Below are simple answers about why losing small items feels emotionally draining and what helps.
Your brain treats lost items like unfinished jobs. This keeps them on your mind and makes you feel uneasy. A known idea called the Zeigarnik effect says our mind remembers things we didn’t finish more easily than things we did finish.
Also, your brain expects things to be where you left them. When that expectation is broken, it causes a small stress reaction. Your brain tries to fix the gap between what you expect and what actually happened.
Distraction often causes misplacing. If you put something down while thinking about other tasks, your brain may not store the memory well. Later you can't recall where you left it, which adds to the frustration.
Small items often mean more than their use. Your phone or keys show access, safety, and control over daily life. Losing them can make you feel like things are out of order.
The stress comes from what the item lets you do, not the thing itself. You may feel vulnerable without your wallet or nervous without your phone because these items connect you to people and help you get things.
You may also value things more once you own them. This idea, called the endowment effect, makes small or cheap items feel important and hard to lose.
Often losing things creates ongoing frustration. Each time you lose something you might feel more scattered or disorganized. Over time this can lower your self-esteem.
You might worry about memory problems, especially as you get older. That worry can be worse than the actual loss. Stress about losing things can make you more distracted and cause more losses.
Looking for lost items uses up mental energy. This decision fatigue leaves you with less focus for other tasks. The constant drain can hurt your ability to make good choices during the day.
Set one spot for things you use often. If your keys always go in the same place, putting them away becomes a habit and uses less thought.
Use visible reminders. A bright keychain or a unique phone case makes items easier to find and harder to forget.
Try the "one-touch rule." When you pick something up, put it straight in its proper place instead of setting it down somewhere else.
Practice simple mindfulness. Take a few seconds to notice where you put an item. Saying the place out loud can help you remember it later.
Your feelings often come from worry about your memory, not just the lost item. If you can't remember where you put something, you might wonder if your brain is failing.
Prospective memory is the part of memory that helps you remember to do things later, like taking your keys when you leave. When this fails, plans get interrupted and you feel upset.
Objects tied to people or important moments cause stronger feelings. Your brain links the object to the memory, so losing it can feel like losing part of that memory.
Worrying about losing things can make you more likely to lose them. Stress splits your attention and makes you more distracted.
Your upset feelings can make a loop. You get stressed about losing items, which makes you more distracted, which leads to losing more items.
Negative self-talk also matters. If you tell yourself "I always lose things," you might pay less attention and actually lose more items.

Having friends or family over should feel fun, but for many people it causes strong worry and stress. You might imagine things going wrong, like awkward silences or guests judging your home. This fear of hosting is not just being nervous—it's often part of social anxiety that makes inviting others feel hard.
Social anxiety about hosting is more than normal party nerves and can make people avoid having others over, even if they want to connect. The pressure to make everything perfect and the worry about being judged or boring can make hosting feel impossible. Your home is private, and letting people in can make you feel exposed.
The good news is you can learn simple ways to handle hosting anxiety and enjoy having people over. By learning what causes these fears and using easy strategies, you can host gatherings that feel comfortable and build real connections with the people you care about.
Hosting anxiety combines perfectionism, social comparison, and logistical pressure that can trigger real psychological stress responses. These feelings affect how you prepare for guests, interact during events, and reflect afterward.
Perfectionism is a big trigger when you host at home. You may worry your house is not clean enough, the food will not taste good, or your decorations will be judged. Social media makes this worse by showing perfect parties that are not real.
Fear of judgment about your home can cause anxiety. Your home can show personal details about your life, money, and habits. Letting people into your private space can feel scary and exposed.
Social comparison happens when you compare your hosting to others. You might think your parties are worse after seeing friends' more elaborate events.
Family dynamics add stress too. Past experiences with critical family members or hard guests can make you anxious about future gatherings.
Physical signs can be tightness in your chest, a fast heartbeat, or stomach pain before guests arrive. You might sweat, have headaches, or sleep poorly in the days before the event.
Emotional signs include worrying too much about small details, fearing that people will not have fun, or feeling dread when you think about the gathering. You may feel irritable or overwhelmed by tasks that normally would not bother you.
Behavioral changes often include:
These signs can start days or weeks before your event and may continue during the gathering.
Many people feel strong anxiety when they host at home. This kind of worry can affect your mind and mood beyond one party. You might start avoiding friends and family because the stress of hosting feels too big. That can make you feel lonely and cut off from support.
Your self-esteem can drop when you focus on what went wrong instead of what went well. Each event might feel like a chance to judge yourself instead of enjoy being with others.
Long-term effects can include more general anxiety and avoiding social situations. Negative thoughts about hosting can spread to other parts of your life. The pressure you put on yourself can also make relationships with family and friends harder.
Beating the social anxiety behind hosting at home means building confidence, planning well, and putting connection above perfection. These simple steps can help you move from stress toward enjoying time with guests.
Being a good host is not about perfect decorations or fancy food. Hosting is about having people over and spending time together, not about showing off.
Be kind to yourself when you feel worried. Letting people into your home takes bravery, especially if you have social anxiety. Admit that you feel nervous instead of pretending you are not.
Think about what you enjoy when people come over. Maybe you like cooking simple meals or talking with friends. Use these things you like instead of trying to reach impossible standards.
Remember that guests come to see you, not to judge your home. Most people are happy to be invited and don't notice small messes. They care about the time together, not small mistakes.
Start small if hosting makes you anxious. Invite two or three friends for coffee before doing a big dinner. Doing smaller events first helps you feel more comfortable.
Make a short plan for the day of your gathering:
Cook recipes you know well instead of trying hard new dishes. Familiar food helps you relax and enjoy your guests.
Ask guests to bring something if you need help. People usually like helping by bringing drinks, dessert, or snacks. It makes things easier for you and lowers stress.
You don't need to do big renovations to make your home feel nice. Clean the bathroom, pick up clutter, and make sure there is enough seating. These simple things matter more than expensive decorations.
Add small personal touches that show who you are. Put out books you like, play music you enjoy, or light a candle you like. These real touches make your home feel warm and relaxed.
Set up an easy drink station where guests can help themselves. This gives people something to do when they arrive and takes some pressure off you.
Change the lighting to make the room cozy. Turn down bright overhead lights and use lamps or candles. Softer light helps everyone relax, including you.
Keep activities optional and low-pressure. Board games, a playlist, or simple conversation can work. Avoid strict schedules that make you worry about timing.
Managing the social anxiety behind hosting at home means using simple steps to feel more comfortable. Below are easy answers to common worries about inviting people over while keeping your stress low.
Start with basics that help people relax. Keep the room a comfortable temperature and clear a spot where guests can put their bags or coats.
Offer drinks when people arrive. Holding a drink gives guests something to do and eases awkward first moments.
Tell guests where the bathroom is in a casual way during the first few minutes. They will not need to ask later, which can reduce stress for you and them.
Do as much as you can the day before. Clean the main rooms, set out plates and cups, and pick the food. This helps you avoid rushing on the day of the event.
Pick foods that need little or no last-minute work. Simple snacks, ready-made dishes, or store-bought items are fine.
Give yourself permission to keep things simple. Guests are there to spend time with you, not to judge your hosting.
Tidy the places guests will use: the entry, living area, and bathroom. It does not have to be perfect—just neat.
Provide enough seats so people can choose where to sit. Mix chairs, couches, and floor cushions.
Use warm, soft lighting that is bright enough to see. Daylight or lamps make the space feel cozy.
Play low-volume background music to fill quiet moments without blocking conversation. Make a playlist before people arrive.
Put snacks and drinks where guests can serve themselves. This lowers your work and gives guests something to do with their hands.
Check shared areas now and then to tidy small messes or refill bowls. Small fixes stop bigger cleanups later.
Make different spaces so guests can pick what feels best. Some people like being where the action is. Others want quieter corners.
Don’t force activities unless that’s the plan. Let conversations start and grow on their own.
If someone looks uncomfortable, offer simple choices. Ask if they want a drink, a breath of fresh air, or a quieter place to sit.
Feeling nervous about hosting is normal. Many people feel some social anxiety, so you are not alone.
Be kind to yourself. Inviting people over takes courage, and your guests are glad you did it even if things are not perfect.
If you get anxious during the event, talk about the room or ask open questions. That helps move your focus from your worries to the people around you.

The kitchen is often called the heart of the home. When guests walk in, many people feel nervous about what others will think. This feeling is normal and lots of people have it.

We feel judged when guests see our kitchens because the kitchen shows our habits, cleanliness, and how we live. A living room can be tidied fast, but the kitchen often has dishes, countertops with stuff on them, and messy appliances. These things make us feel exposed.
Knowing why you feel this way can help lower the worry. The reason is more than just a few dirty dishes. It comes from how kitchens reveal daily life and personal choices. Understanding that can make the kitchen feel more comfortable for you and your guests.

When guests enter your kitchen, your brain often reacts like it would to a social threat. This reaction comes from old survival instincts about being accepted by others. The kitchen connects to social rules, personal identity, and cultural ideas about home life.
Society creates unspoken rules about what a "proper" kitchen should look like. These ideas come from TV, family habits, and social class. If your kitchen does not match those ideas, your brain can see it as a danger to your social image.
You learn these rules when you are young. If your parents kept the kitchen very clean, you probably saw that as the right way. If people you know made comments about messy kitchens, you remember that. Research shows many people form beliefs about household cleanliness by about age 12.
Common social expectations include:
Your worry about being judged is not random. Studies show people make quick opinions about others based on kitchen cleanliness. They often link a clean kitchen with being responsible and organized.
Your kitchen can reveal things about you that other rooms do not. It shows your daily habits, eating patterns, how you organize, and how stressed you might be. This makes the kitchen feel more personal than a living room you can easily tidy for visitors.
Dishes in the sink tell a story about your week. Items on the counter show what you are working on. The state of your fridge can suggest how you manage time and food. Your brain knows guests may notice these signs, even if they do not mean to.
The kitchen matters because it connects to basic needs. Preparing food is tied to caring for yourself and others. That link makes the kitchen feel important and personal when others see it.
messy kitchen can feel like evidence that you're failing at fundamental adult responsibilities.
Different cultures have different ideas about how a kitchen should look. In some Mediterranean and Latin American places, a kitchen that looks lived-in can feel warm and welcoming. In many Northern European and East Asian places, a messy kitchen can seem like a lack of self-control.
Your cultural background helps shape why you worry about being judged. If you grew up where homes must look perfect, you may feel more anxious about a messy kitchen. If your culture values cooking together and casual hosting, you might feel less pressure.
Factors that affect kitchen anxiety:
Moving to a new country or living in a mixed culture can make these worries stronger. You may have two sets of rules in your head. This can make it hard to know which rules to follow and increase your fear of being judged.

When someone comes into your kitchen, you often start to judge your own space. You see things you usually ignore and wonder what the guest thinks. This makes you feel self-conscious and worried about being judged.
Your mind often compares your kitchen to the ones you have seen. If a guest has granite counters and you have laminate, you might feel your kitchen is not as nice. These comparisons happen quickly and without you always noticing.
People often compare specific things like:
You might remember a friend's very clean kitchen and then notice every crumb on your counter. Seeing a fancy espresso machine at a relative's house can make your simple coffee maker feel worse. These thoughts can make you feel your kitchen does not measure up, even if it works fine for you.
Social media can make this worse. Many photos show perfect, magazine-style kitchens that are not realistic for most people.
You may feel anxious because you worry guests will judge your habits and life. A sink full of dishes could seem like laziness. Old food in the fridge might look careless.
This worry is about how others see you. Your kitchen can show your daily routines, what you value, and how you run your home. A messy counter might show you are busy or stressed and could not clean up.
People often worry guests will notice things like:
The fear gets stronger when guests come without warning. You do not have time to tidy up or hide the mess, so you feel more judged.
Your kitchen can show how you see yourself as a cook and host. If you like to make homemade meals but your kitchen looks messy, you may feel like a fraud. The difference between how you want to be seen and what guests actually see can feel upsetting.
People who care a lot about cooking and hosting feel this most. Your kitchen can seem like proof of your ability to care for others and make them feel welcome. If it does not meet your standards, it can feel like a personal failure.
The tools and foods you leave out tell a story about your cooking skills. A full spice rack suggests you know how to cook. Simple or few supplies might make you worry guests will think you do not cook much or do not know how.

People worry about being judged in the kitchen for good reasons. Psychology, culture, and home design all play a part. Knowing this can help you feel less anxious when guests come over.
Your kitchen gives clues about your daily life and what you care about. Clean counters and neat cabinets suggest you like order and have time to keep things tidy. Dirty dishes or crumbs can show you are busy or stressed.
The things you leave out also show your interests. Coffee gear can mean you are a morning person. Fresh vegetables and many ingredients can show you cook often. These small details help guests make quick ideas about how you live.
Comparing yourself to others often makes you feel worried about your kitchen. You see other homes and pictures online and judge your space against them. This can make your kitchen seem not good enough.
Your kitchen can also affect how capable you feel. A messy kitchen might make you feel like you are not handling adult tasks well. This feeling comes from learning that clean spaces mean you are responsible.
Kitchens are usually open to guests, so they are easy to see. Unlike bedrooms, kitchens are public in your home. That makes it easier to feel judged when people come over.
The layout gives a quick first impression when someone walks into your kitchen. Open, bright kitchens feel welcoming and tidy. Small or dark kitchens can seem messy or crowded. Good lighting makes a kitchen look cleaner.
The way work areas are arranged matters, even if guests do not notice it on purpose. A sensible order for the sink, stove, and fridge shows the kitchen works well. A bad layout can make a kitchen feel chaotic, even if it is clean.
Storage affects how neat the kitchen looks. Things left out make the space seem cluttered. Hidden cabinets and good shelves help the kitchen look organized.
Culture shapes what you think is an acceptable kitchen. In some cultures, showing a tidy kitchen is very important because hospitality matters a lot. In others, function is more important than looks, so people feel less worried about guest impressions.
Expectations about gender can add stress. Old ideas about who should clean or cook can make some people feel judged, even if chores are shared at home.
Where you live and how much money you have also matter. Apartment kitchens in cities are judged differently than kitchens in larger homes. What seems normal in one area may seem odd in another. This is why we feel judged when guests see our kitchens.
Clutter is often the first thing guests notice in a kitchen. Counters full of appliances, papers, or dishes make the room look messy right away. Even if the surfaces are clean, visible items make the space seem untidy.
The kind of clutter changes what people think. Dirty dishes show a current mess. Clean appliances mean there might not be enough storage. Mail and random stuff make the kitchen look like a place to drop things instead of a working room.
Clear counters make a kitchen feel clean, even when other parts need work. That is why putting things away before guests come can reduce your worry more than deep cleaning.
Start with what guests will see first. Clear counters, wipe visible surfaces, and take out the trash. These quick tasks make the biggest change and do not take much time.
Choose ways of keeping your kitchen that fit your life, not perfect pictures online. A kitchen can be used and still look okay. Most visitors know real homes are not showrooms.
Remember that guests notice less than you think. They are there to see you, not to check every detail. Focusing on hosting and being relaxed can help lower the pressure you feel when people see your kitchen.

You probably think a messy home just looks bad. But the real problem runs deeper than appearances. Poor home organization quietly steals hours from your day, forcing you to search for lost items, clean the same areas repeatedly, and struggle through simple daily tasks that should take minutes.

A disorganized home costs the average person between 30 minutes to 2 hours every single day in wasted time, adding up to weeks or even months of lost productivity each year. That time could be spent with family, on hobbies, or simply relaxing. Instead, it disappears into searching through cluttered drawers, moving piles from one spot to another, and dealing with the stress of not knowing where things are.
The good news is that understanding how disorganization drains your time is the first step toward fixing it. Once you see the patterns and recognize the actual cost, you can take practical steps to organize your space and reclaim those lost hours.
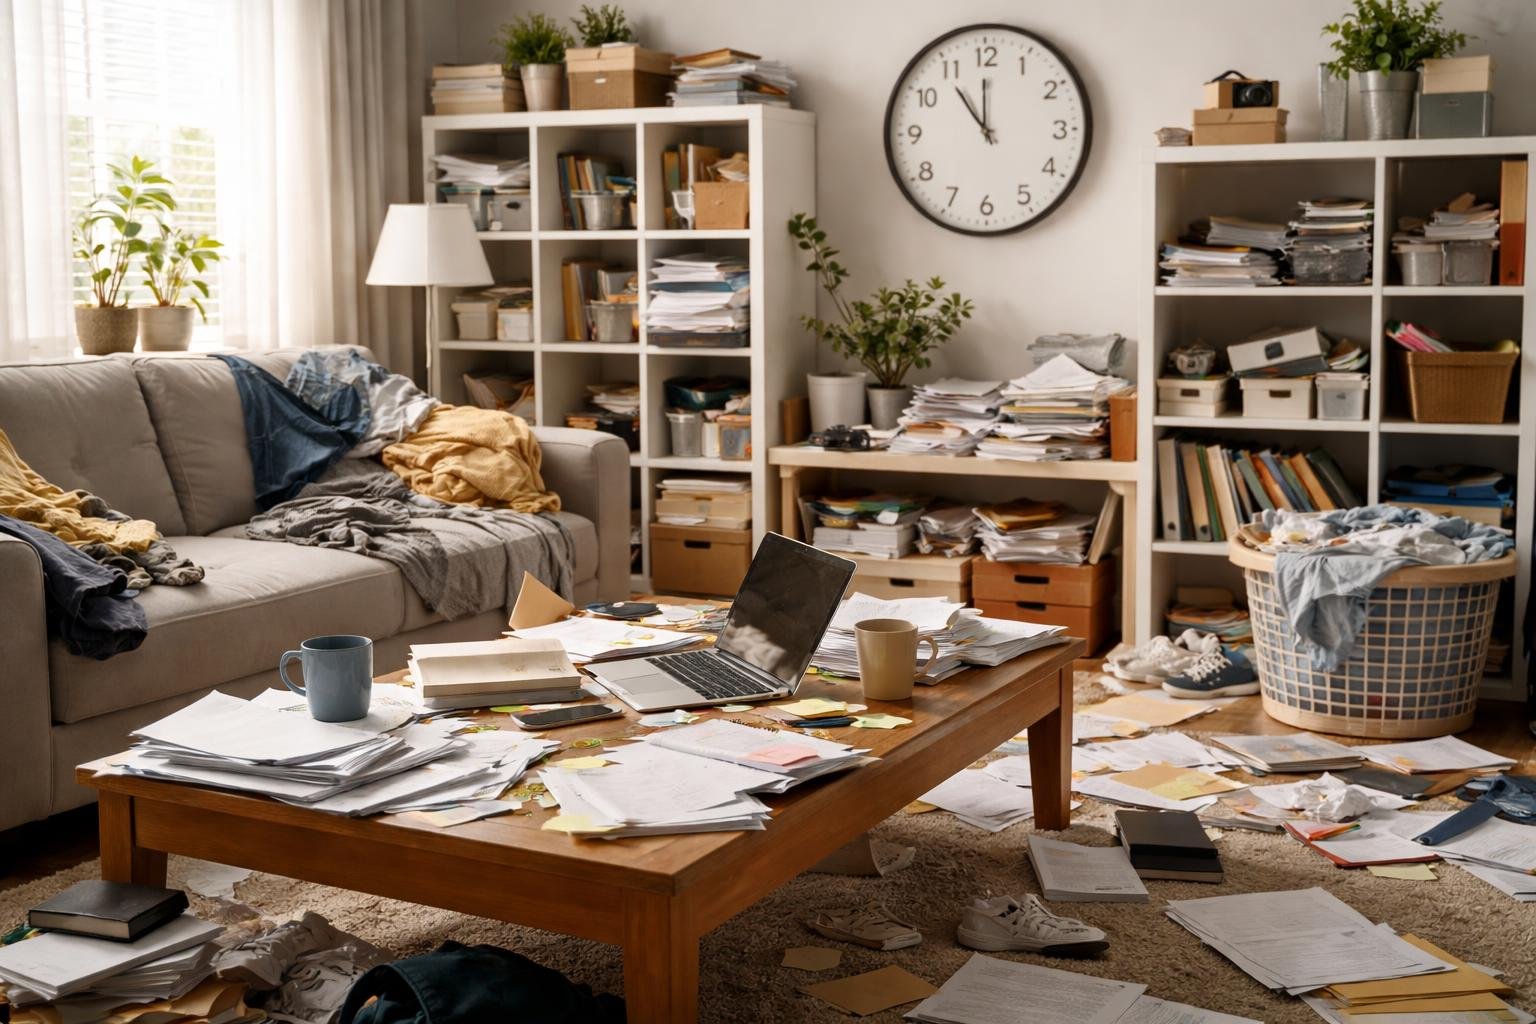
When your home lacks organization, you lose hours every week to inefficiency and disruption. These lost minutes add up to days of wasted time each year that could have been spent on more meaningful activities.
Your morning routine takes longer when you can't find your keys, wallet, or important documents. Instead of leaving on time, you scramble through drawers and piles looking for essentials.
Clutter disrupts simple tasks throughout your day. Making breakfast becomes harder when you need to move items off counters just to prep food. Getting dressed takes extra time when clean clothes mix with dirty ones or your closet lacks any system.
These disruptions create a ripple effect. When your morning runs behind schedule, you rush through other tasks or skip them entirely. You might forget to pack lunch, miss your usual commute time, or arrive late to appointments.
The stress from these disruptions affects your decision-making and mood for hours afterward.
Most people spend 9 minutes per day searching for misplaced items in their homes. That equals over 50 hours per year spent looking for things you already own.
Common items that get lost include:
You waste additional time when you can't find something and need to replace it. You make unnecessary trips to the store, spend money on duplicates, and still end up finding the original item weeks later.
The mental energy spent trying to remember where you put things drains your focus from more important tasks.
Poor organization slows down every household task. Cleaning takes twice as long when you need to move clutter before you can vacuum or dust. Cooking requires extra time when you can't locate ingredients or cookware quickly.
Your family members also lose time searching through disorganized spaces. Kids struggle to complete homework when they can't find school supplies. Everyone wastes time asking where things are stored.
Maintenance and repairs get delayed because you can't access problem areas or find the right tools. Small issues grow into bigger problems that demand even more of your time to fix.
The inefficiency compounds when multiple people share disorganized spaces, multiplying the time cost across your entire household.

Poor home organization creates lasting effects that extend beyond daily frustration. The mental strain accumulates over months and years, while specific strategies and reliable systems can break this cycle.
Living in a disorganized home creates constant mental pressure that builds over time. Your brain processes visual clutter as unfinished tasks, which keeps your stress levels elevated even when you're trying to relax.
This ongoing stress can lead to decision fatigue. When you face disorganization daily, your brain exhausts energy on small choices like finding your keys or locating important papers. You have less mental energy left for important decisions at work or in your personal life.
Sleep quality often suffers in cluttered environments. Your bedroom should be a calm space, but disorganization triggers low-level anxiety that makes it harder to fall asleep and stay asleep. Over months and years, poor sleep affects your physical health, mood, and cognitive function.
Relationships can also deteriorate. Arguments about lost items, missed events due to poor planning, or disagreements about household organization create ongoing tension with family members or roommates.
Start by tracking how much time you actually lose to disorganization. Spend one week noting every instance where you search for items, handle the same paper twice, or miss commitments. This creates awareness of your specific problem areas.
Common time-wasters to address:
Create designated homes for items you use daily. Your keys, wallet, and phone should always go in the same spot when you enter your home. Important papers need a specific location, not random piles on counters.
Use the "one-touch rule" for incoming items. Mail gets sorted immediately into action, file, or recycle categories. Groceries go directly into their proper storage locations rather than sitting in bags for hours.
Sustainable systems work with your natural habits rather than against them. Place storage solutions where you naturally tend to drop items. If you always leave shoes by the door, put a shoe rack there instead of expecting yourself to walk them to a closet.
Key principles for lasting systems:
| Principle | Application |
|---|---|
| Visibility | Store items where you can see them |
| Accessibility | Keep frequently used items within easy reach |
| Simplicity | Use systems that require minimal steps |
| Consistency | Maintain the same system across similar items |
Set up maintenance routines that take 10-15 minutes daily. This prevents clutter from accumulating to overwhelming levels. A quick evening reset where you return items to their homes maintains order without requiring hours of cleanup.
Digital organization deserves equal attention. Create folders for important documents, set up automatic bill payments, and use calendar reminders for recurring tasks. These systems reduce the mental load of remembering everything.
Label containers and shelves clearly. When every item has an obvious home, other household members can maintain the system too. This distributes the organizational burden across everyone who uses the space.
Review your systems quarterly. What works in winter might not work in summer, and your needs change as your life evolves. Adjust storage solutions and routines based on what actually happens in your daily life rather than ideal scenarios.

Poor home organization creates a ripple effect that touches every part of your day, from the minutes spent hunting for lost items to the mental energy drained by visual chaos. Understanding how disorganization impacts your time helps you make informed decisions about organizing your space.
You lose time every day searching for misplaced items in a disorganized home. Keys, phones, important papers, and other daily essentials disappear into the clutter, forcing you to stop what you're doing and hunt through piles.
Each search session might only take a few minutes, but these minutes add up quickly. If you spend just 10 minutes a day looking for things, that's over 60 hours per year lost to searching.
Disorganization also slows down basic tasks. Cooking takes longer when you can't find the right pan or ingredient. Getting dressed becomes a time-consuming chore when clothes are scattered or wrinkled in piles.
You face financial costs when disorganization leads to duplicate purchases. You buy items you already own because you can't find them in the clutter.
Your stress levels increase in a messy environment. Visual clutter creates mental clutter, making it harder to focus and relax in your own home.
Relationships can suffer when shared spaces become chaotic. Family members waste time looking for their belongings and may feel frustrated with the disorder.
You miss important deadlines and appointments when papers and reminders get buried. Late fees, missed opportunities, and forgotten commitments become more common.
Start with one small area rather than trying to organize your entire home at once. A single drawer or shelf gives you a manageable project and builds momentum.
Create designated spots for items you use daily. Your keys, wallet, and phone should always go in the same place when you come home.
Use the one-in-one-out rule for new purchases. When you buy something new, remove something old to prevent accumulation.
Set up a simple filing system for important papers. Sort mail immediately and discard what you don't need instead of letting it pile up.
Dedicate 15 minutes each day to putting things back in their designated spots. This small daily habit prevents clutter from building up again.
Regular decluttering creates clear pathways and visible surfaces in your home. You can move through rooms faster and complete tasks without obstacles in your way.
You spend less time cleaning when you have fewer items to work around. Dusting, vacuuming, and wiping surfaces becomes quicker and simpler.
Your morning and evening routines speed up significantly. Getting ready for work or preparing for bed takes less time when everything has a proper place.
You make decisions faster in an organized space. Your brain doesn't need to filter through visual noise to find what you need.
You leave on time more consistently when you can quickly grab what you need. Your morning routine flows smoothly without last-minute searches for essential items.
An organized workspace at home helps you focus on tasks. You don't waste time clearing a space before you can start working or pay bills.
You complete household chores more efficiently. Knowing where cleaning supplies and tools are stored means you can start and finish tasks without interruption.
Your planning becomes more effective in an organized environment. You can see what needs to be done and access the materials required to do it.
Your stress levels drop when you're surrounded by order instead of chaos. A tidy space gives your mind room to rest rather than constantly processing visual clutter.
You feel more in control of your life when your physical space is organized. This sense of control reduces anxiety and helps you feel more capable.
Your sleep quality can improve in a clean, organized bedroom. Your brain associates the space with rest rather than unfinished tasks and disorder.
You experience less guilt and shame about your living space. An organized home removes the embarrassment of having people over or the constant feeling that you should be cleaning.

You probably waste more time than you realize searching for your keys, phone, wallet, or other everyday items. Studies show that most people spend several minutes each day hunting for misplaced objects, which adds up to hours every month. This lost time creates stress and can throw off your entire schedule.

The good news is that you can stop this daily frustration by creating simple systems that give each important item a specific place and building habits around putting things back. These aren't complicated tricks or expensive solutions. They're practical methods based on how your brain actually works and how clutter builds up in your space.
This guide will explain why you keep losing track of your belongings and walk you through specific steps to fix the problem. You'll learn how to set up your home or workspace so items are easy to find, and you'll discover ways to change the habits that lead to misplacing things in the first place.

Most people spend about 10 minutes every day looking for misplaced items, which adds up to hours of wasted time each year. The root causes usually come down to a lack of consistent storage spots, too much clutter, and daily habits that work against you.
You lose things when items don't have a designated home. When you put your keys on the kitchen counter one day and the coffee table the next, your brain can't form a reliable memory of where to find them.
Clutter makes the problem worse. The more stuff you have scattered around, the harder it becomes to spot what you need. A cluttered desk or entryway creates visual noise that hides important items in plain sight.
Multitasking also plays a role. When you're thinking about three different things while setting down your phone, you don't create a strong memory of that action. Your brain simply doesn't register where the item went because your attention was divided.
Common reasons items go missing:
Those five-minute searches throughout your day interrupt your focus and drain mental energy. Each time you stop what you're doing to hunt for something, you lose momentum on your actual tasks.
The time cost is just the beginning. Disorganization creates stress that affects your ability to concentrate even after you find what you needed. Your mind stays partially occupied with worry about what else might be lost or what you're forgetting.
This pattern also delays your schedule. Missing your wallet means a late start to work. Not finding the right document means missing a deadline. These delays create a ripple effect that impacts your whole day and the people counting on you.
You probably lose the same types of items repeatedly. Track what you search for most often over a week. Most people discover they're looking for the same five to seven things again and again.
Pay attention to when you lose things. Do you misplace items more often when you're tired, rushed, or stressed? Understanding your triggers helps you create solutions that work with your real life instead of against it.
Notice where items turn up. If your phone always ends up in the bathroom or your keys land in coat pockets, these patterns show you where your natural habits already take you. You can use this information to place storage solutions in spots you already use.

The average person spends about 153 days of their lifetime searching for misplaced items. You can cut down this time significantly by setting up specific spots for your belongings, building simple daily routines, and using helpful tools to track what matters most.
Your items need a permanent home. When everything has a designated spot, you stop wasting time trying to remember where you put things.
Start by choosing specific locations for items you use every day. Put a small bowl or hook near your front door for keys. Keep your phone charger in the same outlet each night. Store your wallet in one pocket of your bag or one drawer at home.
Label storage areas to make the system stick. Use clear bins with labels for similar items. Put sticky notes inside drawers until the habit forms.
Common items and their best storage spots:
The key is consistency. You must return items to the same place every single time you finish using them.
Small daily actions prevent the buildup of clutter that makes items disappear. The habit of putting things away immediately saves hours of searching later.
Make "put it away, don't put it down" your rule. When you walk in the door, hang up your coat instead of dropping it on a chair. When you finish checking your phone, place it on the charger instead of leaving it on the counter.
Set up a nightly reset routine. Spend five minutes before bed putting items back where they belong. Check common dump zones like kitchen counters, coffee tables, and bedroom chairs.
Clean out your bag or pockets at the same time each day. This prevents important items from getting buried under receipts and other clutter.
Technology can help you locate items quickly when other methods fail. Bluetooth trackers attach to frequently lost items and connect to your smartphone.
Attach small tracking devices to keys, wallets, backpacks, and remote controls. Popular options include Tile, AirTags, and Samsung SmartTags. These devices make your phone ring when activated, or they make the lost item beep.
Use your phone's built-in features too. The "Find My" app locates misplaced phones, tablets, and connected accessories. Set up location tracking for devices you carry regularly.
Create a simple home inventory list on your phone. Take photos of where you store seasonal items or things you use occasionally. This visual reference helps you remember storage locations months later without searching.
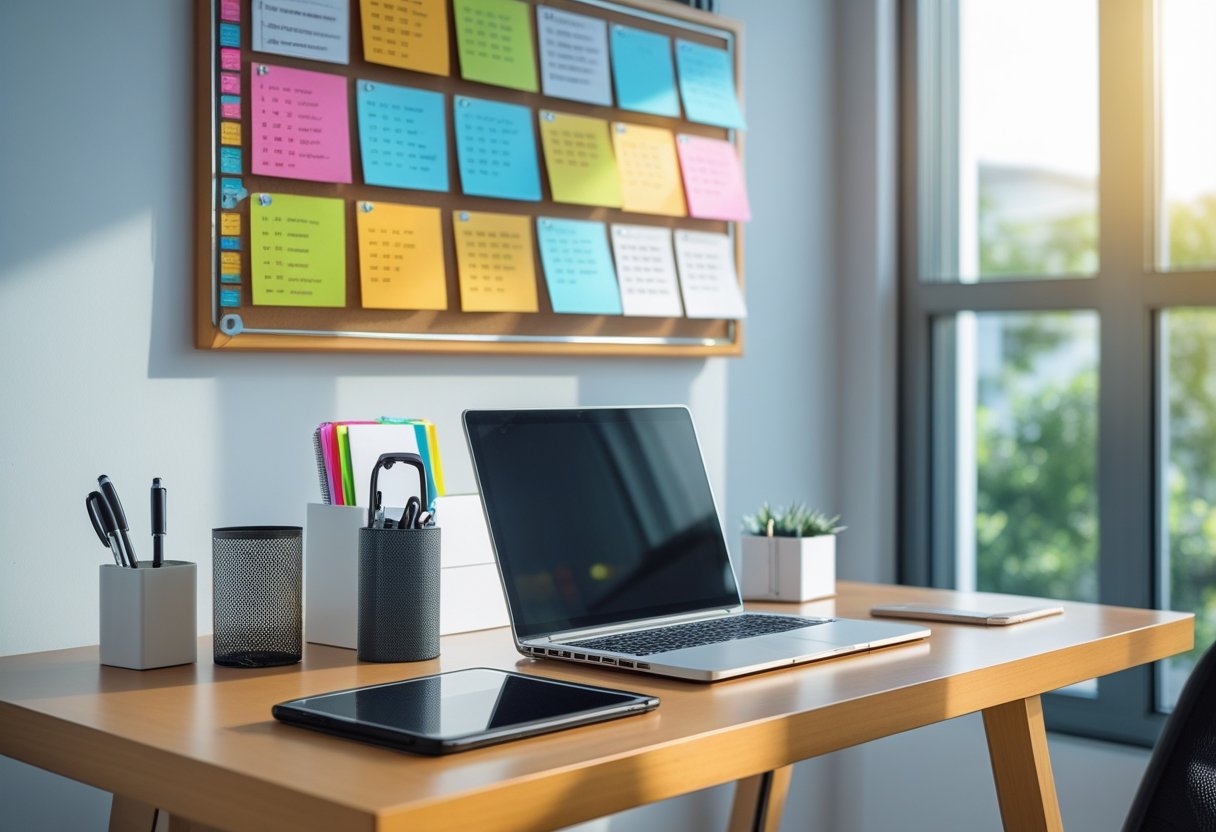
Lost items consume valuable time each day, but simple systems and tools can help you track your belongings better. Understanding how organization, habits, and mental patterns affect your ability to find things quickly makes a real difference.
Assign each item a specific home where it always belongs. Your keys should go in the same bowl or hook every time, and your wallet should have one designated spot.
Use containers and labels to group similar items together. Clear bins work well because you can see what's inside without opening them.
Keep frequently used items in easy-to-reach places at eye level. Store items where you naturally use them instead of where you think they should go.
Create visual cues to remind you where things belong. Drawer dividers, shelf markers, and color-coded systems help your brain remember locations faster.
Set up a landing station near your main entrance for everyday essentials. Place a small table or shelf there for keys, wallet, phone, and bags.
Prepare items the night before you need them. Pack your bag, lay out clothes, and gather work materials before going to bed.
Do a quick reset at the same time each day. Spend five minutes returning items to their proper places before starting your evening routine.
Check for your essential items at specific moments. Touch your pocket for your phone, keys, and wallet before leaving any location.
Bluetooth trackers like Tile and Apple AirTags attach to items and help you locate them through your phone. These small devices work within a limited range but can show you the last known location.
Smart home systems can integrate with your daily routine. You can set reminders to grab specific items or use voice commands to help you remember where you placed things.
Phone apps can create checklists for what you need before leaving home. Simple reminder apps work well for building habits around checking for your belongings.
Digital inventory systems help track items in storage areas. Taking photos of where you store seasonal items saves time when you need them months later.
Remove items you haven't used in the past year from your main living spaces. Less stuff means fewer places for important items to hide.
Sort items into three categories: keep, donate, and trash. Make decisions quickly without overthinking each object.
Limit the number of similar items you own. You only need enough dishes, towels, and clothes to meet your actual needs.
Create open space on surfaces and in drawers. Empty areas make it easier to spot what you're looking for at a glance.
Your brain can manage organization tasks automatically when you repeat actions consistently. After about two months of placing your keys in the same spot, you won't need to think about it anymore.
Build one small habit at a time instead of changing everything at once. Start with just your keys for two weeks, then add another item.
Link new organization habits to existing routines. Put your wallet away right after you take off your shoes or hang your bag on the same hook where you place your coat.
Track your progress to stay motivated. Mark days on a calendar when you successfully complete your organization routine.
Clutter creates mental stress that makes it harder to focus on tasks. Your brain processes every visible item in your environment, which drains energy.
Searching for lost items increases frustration and anxiety throughout your day. These negative emotions reduce your ability to think clearly and make good decisions.
Disorganization affects your working memory, which is the part of your brain that holds information temporarily. When your space is messy, you have less mental capacity for other important tasks.
Constant searching creates a cycle where you feel less in control of your life. This feeling of lost control can lead to avoiding tasks and wasting more time overall.

Hosting guests can feel stressful when your kitchen isn't set up right. But there's a simple solution that changes everything. A well-designed pantry space between your kitchen and dining room creates a natural staging area that makes entertaining smooth and easy.

This isn't about fancy renovations or expensive upgrades. It's about arranging your pantry so everything you need for hosting is within reach and looks good while doing it. The right setup means less time searching for serving dishes and more time with your guests.
The pantry aesthetic that makes hosting effortless combines smart storage with thoughtful design choices. You'll learn how to turn your pantry into a functional space that supports entertaining. From the layout to the small details that matter, these ideas help you create a pantry that works as hard as you do when company comes over.

A pantry designed for hosting combines visual appeal with smart organization that lets you find what you need in seconds. The right approach balances attractive storage containers, logical grouping systems, and easy access to your most-used items.
Your pantry should make you feel calm, not stressed. Start by keeping only what you actually use and host with regularly. A cluttered pantry slows you down when guests arrive.
Use designated zones for different categories. Group baking supplies together, place all beverages in one area, and keep entertaining essentials at eye level. This zoning system means you never waste time searching.
Clear containers let you see inventory at a glance. You can quickly check if you need more coffee, pasta, or crackers before your next gathering. Labels add polish and help anyone helping you in the kitchen find items quickly.
Vertical space matters more than you think. Stackable containers and shelf risers double your storage capacity. Pull-out drawers make deep shelves accessible without digging.
Glass jars and clear acrylic containers create a cohesive look while keeping food fresh. Choose airtight seals for dry goods like flour, sugar, rice, and coffee beans. Square or rectangular shapes use shelf space better than round containers.
Matching container sets create visual harmony. You don't need expensive options. Basic containers in the same material and style work perfectly well.
Essential Storage Items:
Invest in storage that fits your actual shelves. Measure your pantry depth and height before buying containers. This prevents wasted money on items that don't fit.
Place items you use most often between waist and eye level. Reserve high shelves for special occasion serving pieces or seasonal items. Bottom shelves work well for heavy items like bottled water or appliances.
Create a hosting station with everything you need for entertaining. Include cocktail napkins, toothpicks, specialty crackers, and drink mixers in one dedicated area. When guests arrive, you grab from one spot instead of searching multiple areas.
Keep a running grocery list visible inside your pantry door. This habit prevents last-minute store runs before hosting. You always know what needs restocking.
Rotate stock by moving older items forward. This simple step reduces waste and ensures you serve fresh products to guests. Check expiration dates monthly and remove anything past its prime.

Smart labeling systems and carefully chosen accessories turn your pantry from a storage space into a hosting tool that works with you, not against you.
Clear labels remove guesswork when you're preparing for guests. Use a consistent labeling system across all containers and shelves so anyone helping you can locate ingredients quickly.
Group items by purpose rather than just type. Create zones like "Coffee & Tea Station," "Baking Essentials," and "Entertaining Staples." This approach makes pre-party prep faster because everything you need for specific tasks lives in one spot.
Label styles that work well:
Choose a font size large enough to read from arm's length. This saves time when you're moving quickly through meal prep. Keep extra labels and a marker in your pantry so you can update the system as your needs change.
The right accessories blend beauty with function. Glass jars with airtight seals keep crackers fresh while letting you see exactly what you have at a glance.
Tiered risers and lazy Susans prevent items from hiding in back corners. You can grab what you need without shifting other containers around. Wooden or metal trays corral smaller items and create visual order on deeper shelves.
Choose containers in materials that match your kitchen. Natural wood, woven baskets, and ceramic pieces add warmth without sacrificing organization. Metal bins work well in modern spaces and wipe clean easily.
Keep a small serving board or two in your pantry for quick cheese plate assembly. Store cloth napkins in a basket so they're ready when guests arrive unexpectedly.

A well-stocked pantry needs the right items, smart organization, and regular upkeep to support easy entertaining. These answers cover practical steps for creating a space that works for both everyday meals and last-minute guests.
Your entertaining pantry should include shelf-stable items that let you create impressive spreads without a grocery run. Stock quality crackers, artisan pasta, canned tomatoes, good olive oil, and a variety of dried herbs and spices. Keep nuts, olives, honey, and preserves on hand for quick charcuterie boards.
Add versatile items like canned beans, tuna, and anchovies for fast appetizers. Wine, sparkling water, and cocktail mixers belong in your pantry zone too. Baking basics like flour, sugar, and chocolate chips let you pull together desserts when needed.
Create dedicated zones for entertaining items so you can find everything quickly. Group all your appetizer supplies together in one area, including crackers, spreads, and cocktail napkins.
Use clear containers to see what you have at a glance. Label shelves or bins by category like "drinks," "serving supplies," or "quick bites." Keep your most-used entertaining items at eye level where you can reach them easily.
Install pull-out drawers or lazy susans to access items in deep shelves without moving everything around. Store serving platters and boards near the foods you'll put on them.
Check expiration dates monthly and move older items to the front. This simple rotation system keeps everything fresh and prevents waste.
Wipe down shelves every few weeks to prevent dust and spills from building up. Keep a running list on your phone of items that need replacing so you can restock before you run out.
Reserve ten minutes after each use to put items back in their zones. This quick reset means your pantry stays organized between guests. Replace items immediately after entertaining rather than waiting until you need them again.
Use vertical space with shelf risers that create two levels on one shelf. Hang small baskets or wire racks on the inside of your pantry door for packets and small items.
Stackable clear bins maximize height while keeping categories separate. Choose square or rectangular containers instead of round ones since they fit together without wasting space. Mount a narrow wine rack on the wall to free up shelf space for food items.
Store items you use less often on high shelves or low shelves. Keep your entertaining essentials in the middle zone where you can reach them without a step stool.
Your pantry selections show guests what you value and how you like to entertain. Stocking local jams and crackers from small producers demonstrates support for artisans and attention to quality. International ingredients like Italian pasta or French mustard hint at your culinary interests.
The balance between convenience items and from-scratch ingredients reveals your entertaining approach. Some hosts keep frozen puff pastry for easy appetizers while others stock flour for homemade bread. Both choices are valid and reflect different hospitality styles.
Your drink selection also tells a story. A variety of teas, coffee, and mixers shows you think about different guest preferences.
Choose storage containers in matching materials like glass or white ceramic to create visual unity. This consistency makes shelves look intentional rather than cluttered, even when full.
Use baskets to hide packaging while grouping similar items together. Woven or wire baskets add texture without creating visual noise. Install lighting inside your pantry so you can see everything clearly and create an inviting atmosphere.
Leave some empty space on each shelf instead of packing everything tight. This breathing room makes the pantry feel organized and lets you spot what you need faster. Group items by height with taller containers in back and shorter ones in front for easy visibility.